Installing door speakers and sound deadening and more
#1
 05-28-2010, 11:03 PM


Join Date: Dec 2009
Location: Quad Cities, IL
Posts: 3,279
A lot of us want to improve our factory sound system. For many, the first step is subs and an amp. However, I don't feel that is the correct first step.
#1 should be new front speakers. You've seen my 2001 EX build with speakers in the kicks. Most people aren't willing to go to that extreme.
So i'm going to give you some photos and instruction on how I go about installing aftermarket speakers in factory door locations. It will take you time, but when it's done right there is nothing quite like it.
The vehicle for this instruction is not a Honda, because that's not what i'm working on right now. It's a 2005 Scion tC. I'm using it as an example because the factory speakers and methods are near identical to a newer Honda. So follow along, and ask questions as they arise.
I have just started the build for this vehicle. Equipment list is as follows:
Head Unit: Pioneer DEH-980BT
Front Speakers: Hertz Mille MLK-165 6.5"
Rear Speakers: None - Hertz High Energy HV165XL planned for future.
Sub: Hertz High Energy HX300 12"
Amp: Audison LRx 5.1k
This list of equipment is all purchased authorized from a local shop. Their prices are the same as online and they warranty directly. Cost of equipment listed is about $3300.
We also picked up 200st. ft. of Raammat BXT II and 200 sq. ft. of adhesive Ensolite ($800 total). The entire vehicle will be treated.
On to the pictures...
#1 should be new front speakers. You've seen my 2001 EX build with speakers in the kicks. Most people aren't willing to go to that extreme.
So i'm going to give you some photos and instruction on how I go about installing aftermarket speakers in factory door locations. It will take you time, but when it's done right there is nothing quite like it.
The vehicle for this instruction is not a Honda, because that's not what i'm working on right now.
It's a 2005 Scion tC. I'm using it as an example because the factory speakers and methods are near identical to a newer Honda. So follow along, and ask questions as they arise. I have just started the build for this vehicle. Equipment list is as follows:
Head Unit: Pioneer DEH-980BT
Front Speakers: Hertz Mille MLK-165 6.5"
Rear Speakers: None - Hertz High Energy HV165XL planned for future.
Sub: Hertz High Energy HX300 12"
Amp: Audison LRx 5.1k
This list of equipment is all purchased authorized from a local shop. Their prices are the same as online and they warranty directly. Cost of equipment listed is about $3300.
We also picked up 200st. ft. of Raammat BXT II and 200 sq. ft. of adhesive Ensolite ($800 total). The entire vehicle will be treated.
On to the pictures...
Last edited by keep_hope_alive; 05-29-2010 at 12:20 AM.
#2
05-28-2010, 11:12 PM
Join Date: Dec 2009
Location: Quad Cities, IL
Posts: 3,279
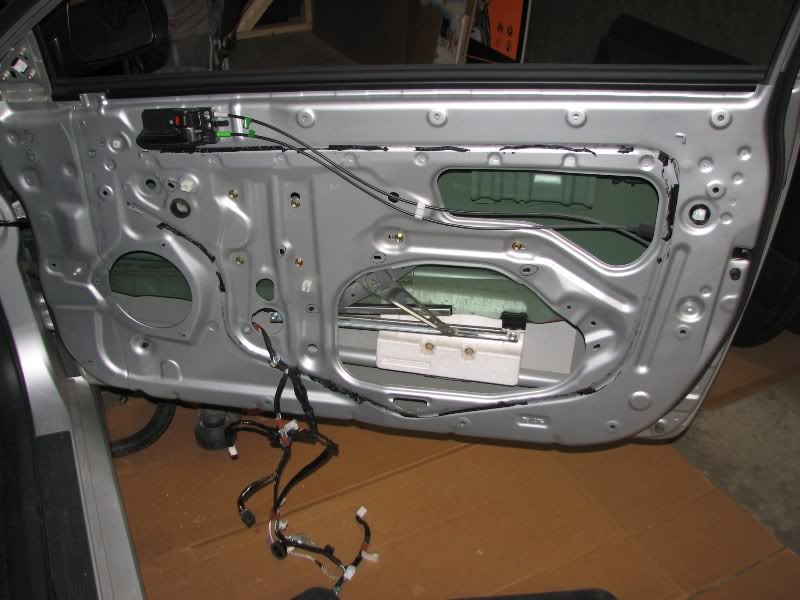
Factory Door - remove panel, remove all wiring clips, remove factory speaker, and clean all metal surfaces
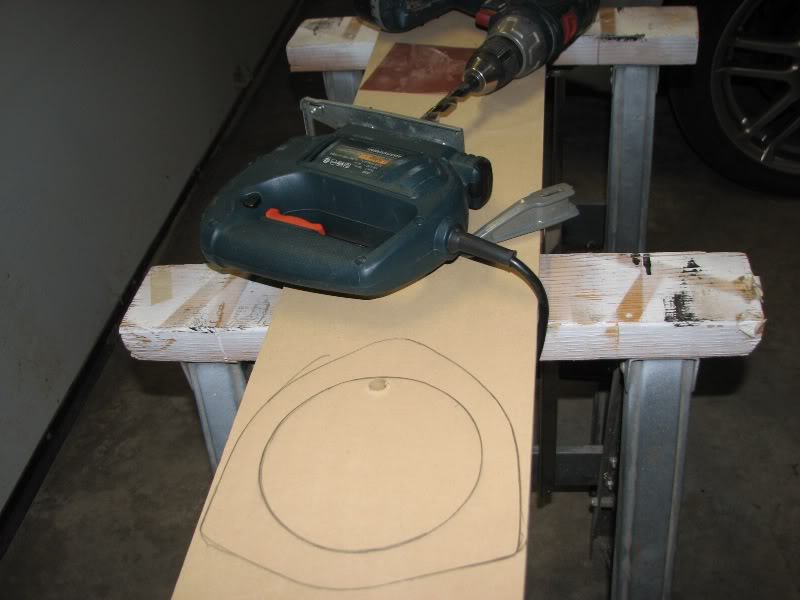
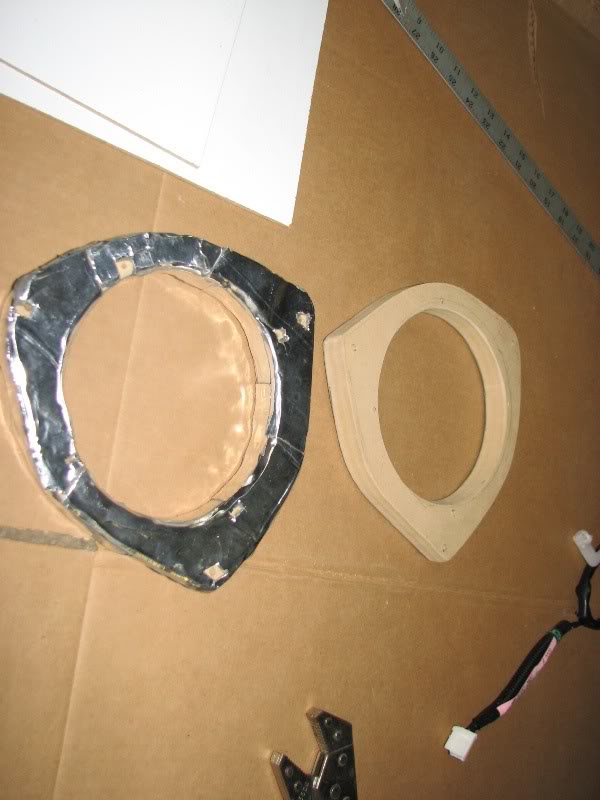
Trace the factory speakers and make a new baffle out of 3/4" MDF
Mount using the factory speaker rivet holes and a 1.5" 10-24 machine screw and bolt.
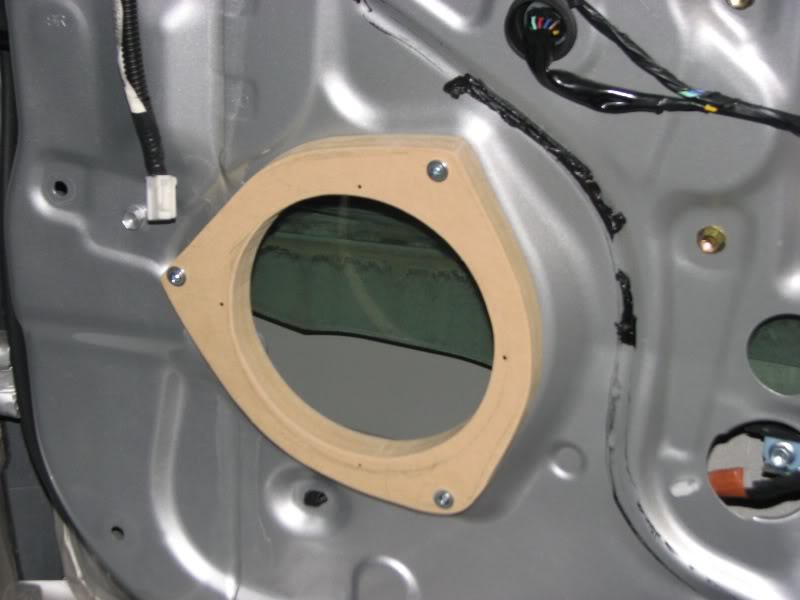
Test fit before deadening

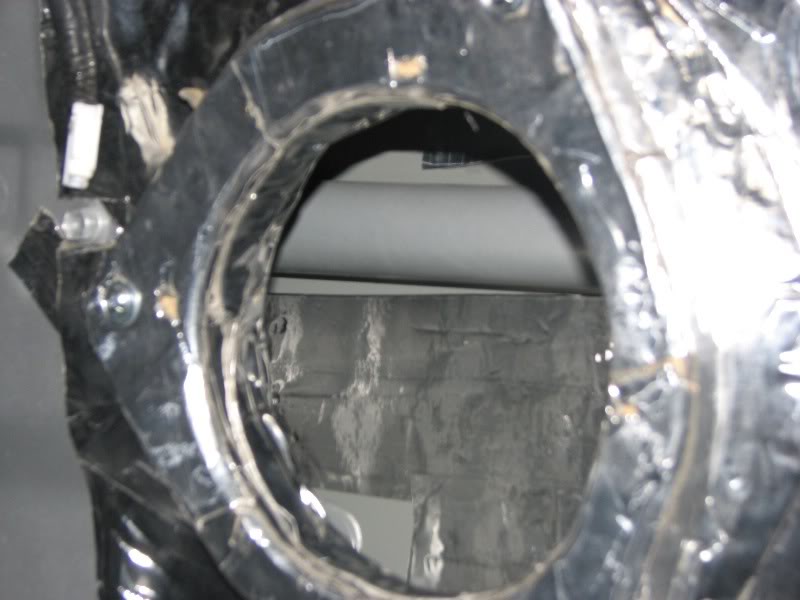
You can't let MDF get wet - deaden the baffle
Cover it 100%
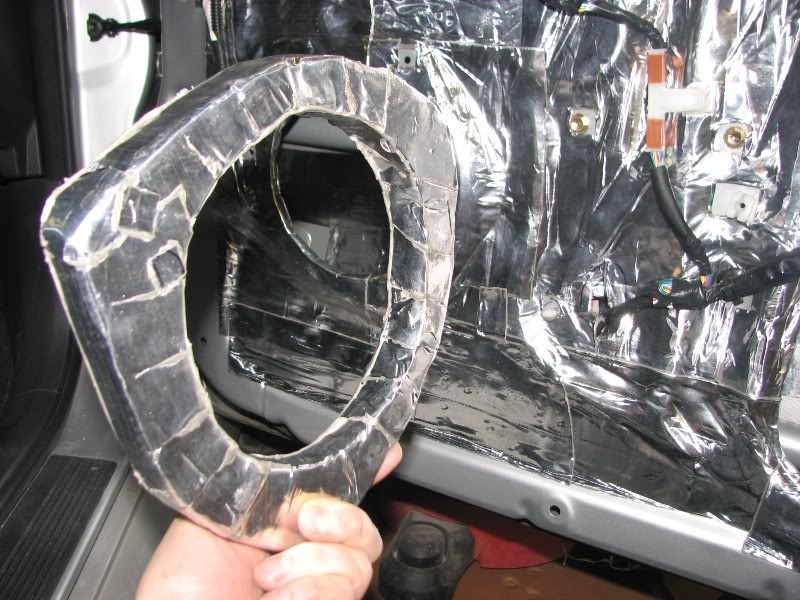
but don't cover the mounting holes!
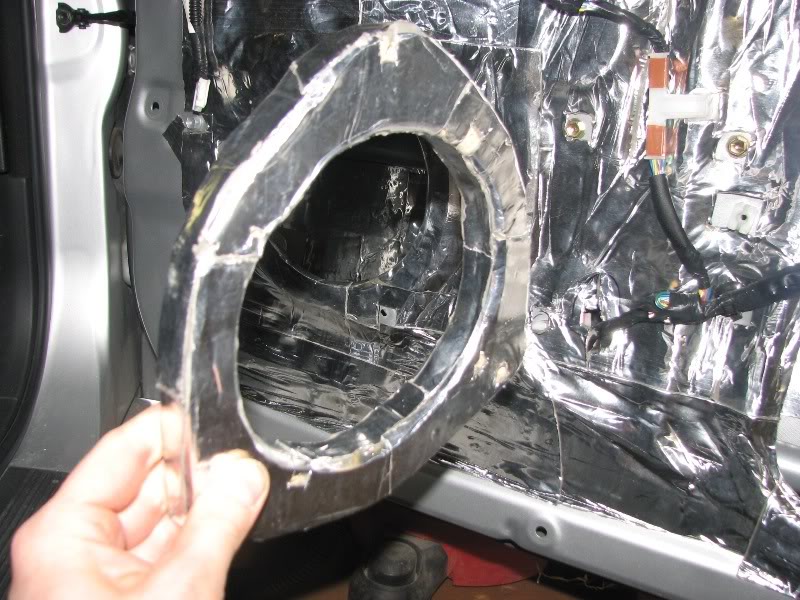
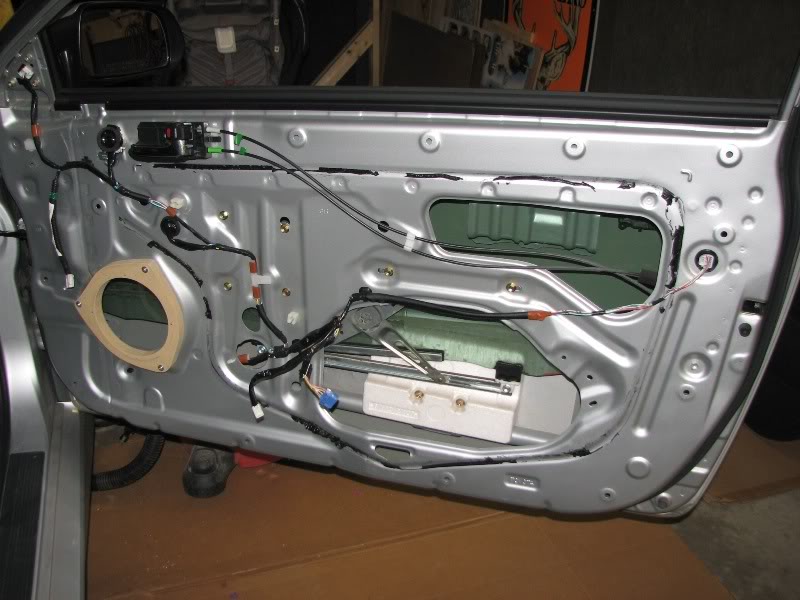
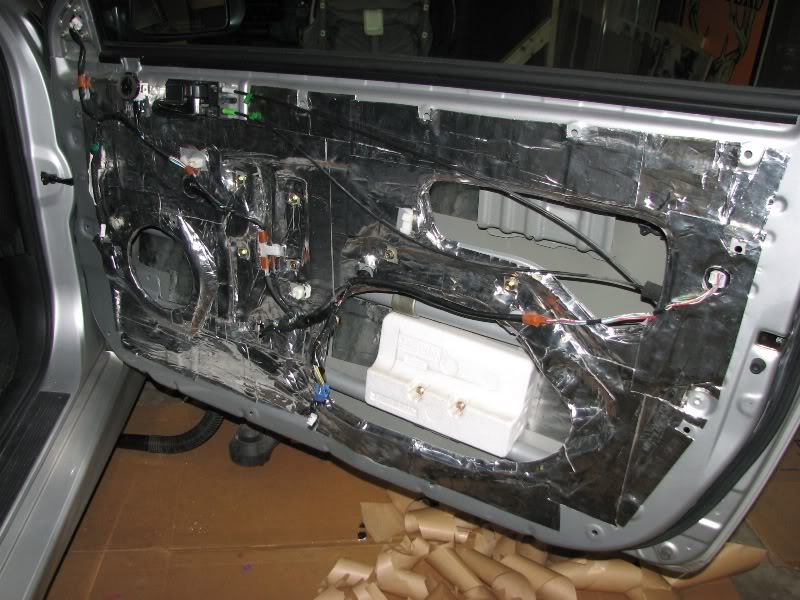
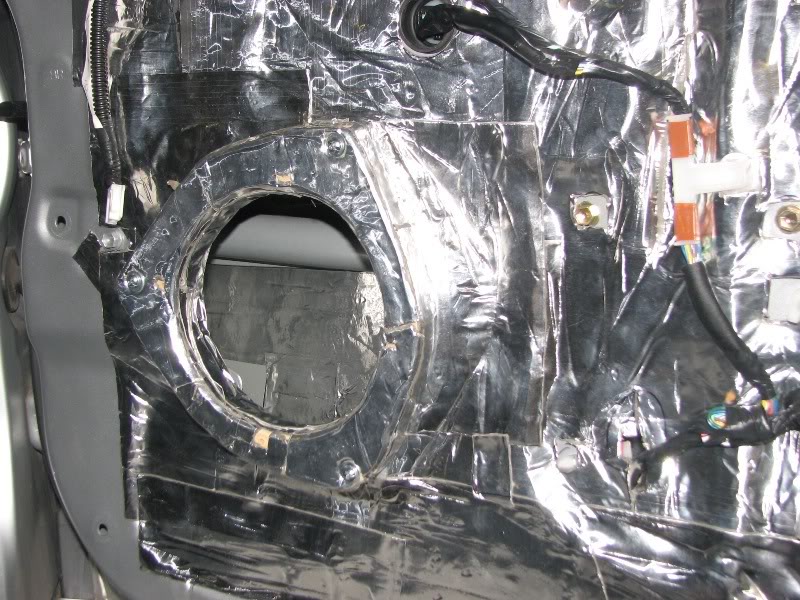
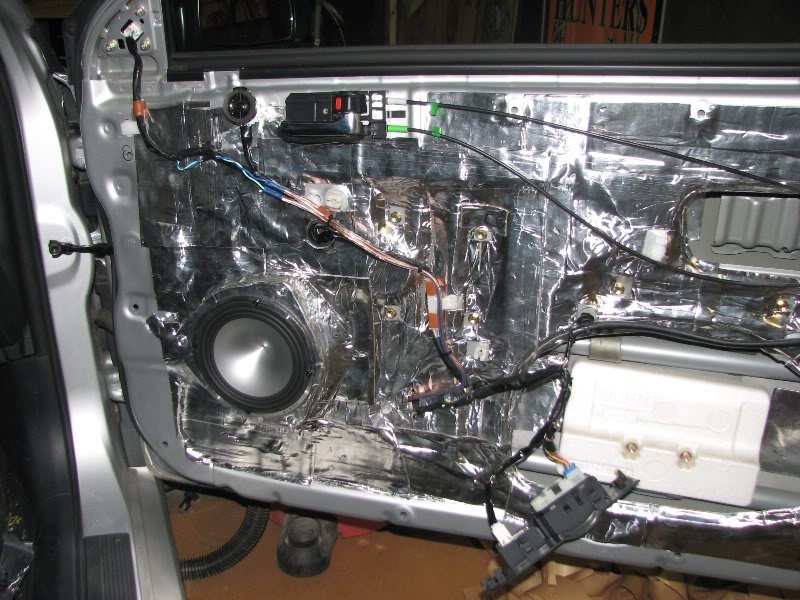
mostly deadened door - holes will be covered up next time and Ensolite applied.
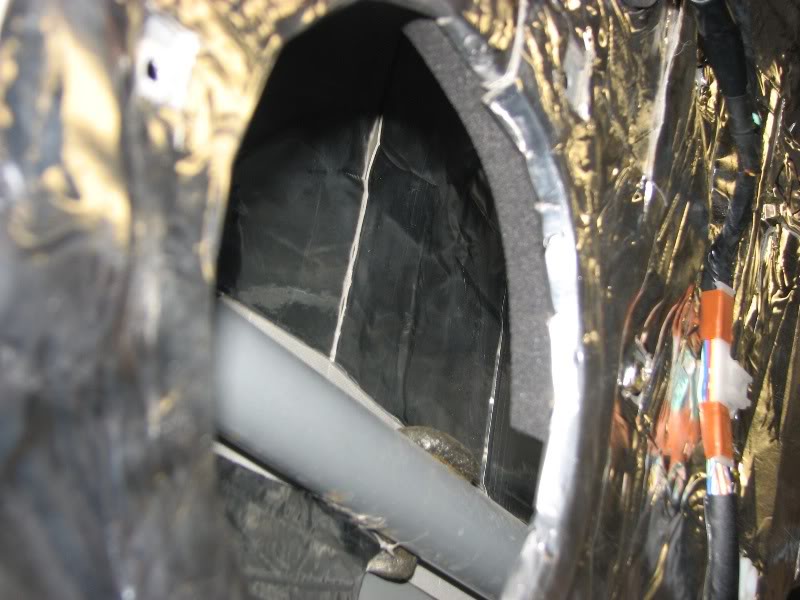
you must protect the speaker from rain water. i use 3/4" closed cell foam weatherstripping along the top of the inside of the opening. gives the water a channel to follow AROUND the speaker.
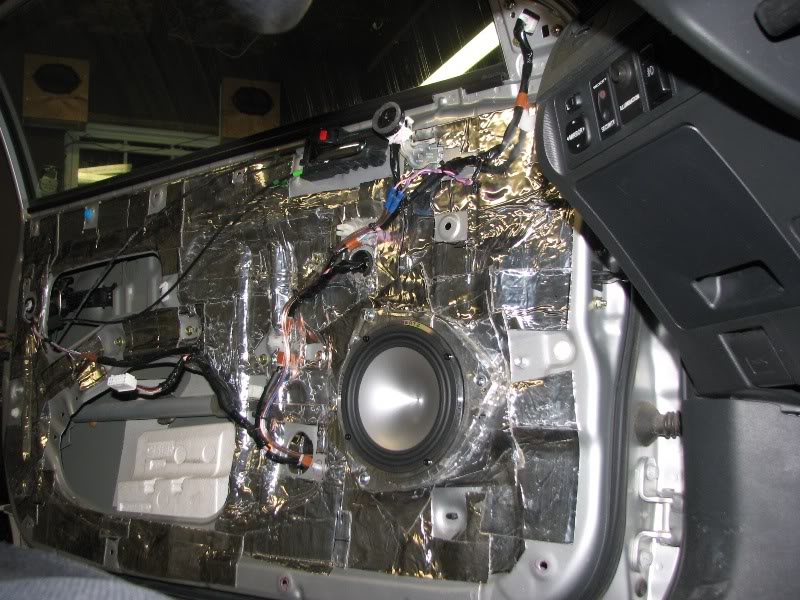
then deaden the seam between the baffle and the door and over the foam
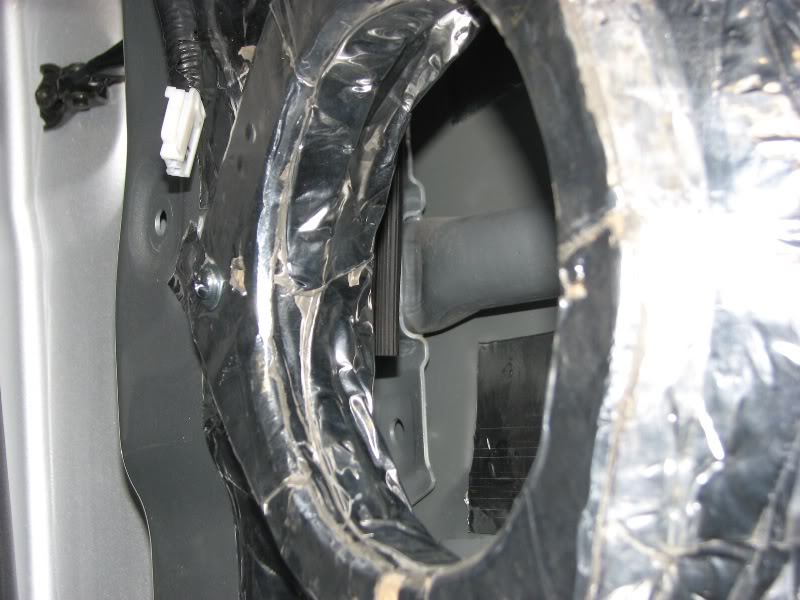
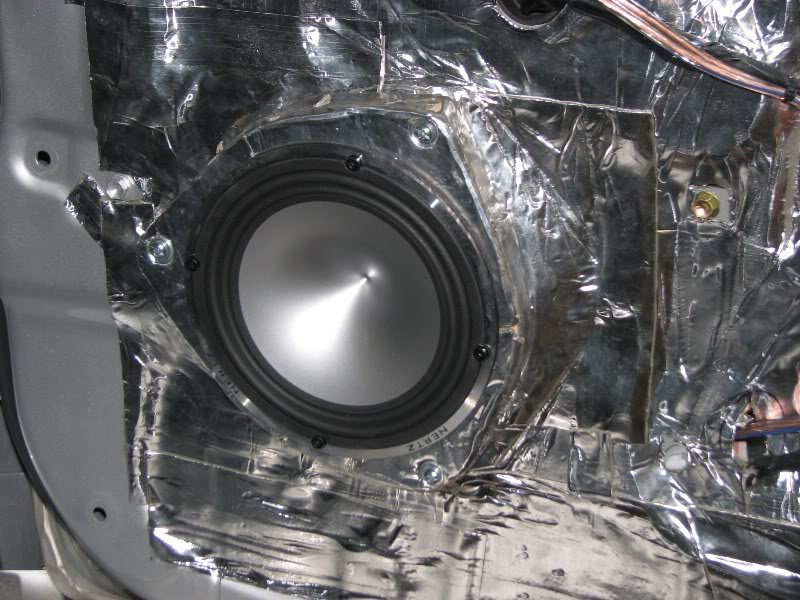
end result after mounting and deadening the front speaker baffle
We are using the factory speaker wiring for now, until we install the Audison LRx5.1k, at which point we'll run new 14awg wire to the amp/crossovers. I cut off the end of the speaker terminal, and extend the wiring to inside the door, zip tied to factory wiring the whole way - even inside the door.

Trace the factory speakers and make a new baffle out of 3/4" MDF
Mount using the factory speaker rivet holes and a 1.5" 10-24 machine screw and bolt.
Test fit before deadening
You can't let MDF get wet - deaden the baffle
Cover it 100%
but don't cover the mounting holes!
mostly deadened door - holes will be covered up next time and Ensolite applied.
you must protect the speaker from rain water. i use 3/4" closed cell foam weatherstripping along the top of the inside of the opening. gives the water a channel to follow AROUND the speaker.
then deaden the seam between the baffle and the door and over the foam
end result after mounting and deadening the front speaker baffle
We are using the factory speaker wiring for now, until we install the Audison LRx5.1k, at which point we'll run new 14awg wire to the amp/crossovers. I cut off the end of the speaker terminal, and extend the wiring to inside the door, zip tied to factory wiring the whole way - even inside the door.
Last edited by keep_hope_alive; 05-29-2010 at 09:52 AM. Reason: fixing image sizes...
#3
05-28-2010, 11:31 PM
Join Date: Dec 2009
Location: Quad Cities, IL
Posts: 3,279
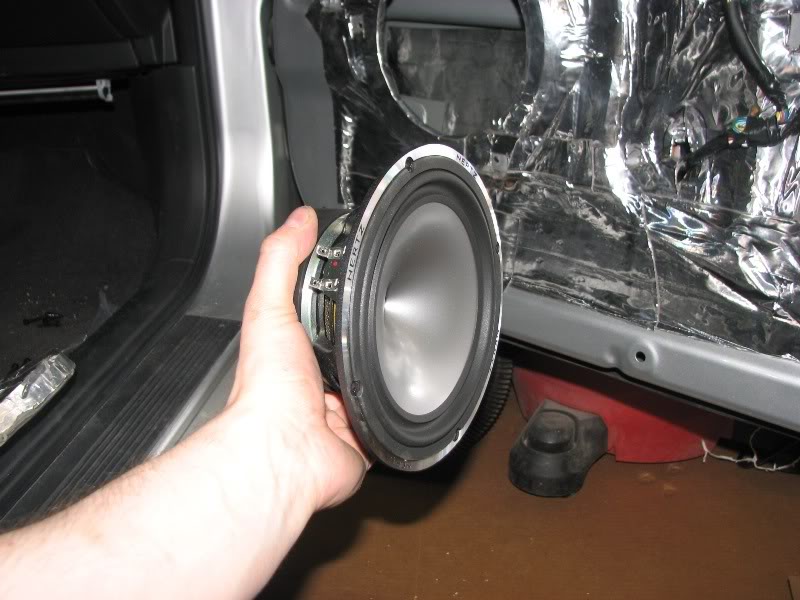
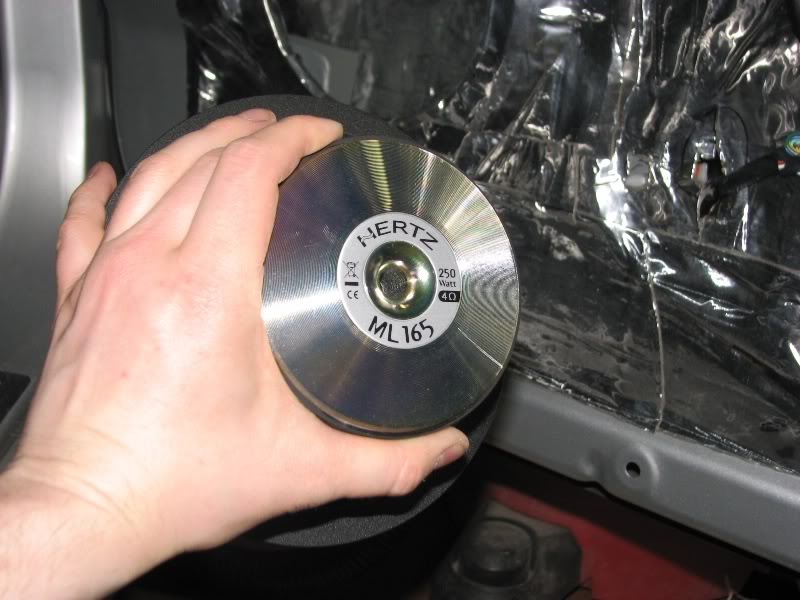
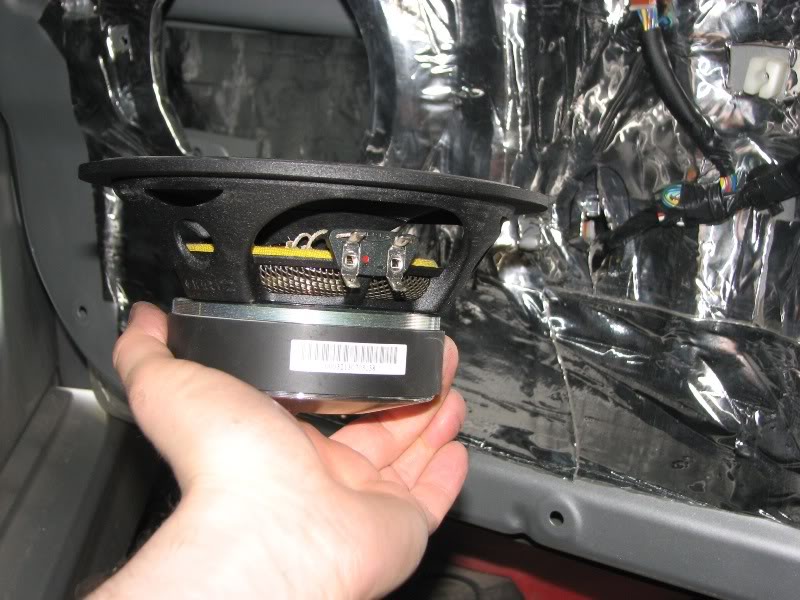
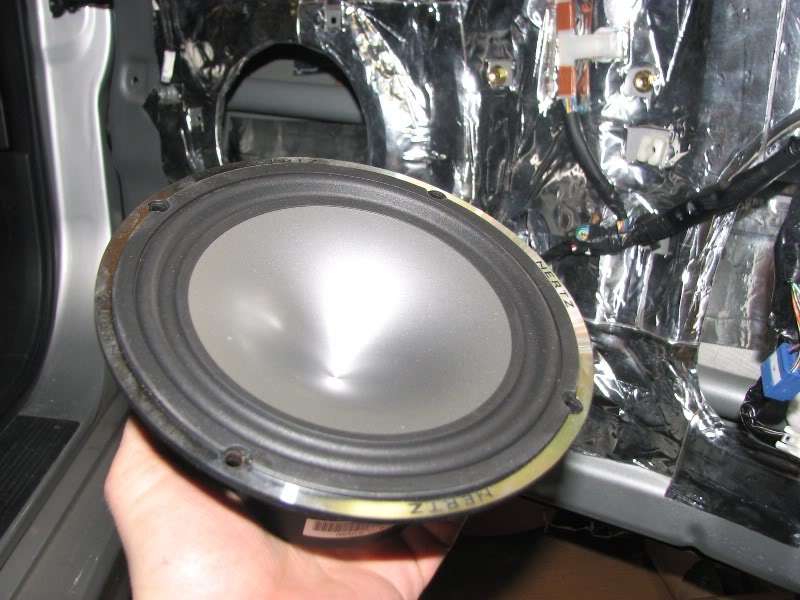
Sexy Hertz Mille MLK-165 pics
Last edited by keep_hope_alive; 05-29-2010 at 09:53 AM. Reason: image size..
#4
05-28-2010, 11:38 PM
Join Date: Dec 2009
Location: Quad Cities, IL
Posts: 3,279
mount the speakers in the door with the supplied hardware
repeat process for the driver's side
door panels installed, speakers tested for fit. foam was placed on the front of the speaker basket so it would seal against the door
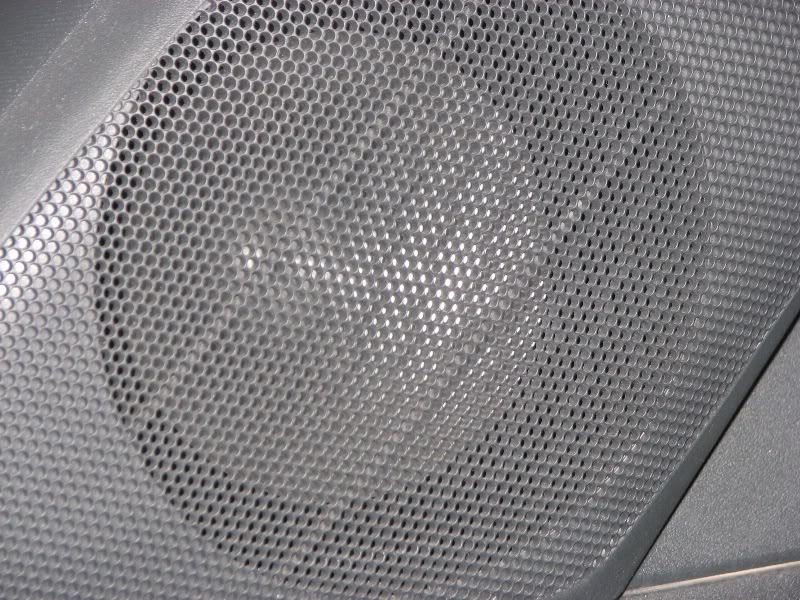
factory door panel reinstalled.

Next we'll install the awesome MLK tweeters in the apillars.
repeat process for the driver's side
door panels installed, speakers tested for fit. foam was placed on the front of the speaker basket so it would seal against the door
factory door panel reinstalled.
Next we'll install the awesome MLK tweeters in the apillars.
Last edited by keep_hope_alive; 05-29-2010 at 09:54 AM. Reason: images
#5
05-29-2010, 12:19 AM
Join Date: Dec 2009
Location: Quad Cities, IL
Posts: 3,279
A couple hints for doing this, lessons i've learned over the years:
1. make one baffle, test fit driver and bolt up. make sure it works before you make the second one.
2. always check window depth first. remove factory speaker, roll down window, measure available depth at top, sides, bottom. measure factory speaker front depth. total up and verify it's less than the new driver. this also determines the amount of thickness needed for the baffle
3. sound deaden, every time. two layers at the speaker mount. deaden the baffle separate. then deaden the seams. that way you have 3-4 layers of deadening between the baffle wood and the door metal.
4. always control water - the insides of your door get wet. Parts Express sells XTC foam baffles that are sized for each speaker size, and can be cut out to match depth and control water.
5. i usually just run new speaker wire, and tie up the factory wiring. If you'll have head unit power only, factory wiring is usually ok. If you add an amp, factory wiring is not adequate. I use 14awg minimum for midrange/midbass speakers. 16awg for tweeters.
6. get a friend to help. for this project, the vehicle owner did the driver's door and i did the passenger door. this was his first time deadening a door ever. the first time he'd ever done a sound system like this. he is learning along the way and helping as well.
7. take the time, spend the money. this takes time. the above install was done in an evening, two people working from 6pm-1am. And we still need to close up the holes and foam the whole panel. then we'll make the apillar mounts for the tweeters.
8. you need the correct fasteners. 10-24 bolts of various lengths, 8-32 sizes as well. I usually secure drivers with t-nuts. for the Hertz speakers, the crazy Italians have a very small driver size. Screws don't handle frequent removal in MDF. If we need to remove the driver more than once, we'll add t-nuts.
9. you need tools. I used a drill, jig saw, palm sander, door panel/clip remover, shop vac, various screwdriver sizes and bits.
10. get a good space. luckily, i own my home and have a nice enough garage with plenty of lighting, 6 2-lamp 4' strips. i use cardboard on the floor with knee pads for comfort.
#6
07-22-2010, 12:01 PM
1st. WOW, your quite the installer !!! Awesome work. Ok here are my questions. I noticed in the pictures there was a tweeter installed also. If ya do a component speak system would it sound good just having woofer and tweet in the door ? It seems it would be a lot easier to do that and put cross overs in that area also. If i did that what could i do w/the rear deck area speakers ? and finally, when you made the mdf baffles was there some type of template you used for the entire thing, or did you just estimate the outer dimensions? Thanks a lot for the great posts !!! Keep up the good work
#7
07-22-2010, 12:47 PM
Join Date: Dec 2009
Location: Quad Cities, IL
Posts: 3,279
actually, the component tweeter has not yet been installed, the factory tweeter is poorly located near the door handle and is still being used in the meantime. you don't want tweeters in the door - you want them far from you, high on the dash. the matching tweeters for the Hertz Mille component speaker will be on the apillars - aiming to be determined, but probably aimed at the dome light.
crossovers for these speakers are HUGE, and will be located in the rear by the amp and subs during that part of the build. we are just now getting back into this project - deadening the vehicle is next.
rear deck speakers can also be components. if you have a 6x9 holes you can fit a 6x5" component set easily.
i use the factory speaker mount as my "template". what i do is remove the factory speaker, then trace the factory speaker mount on cardboard, then test fit. once i like the fit, i'll transfer that to the MDF. cardboard is your friend - you can mock up anything with it, easily cut and trim and make new templates without wasting stock. one note - don't use the cardboard cutout for your hole. use a compass to draw a perfect hole, it greatly increases your chance at a perfect hole with the jig saw.
all you need to make the baffle is a decent jig saw and new blades (for wood).
Last edited by keep_hope_alive; 07-22-2010 at 12:58 PM.
#8
07-22-2010, 12:49 PM
Join Date: Dec 2009
Location: Quad Cities, IL
Posts: 3,279
Here are other installations i have done that include custom door speaker baffles.
2006 Hyundai Elantra GT - completed phase 1, phase 2 is deadening and tweeter relocation - has crossovers in the front door pockets (actually worked out well).
http://forum.sounddomain.com/ubbthre...=3#Post1400581
2009 Scion xB - mostly finished, owner moved to Cali and will deaden the vehicle on his own
http://forum.sounddomain.com/ubbthre...=3#Post1755977
2002 Toyota Tundra Access Cab - not finished because after i got it working the owner stopped bringing the truck over. doors are deadened though, everything is functional. crossovers in the glove box (temporary until the center console is finished).
http://forum.sounddomain.com/ubbthre...=3#Post1625041
Last edited by keep_hope_alive; 07-22-2010 at 12:56 PM.