Installing door speakers and sound deadening and more

#12
 07-22-2010, 09:19 PM

Join Date: Dec 2009
Location: Quad Cities, IL
Posts: 3,279
Rammaudio - Raammat is one of the least expensive sound deadening you will find that actually works. This install used Rammat BXT II, which is twice as expensive and twice as thick.
don't buy sound deadening on ebay
don't buy sound deadening on ebay
#14
09-23-2010, 12:44 PM
Join Date: Dec 2009
Location: Quad Cities, IL
Posts: 3,279
We took another swing at the car yesterday, this time installing Hertz 165XL speakers in the rear. We discussed rear speakers/rear fill for several months. The owner is an experience recording engineer and knows what he wants and what he likes. He saves his sound stage reproduction for his mixing monitors. In this car, he wants a reference system that has tonal accuracy - which is why he chose the speakers he did.
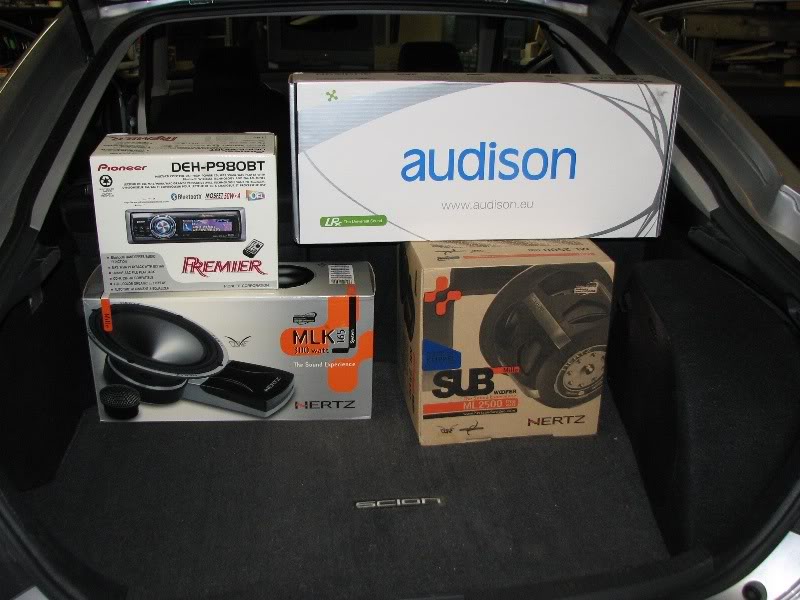
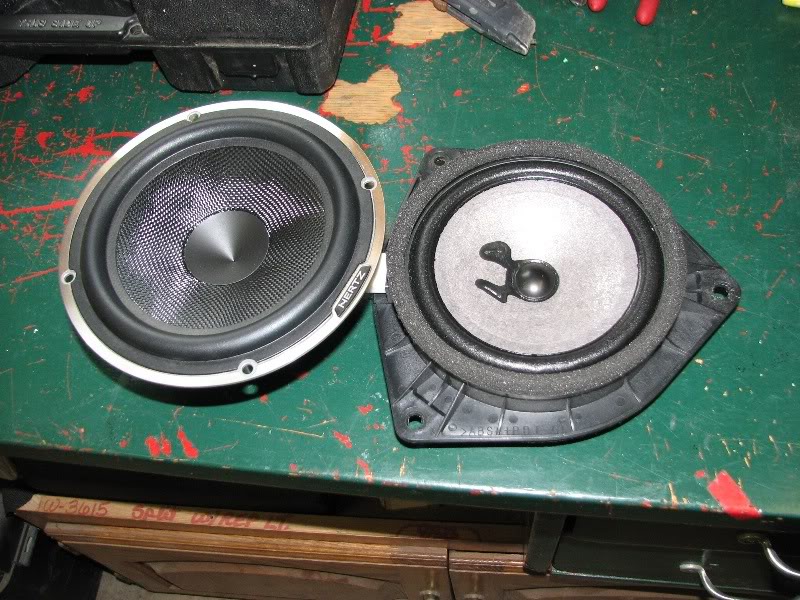
This is the gear for the vehicle, minus the 165XL box since the local shop gave us the mids out of a 165XL comp set.
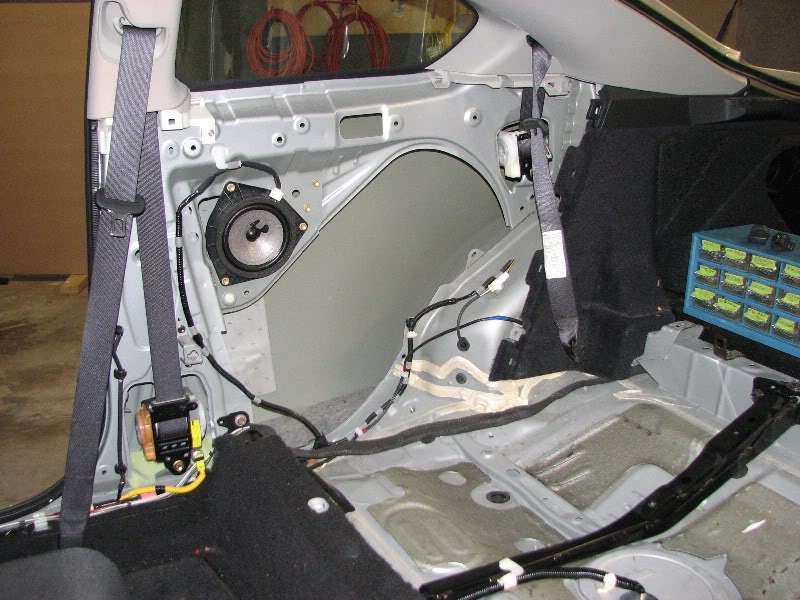
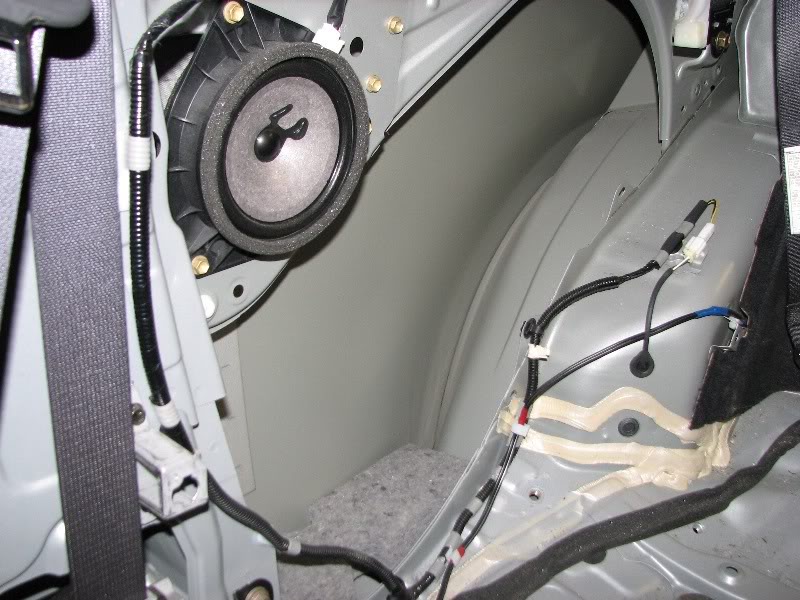
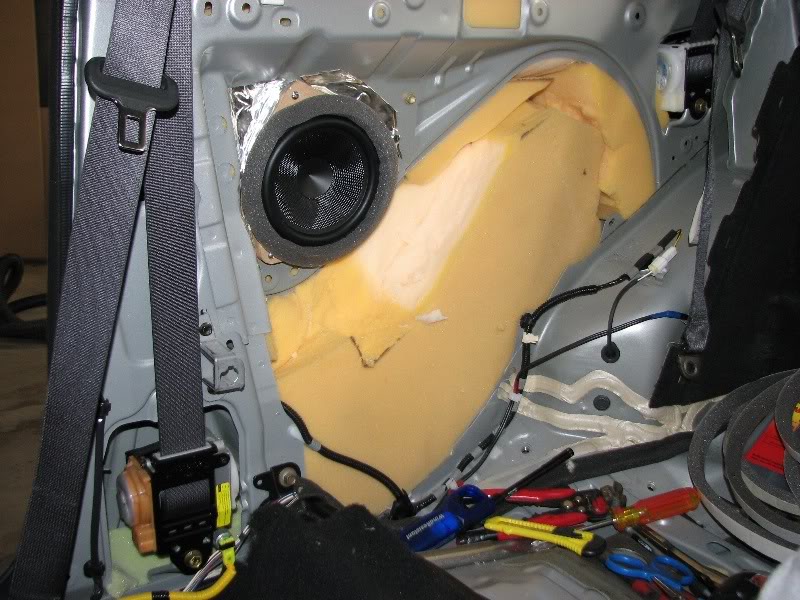
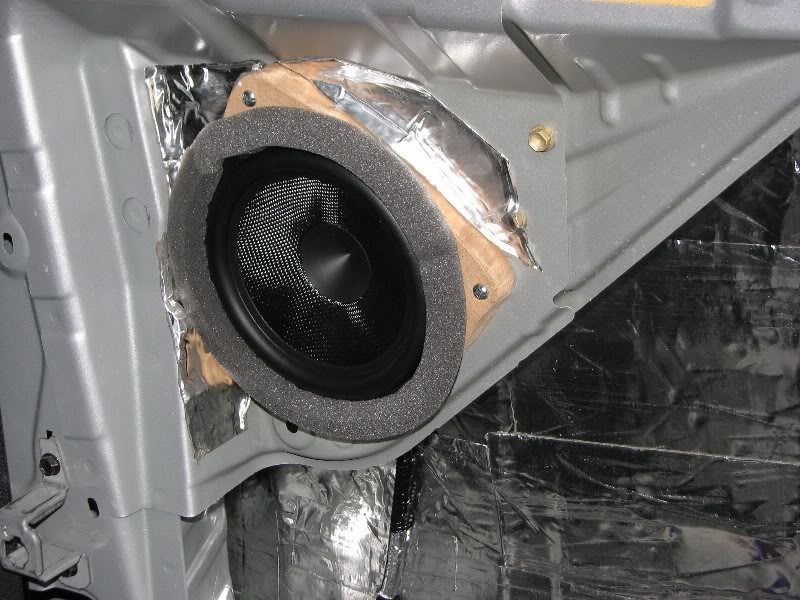
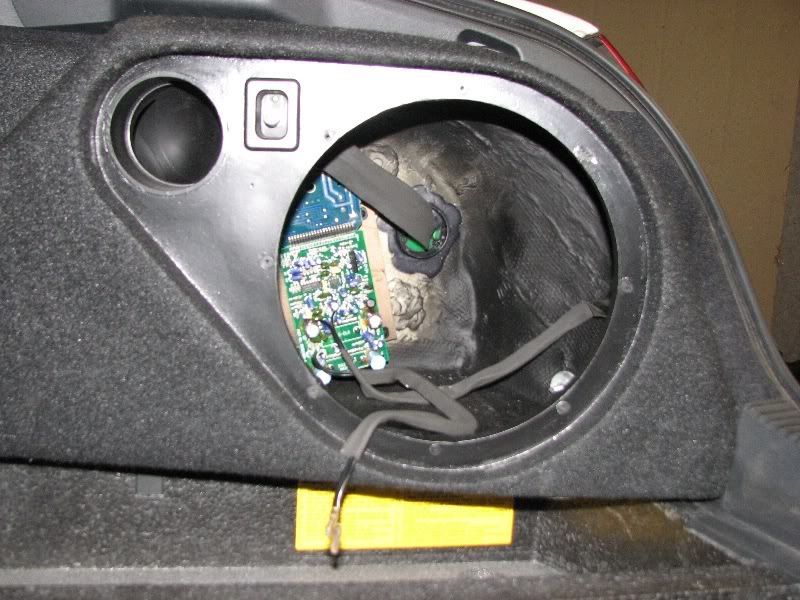
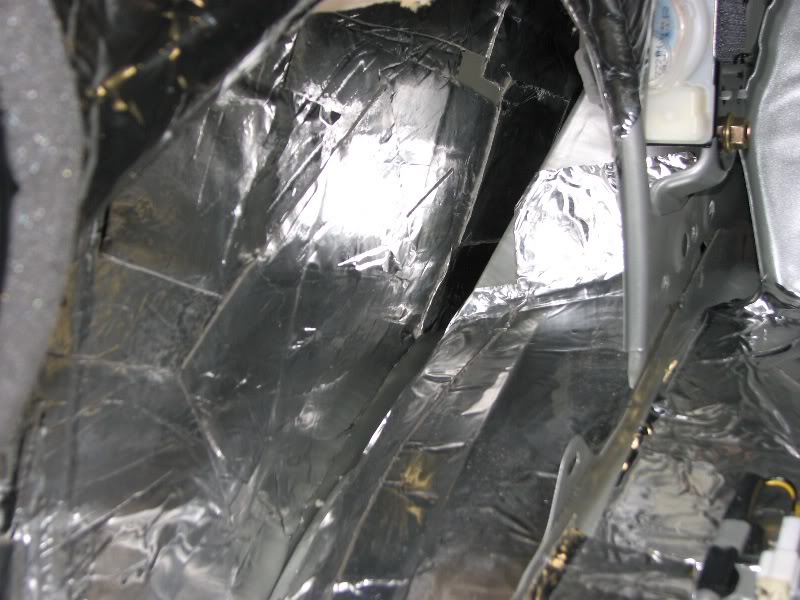
It is comical what they have in the rear of this car. Two thin pieced of sheet metal combine at this rear speaker location, the speaker is mounted to this flimsy piece of metal surrounded by open area - can you say "free air"? The seal created by the rear grill panel is very important.
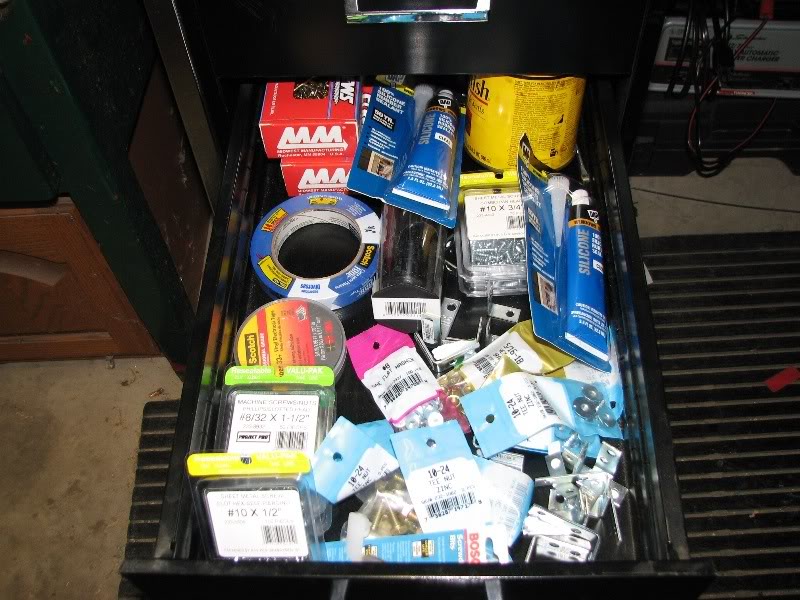
notice the blue organizer drawer - i use that to keep track of screws - i don't lose screws/bolts or end up with missing or extra parts.
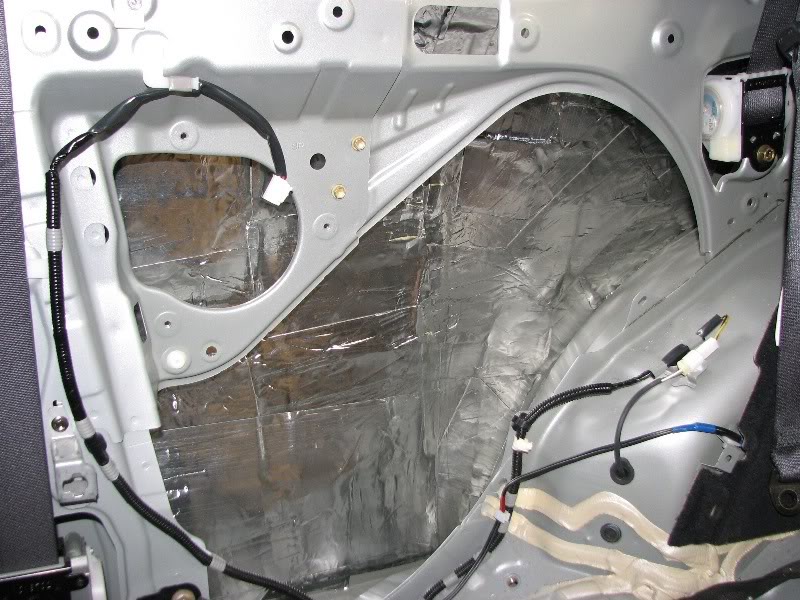
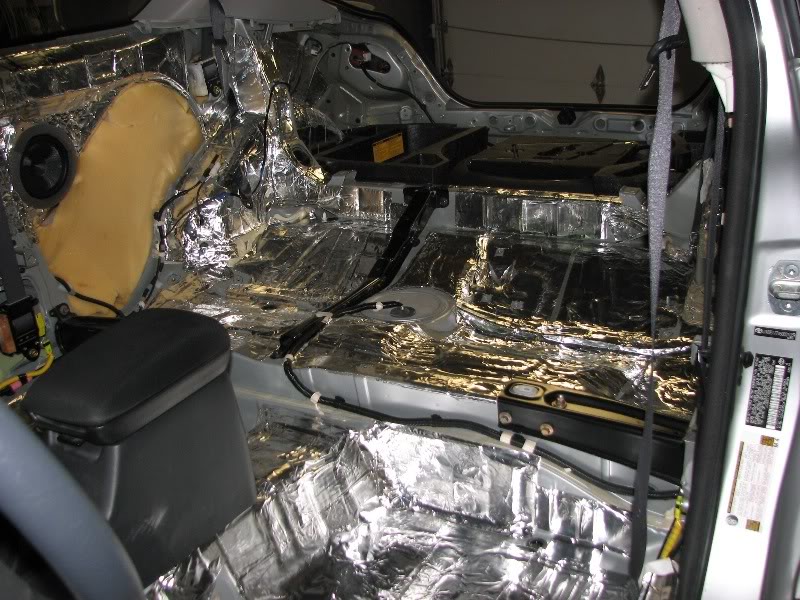
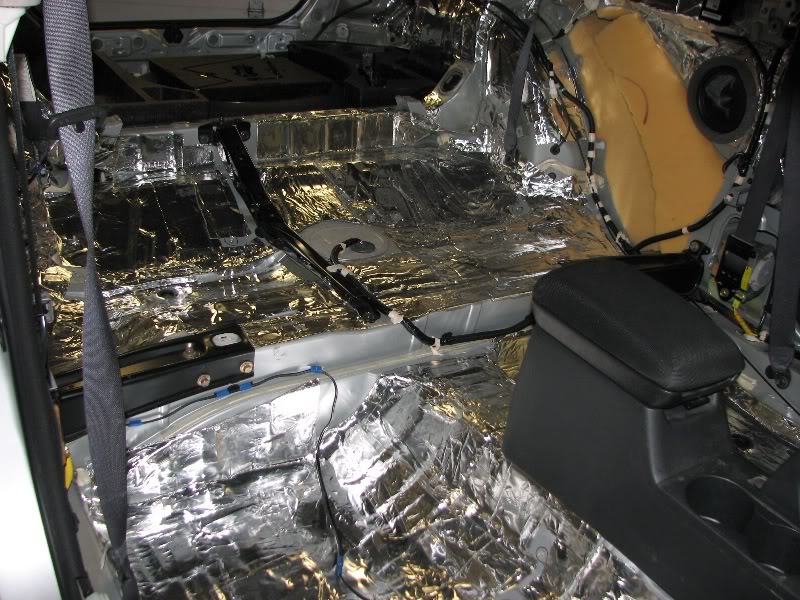
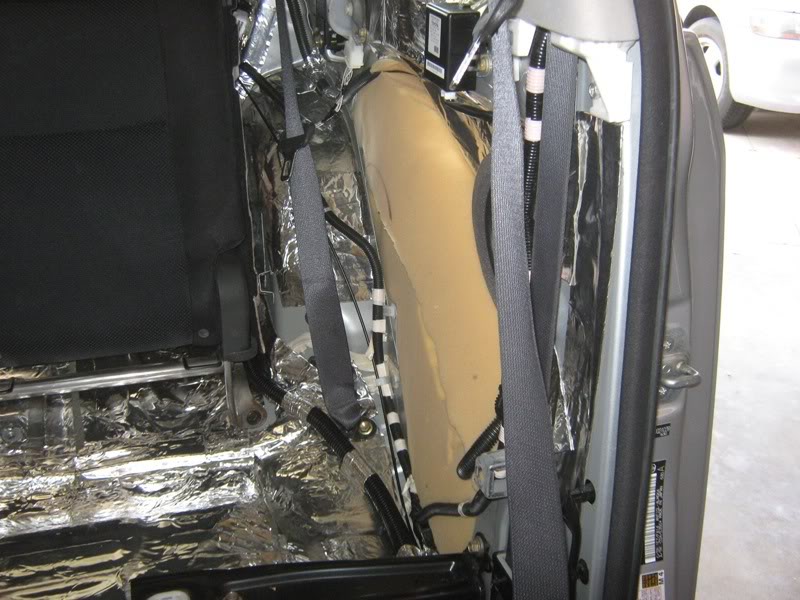
this is part one of this effort, so we focused on deadening the outside skin - two layers of Raammat BXT II.
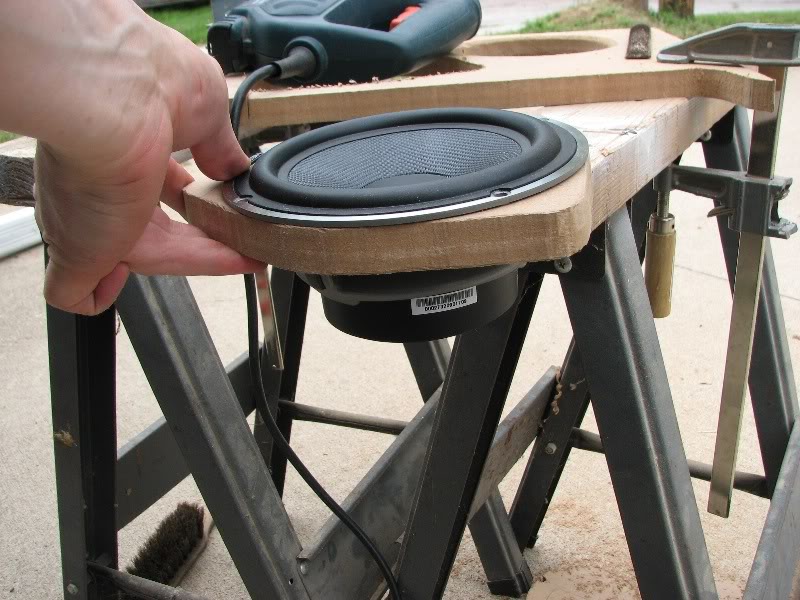
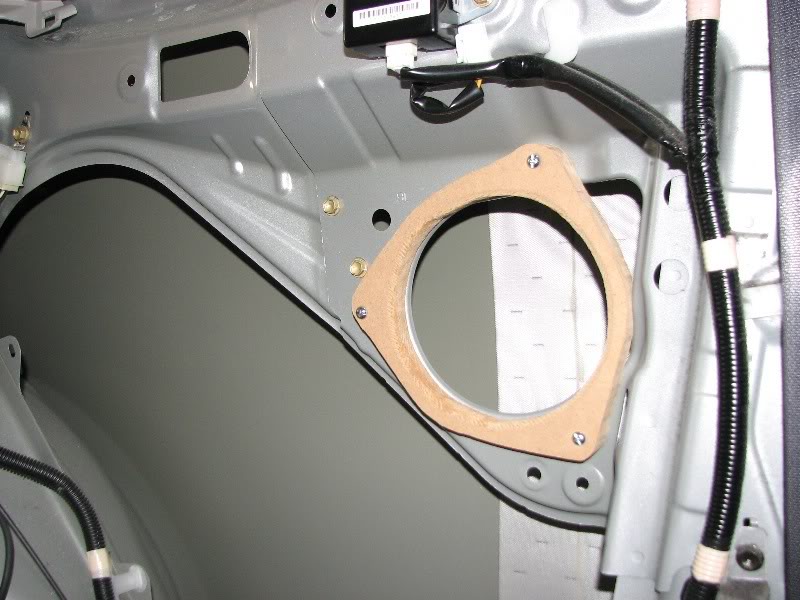
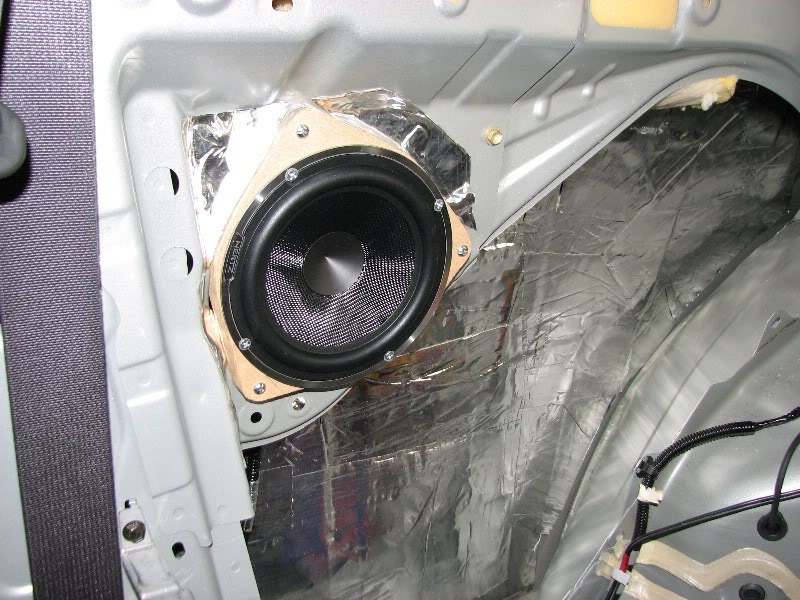
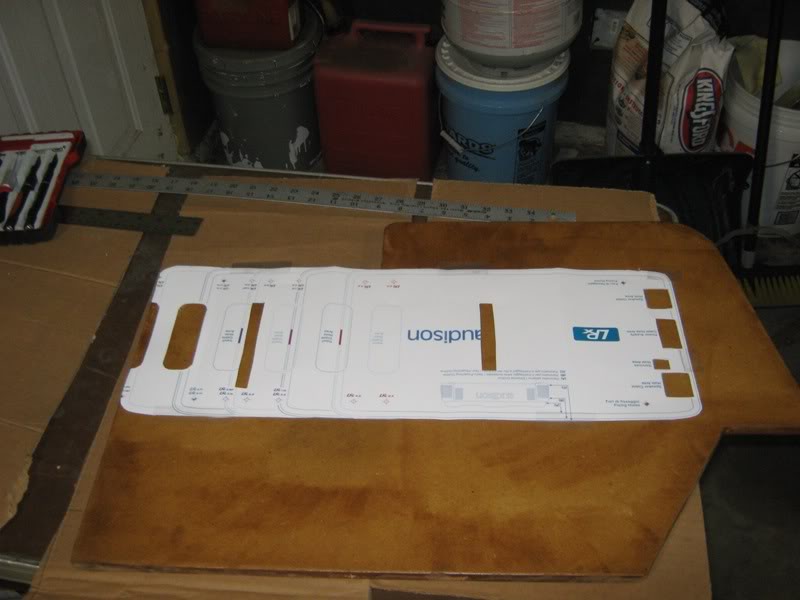
While the owner was laying the deadener, I made 3/4" MDF mounting baffles

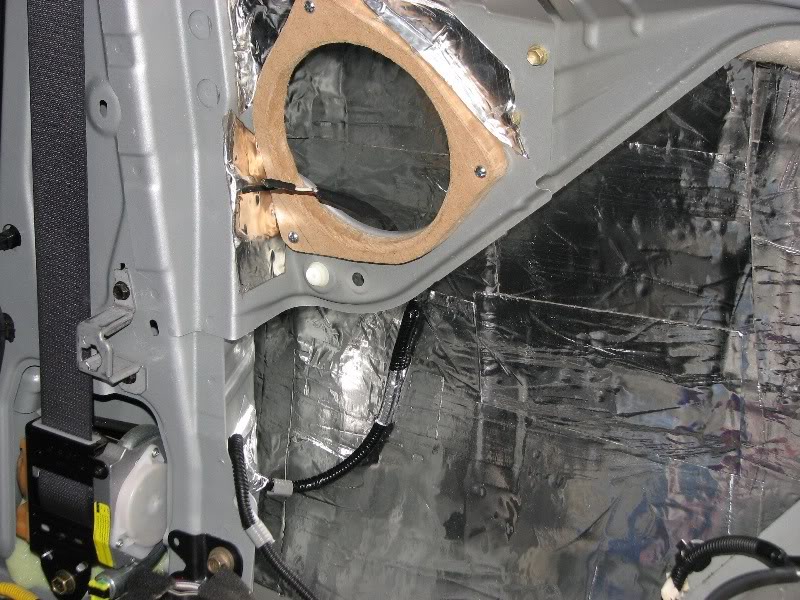
we didn't deaden all over the sheet metal because we may very likely cut away this thin metal to make way for a sealed enclosure. i don't like cutting metal that has deadener on it. for now, before we get the amp in, i just terminated the factory wiring. kinda silly to use this wire on these amazing speakers... all in time.
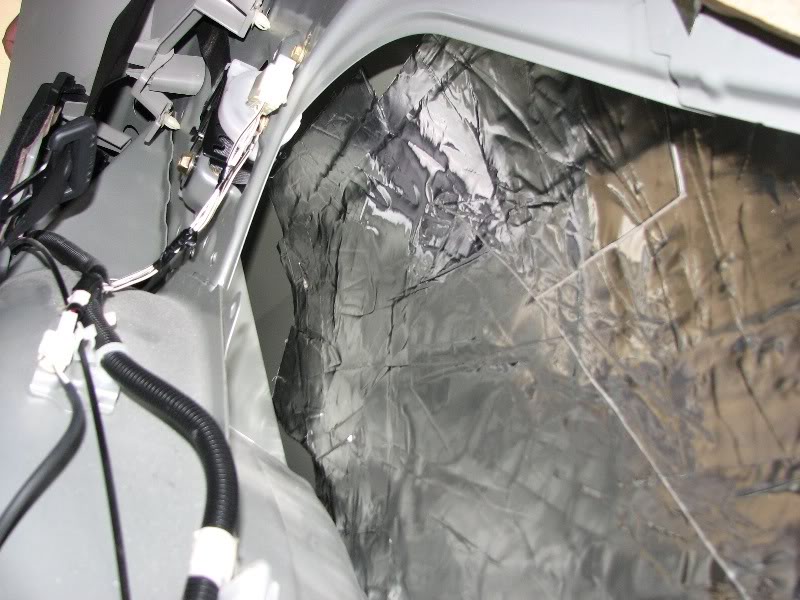
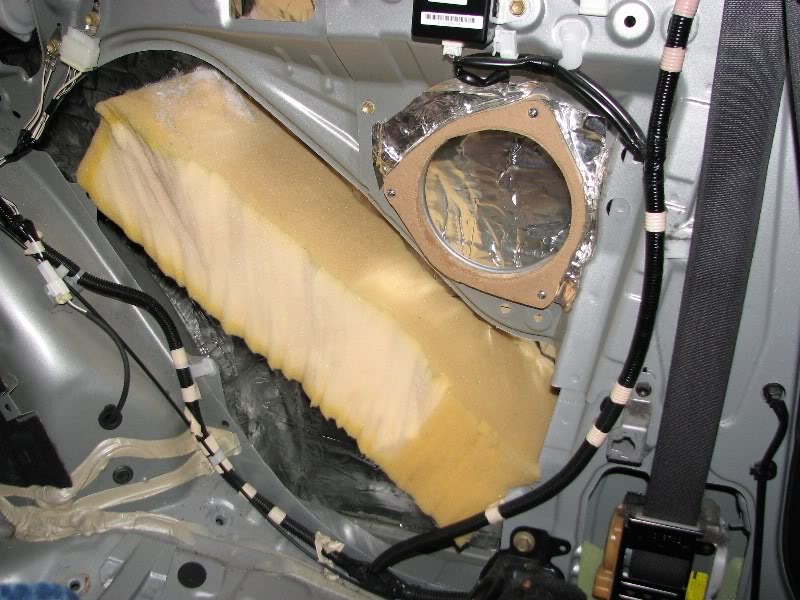
next i decided to fill some of this open area with thick open cell foam. i stuffed some large pieces up above the speaker mount - in hopes of reducing the back wave that makes it up and out by the rear side window
i fit this:
up here
then i just used an obnoxious amount of foam in the rest of the cavity, for now.
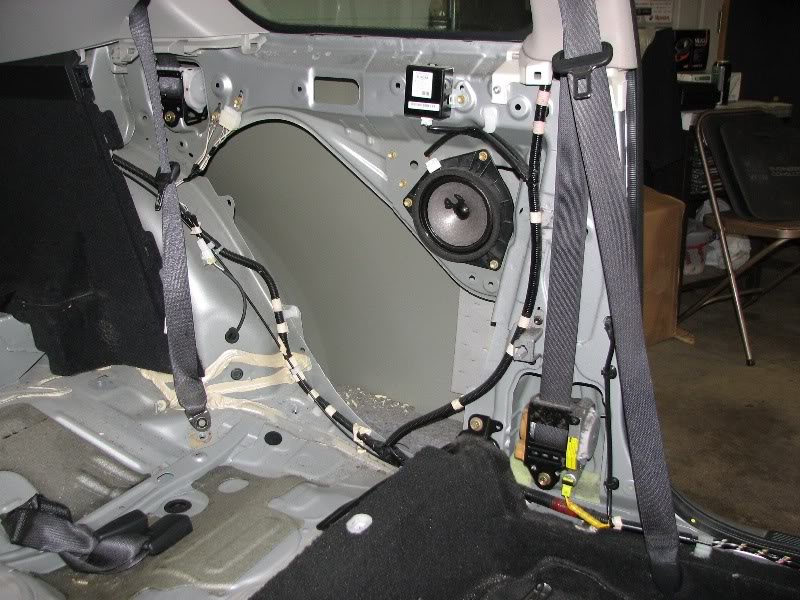
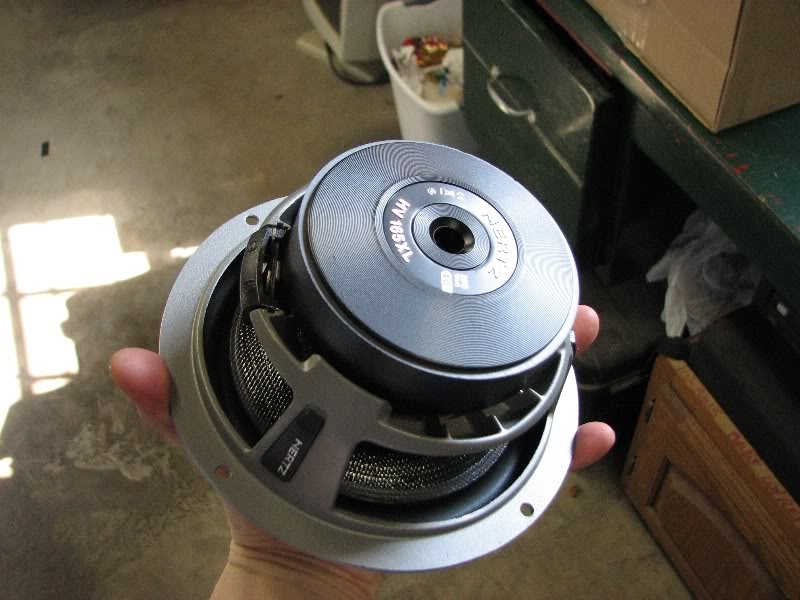
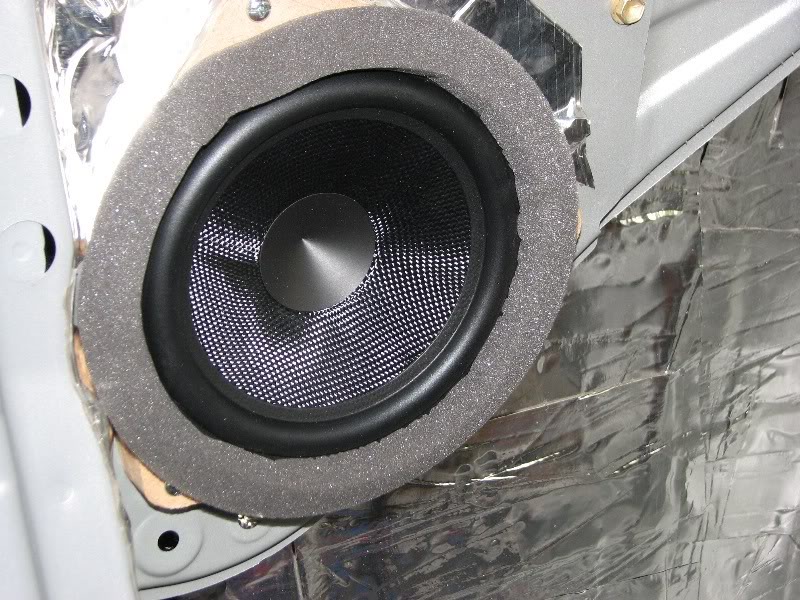
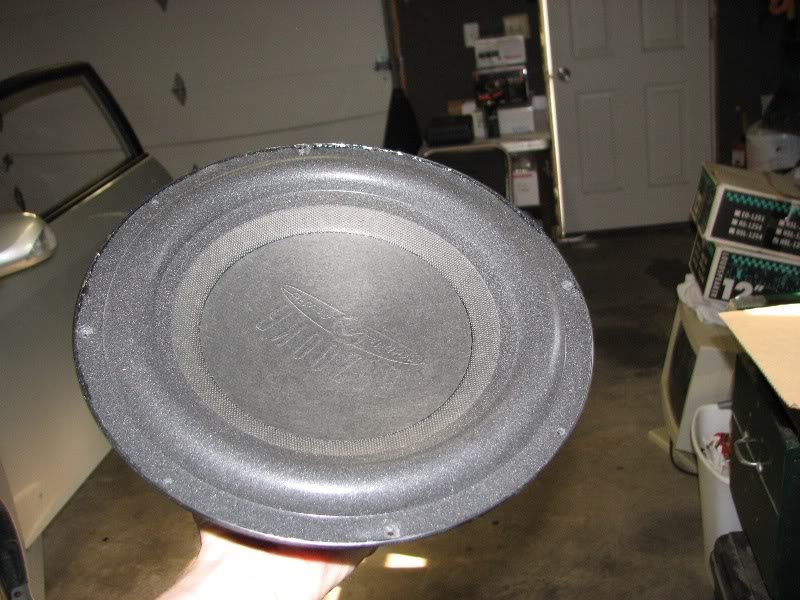
The Hertz 165XL is a nice driver
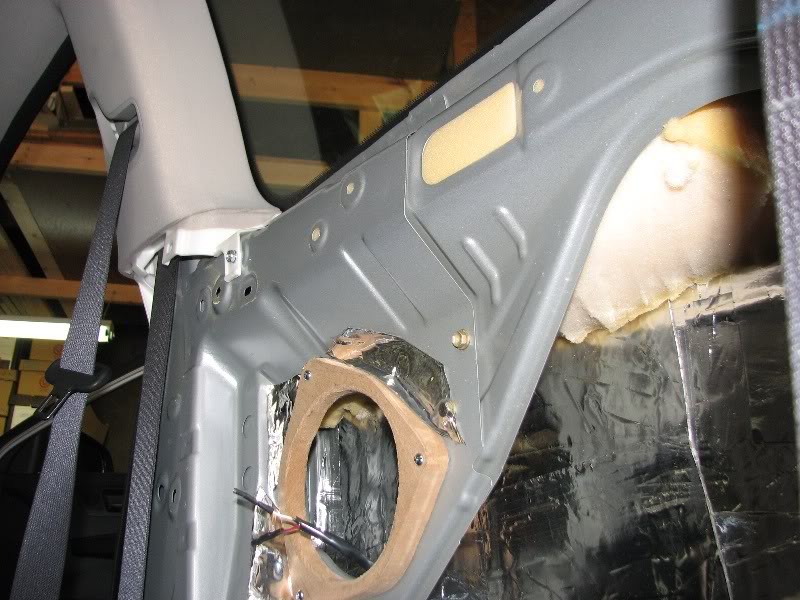
because the seal is crucial, i used thicker open cell foam weatherstripping
This is the gear for the vehicle, minus the 165XL box since the local shop gave us the mids out of a 165XL comp set.
It is comical what they have in the rear of this car. Two thin pieced of sheet metal combine at this rear speaker location, the speaker is mounted to this flimsy piece of metal surrounded by open area - can you say "free air"? The seal created by the rear grill panel is very important.
notice the blue organizer drawer - i use that to keep track of screws - i don't lose screws/bolts or end up with missing or extra parts.
this is part one of this effort, so we focused on deadening the outside skin - two layers of Raammat BXT II.
While the owner was laying the deadener, I made 3/4" MDF mounting baffles
we didn't deaden all over the sheet metal because we may very likely cut away this thin metal to make way for a sealed enclosure. i don't like cutting metal that has deadener on it. for now, before we get the amp in, i just terminated the factory wiring. kinda silly to use this wire on these amazing speakers... all in time.
next i decided to fill some of this open area with thick open cell foam. i stuffed some large pieces up above the speaker mount - in hopes of reducing the back wave that makes it up and out by the rear side window
i fit this:
up here
then i just used an obnoxious amount of foam in the rest of the cavity, for now.
The Hertz 165XL is a nice driver
because the seal is crucial, i used thicker open cell foam weatherstripping
#15
09-23-2010, 12:45 PM
Join Date: Dec 2009
Location: Quad Cities, IL
Posts: 3,279
Everything reassembled:
He has the factory sub upgrade option, but not for long. The performance of this is awful


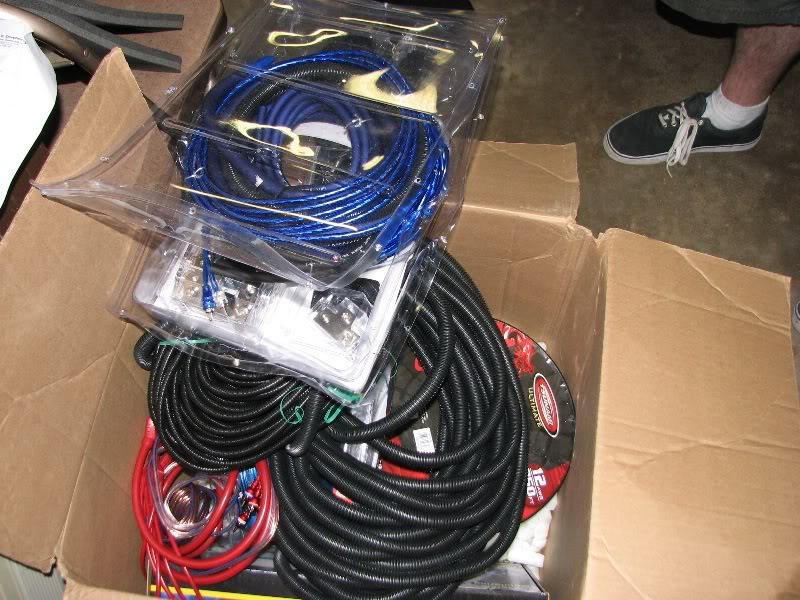
He has another $400 in wiring and accessories including Streetwires 1/0 kit, another random brand 1/0 kit for the big 3, and 250ft of 12awg wire, split loom, etc.
then we spent $110 at Menards on the everyday stuff I keep on hand for installs, he wanted to replenish what we will use
not pictured is Super 77 spray adhesive, Gorilla glue, Acetone, and some other chemicals.
I think this pushed his investment to the $5500 mark.
He has the factory sub upgrade option, but not for long. The performance of this is awful
He has another $400 in wiring and accessories including Streetwires 1/0 kit, another random brand 1/0 kit for the big 3, and 250ft of 12awg wire, split loom, etc.
then we spent $110 at Menards on the everyday stuff I keep on hand for installs, he wanted to replenish what we will use
not pictured is Super 77 spray adhesive, Gorilla glue, Acetone, and some other chemicals.
I think this pushed his investment to the $5500 mark.
#16
11-04-2010, 09:06 PM

Wow, talk about taking your time. Nice job so far. In the middle of my own project right now. I have a set of Boston Pro 60SEs sitting at my house waiting to be installed. Soundstream TX4.560 going with that, not sure if it will be as much power as the BAs are looking for, but I think it will do. Have a set of Polk 6.5s up front right now, they are going to move to the rear deck, took a chance with some Diesel 6x9s back there, and for the price I was pretty happy($35/pair), but with BAs in there I know they are not going to fulfill what I am looking for. I want to have great sound with decent bass. Spent two days deadening floors and rear doors with a combination of edead and fatmat, then put volare closed cell foam over it, and in the rear doors I filled with poly, not sure how well that is going to hold up, but it definitely knocked down outside noise quite a bit. Still have to deaden the rear deck and front doors, make baffles for all of the speakers and push them as far out of the doors as I can without making it look non stock. Going to build a shelf in the truck under the rear deck and trunk bars to mount the amps, crossovers, speaker terminal strips, and relays for remote wires. Also have to find somewhere, probably behind rear passenger seat to mount the power/ground distribution. Then I have to figure out where I am going to hide the sub in the trunk as I can't afford to give up very much space back there. I work on the road doing telecom installs so I need the room to haul tools. I haven't decided if I should put a box on the passenger side over where the jack is hidden and make it removable and put a Thunder Thin in there, or should I just get a fiberglass box made so I can just go ahead and put a Thunder 8500 or 9500 in there. A lot of decisions to make yet, and a lot more work to do!
#17
11-04-2010, 09:41 PM
Join Date: Dec 2009
Location: Quad Cities, IL
Posts: 3,279
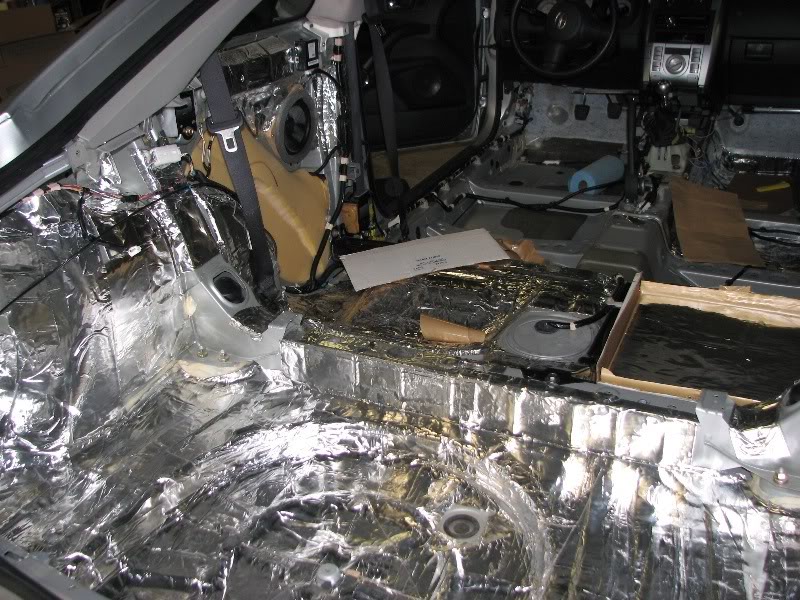
we got a lot of the deadening done in another night. Went though a few boxes of the Raammat BXT II
factory sub removed - this will be for sale shortly. you can see the mounts used
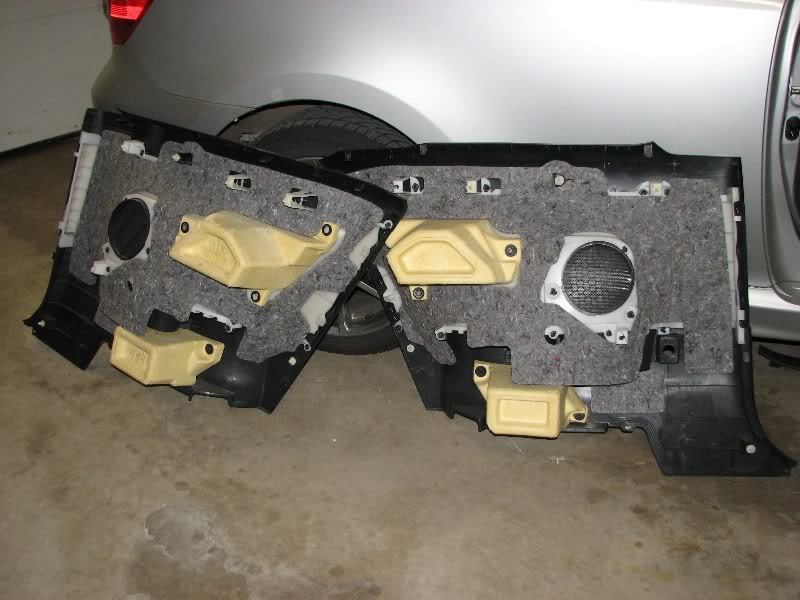
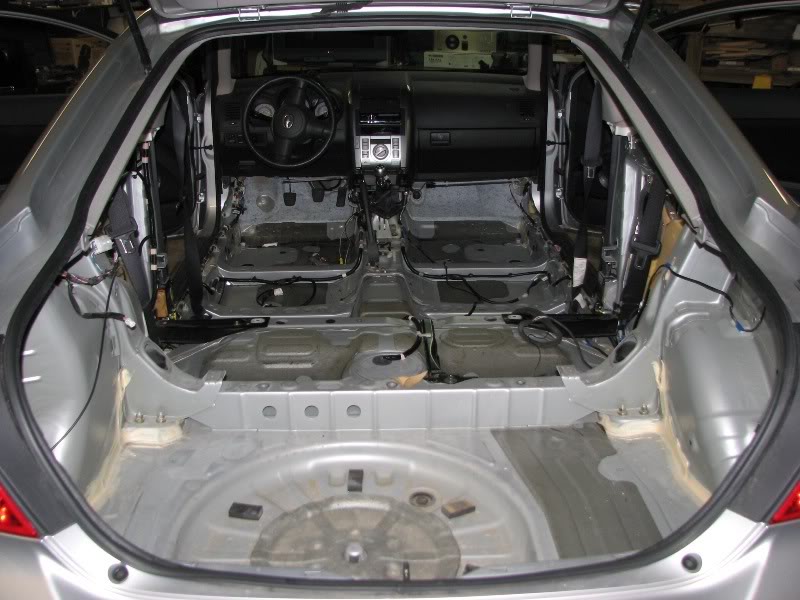
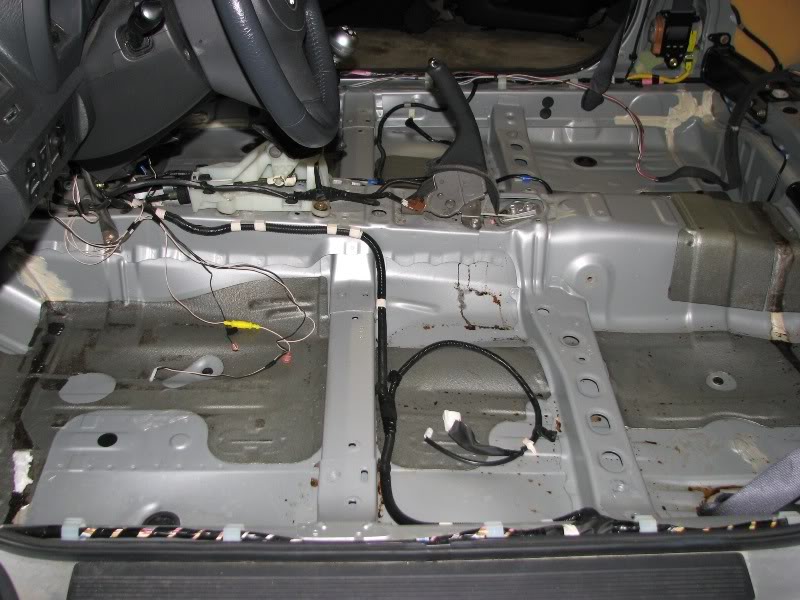
here the car is stripped - took about 40 minutes (first time on this car)

factory sub removed - this will be for sale shortly. you can see the mounts used
here the car is stripped - took about 40 minutes (first time on this car)
#18
11-04-2010, 09:41 PM
Join Date: Dec 2009
Location: Quad Cities, IL
Posts: 3,279
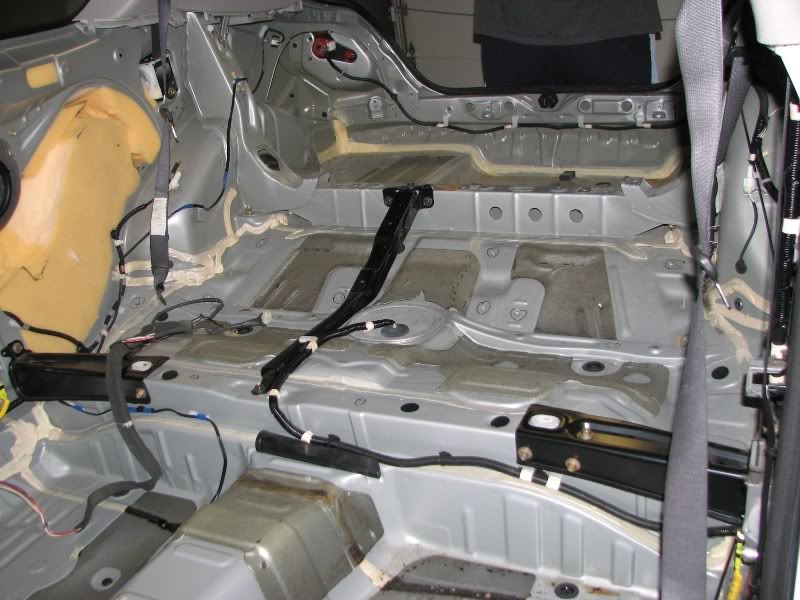
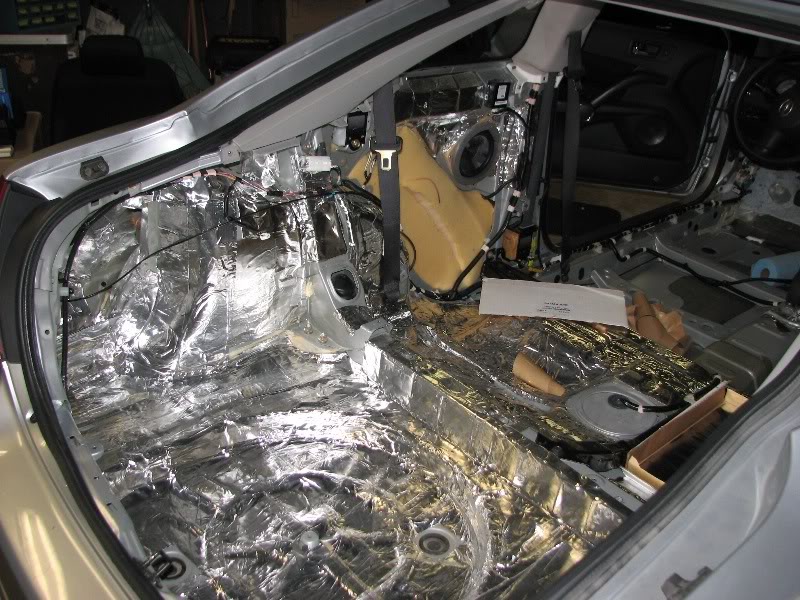
started by doing the wheel wells. i worked on the back seat while the owner worked on the trunk -

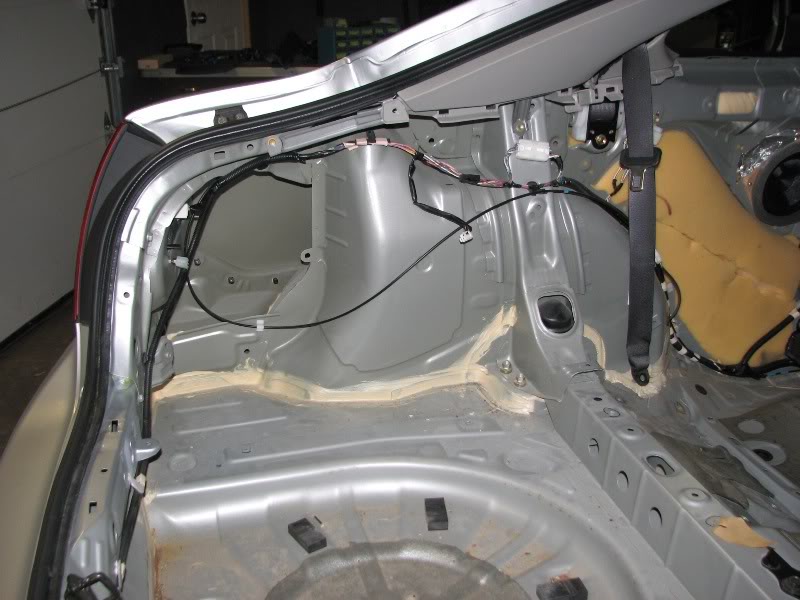
more than 2 layers on the trunk where the Mille sub is going. we spent a lot of time in the rear getting deadener as far as our arms could reach up the rear pillar cavity.
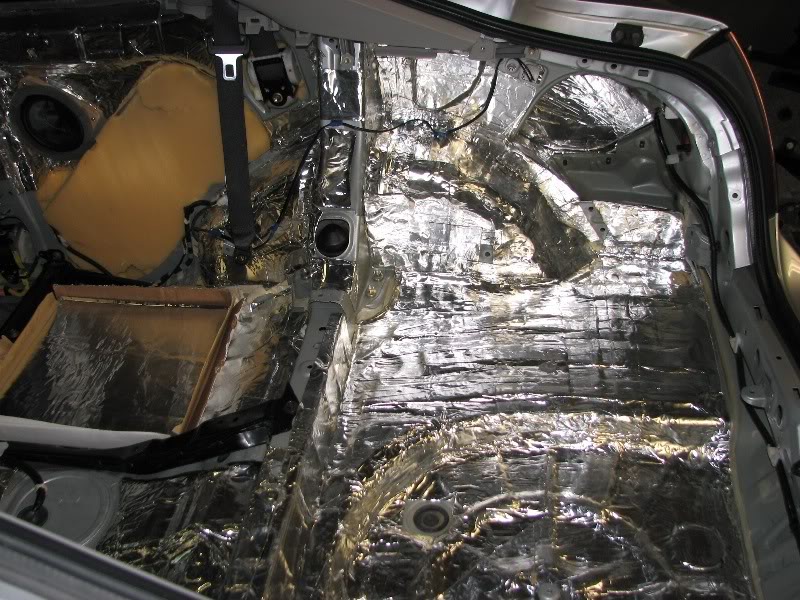
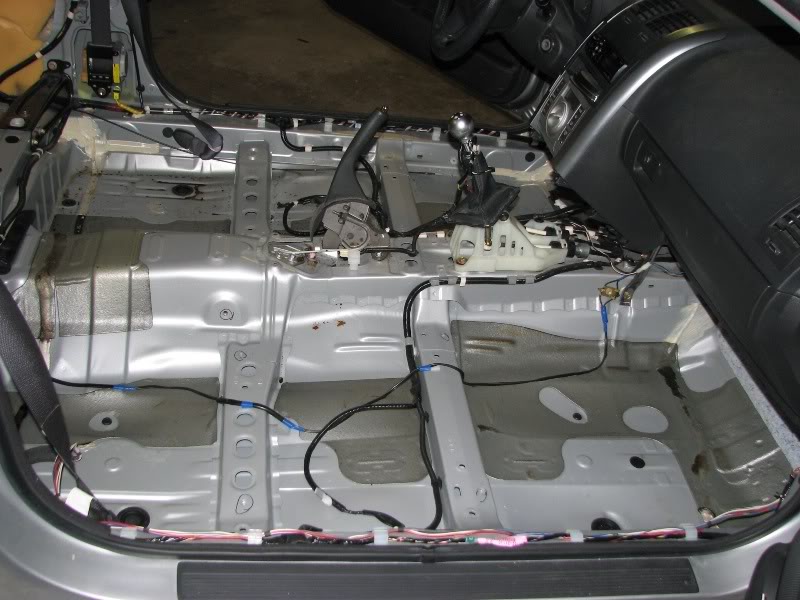
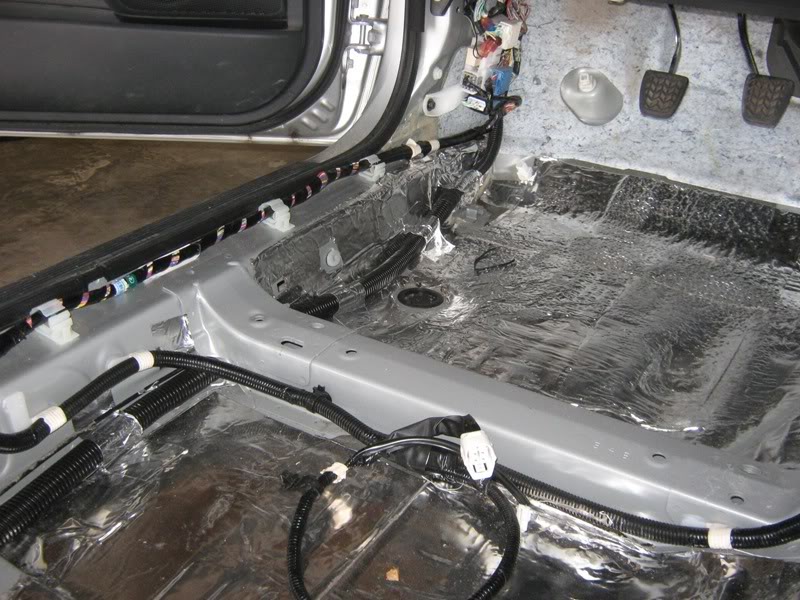
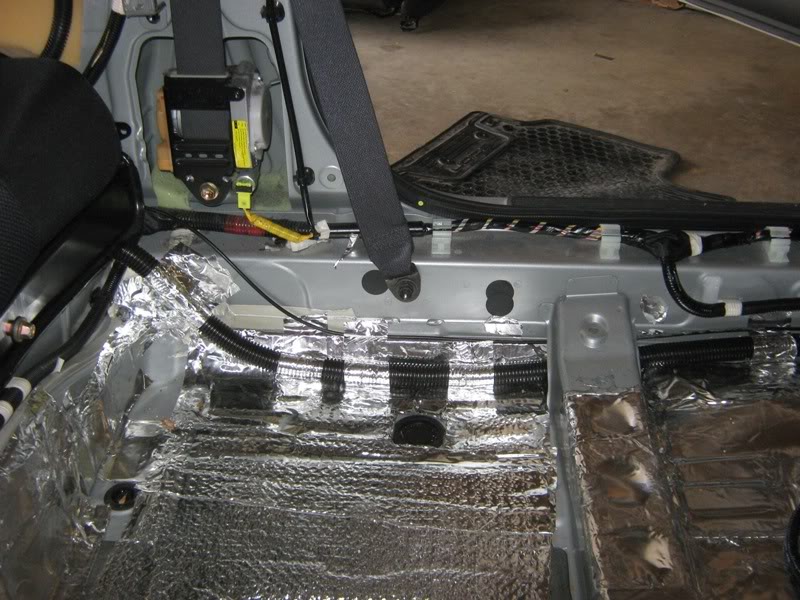
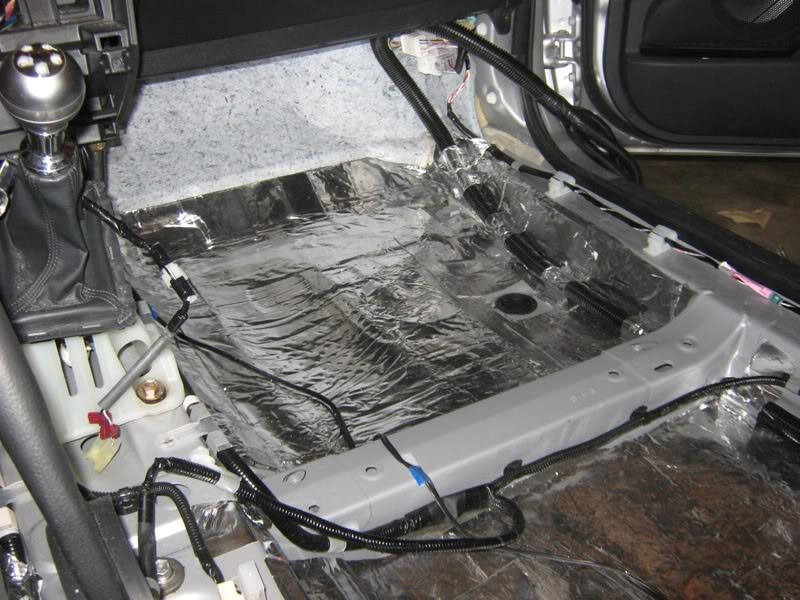
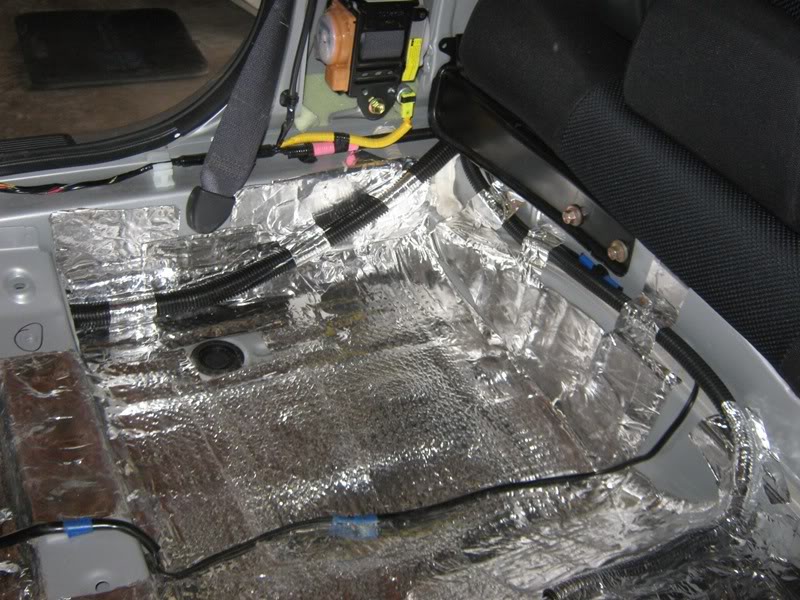
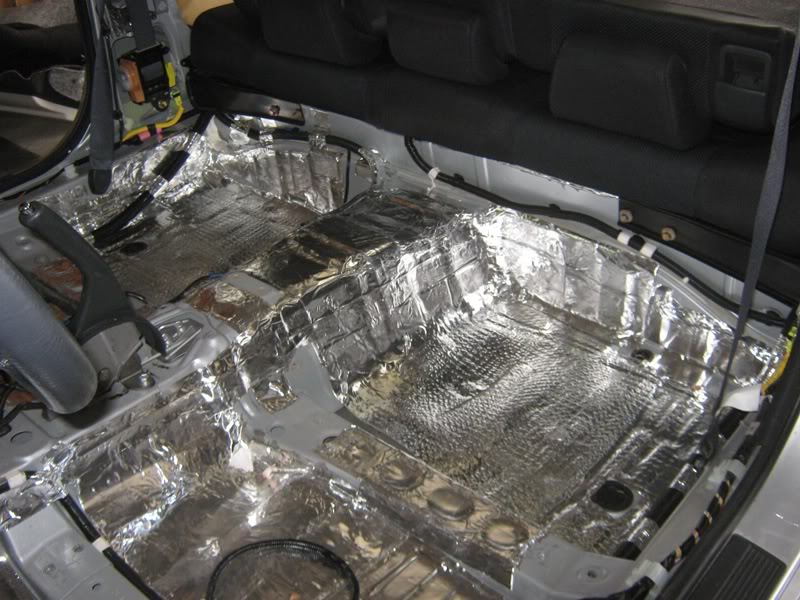
then we moved to the cabin floors
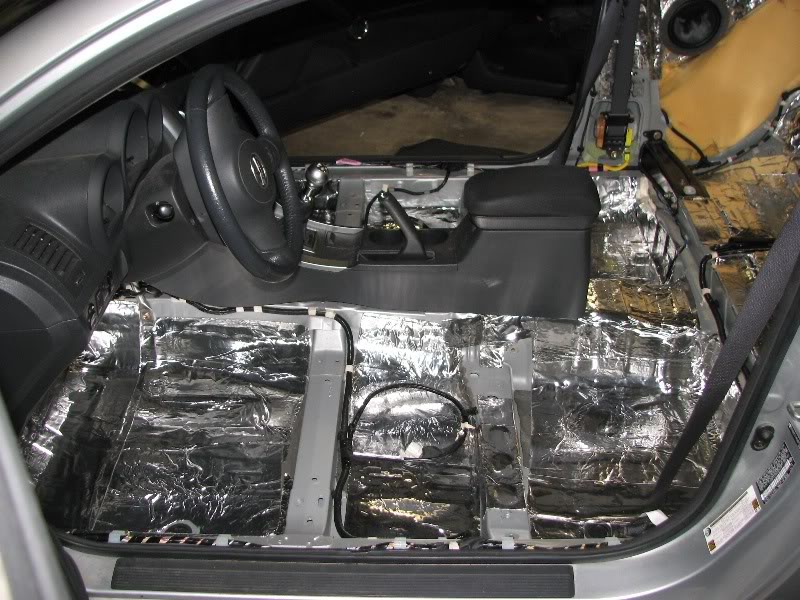

more than 2 layers on the trunk where the Mille sub is going. we spent a lot of time in the rear getting deadener as far as our arms could reach up the rear pillar cavity.
then we moved to the cabin floors
#19
11-04-2010, 09:42 PM
Join Date: Dec 2009
Location: Quad Cities, IL
Posts: 3,279
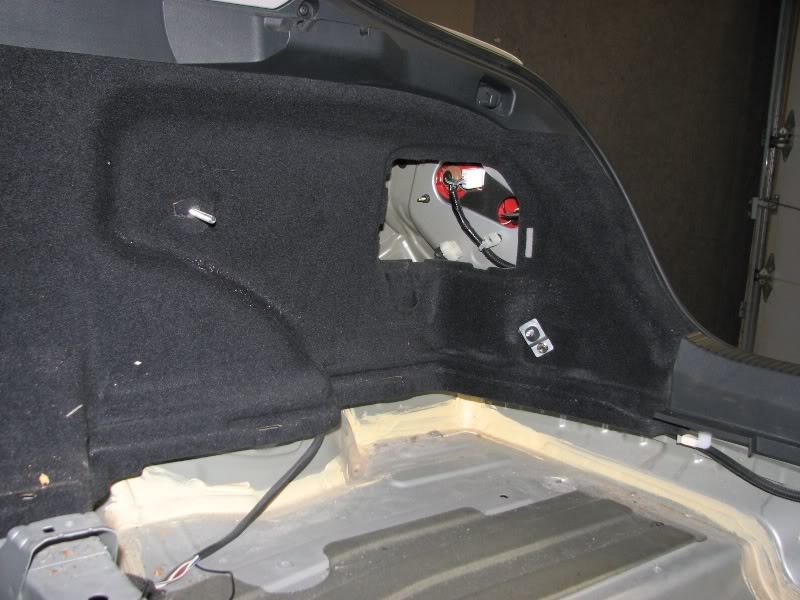
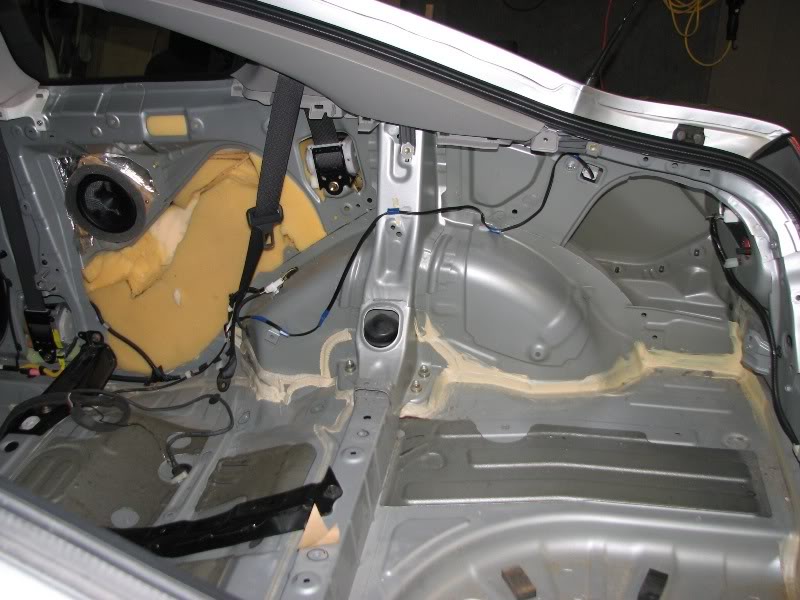
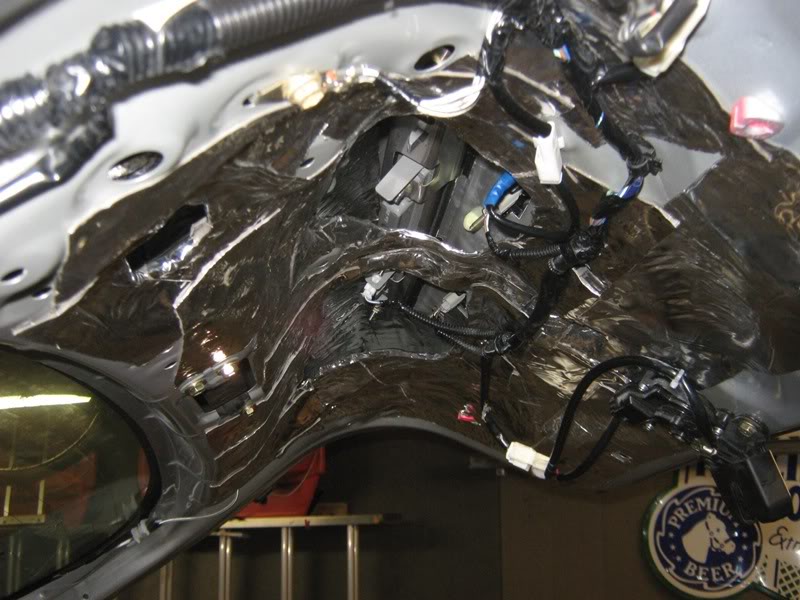
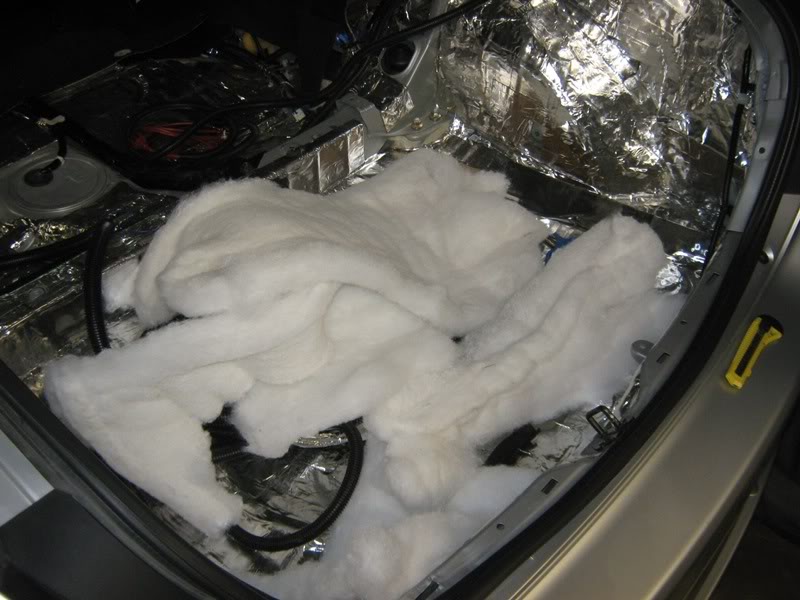
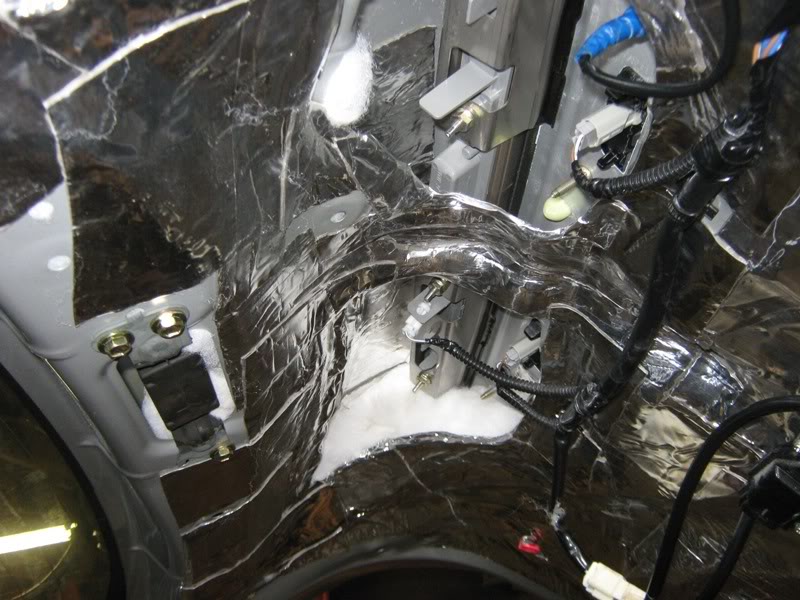
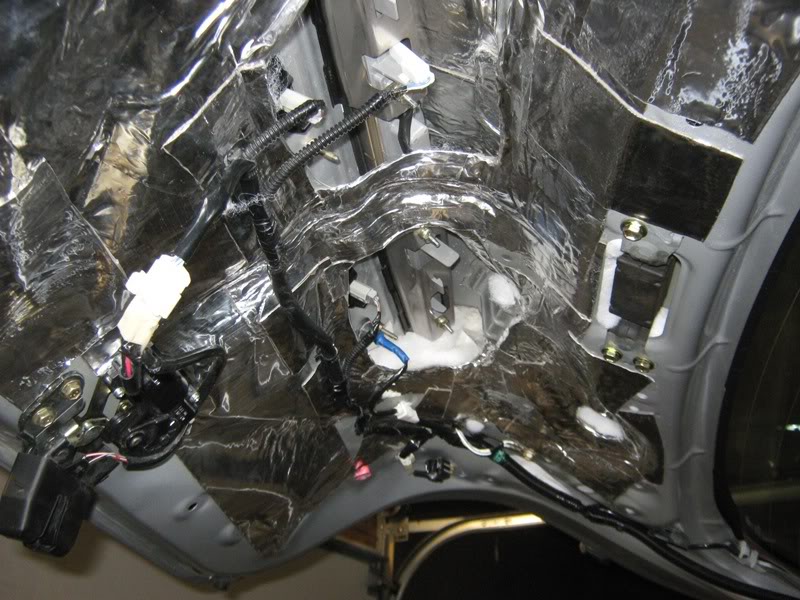
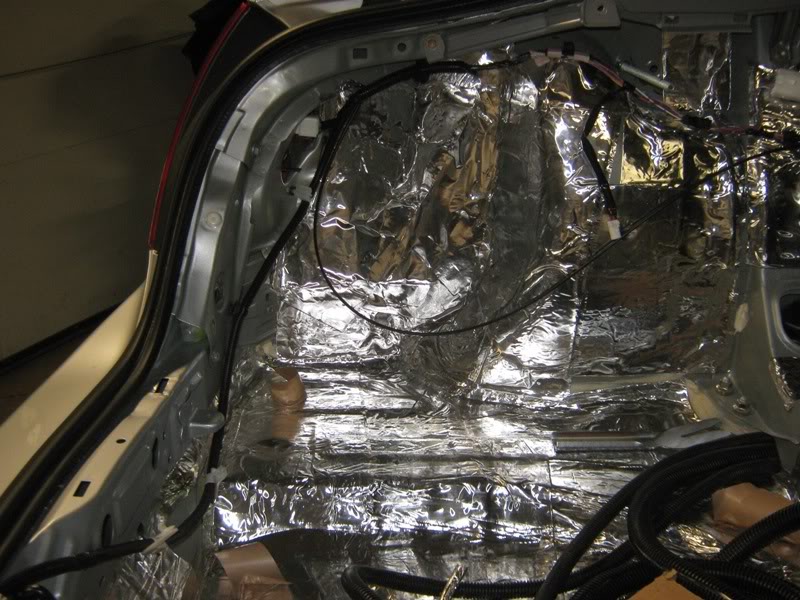
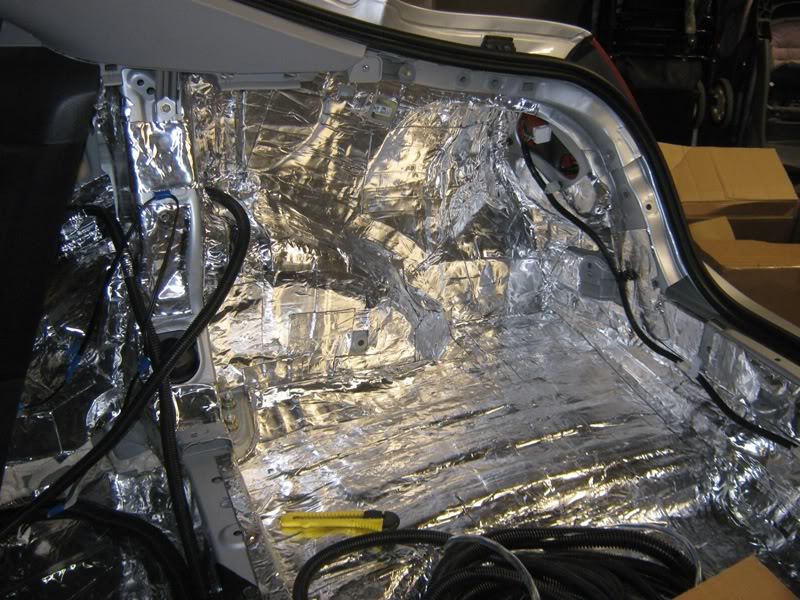
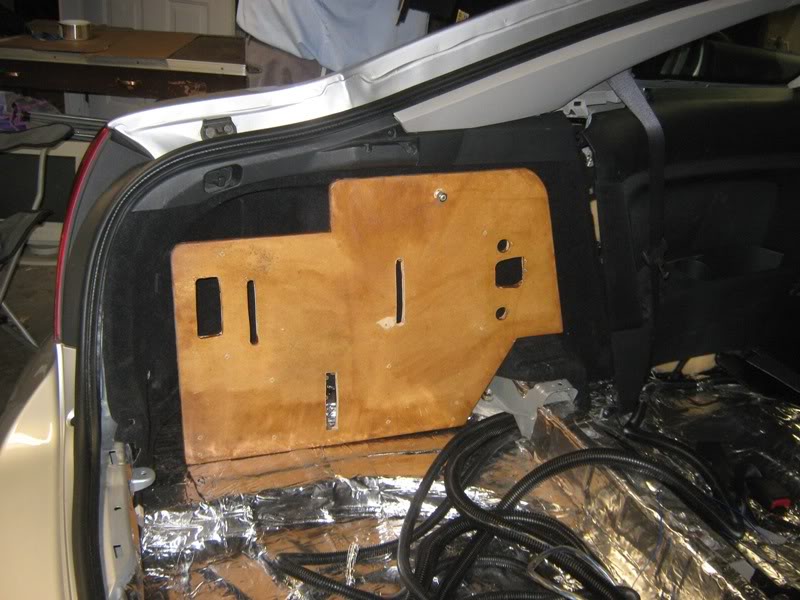
tonight we added three sheets of BXT II inside the rear hatch, reaching inside the cavity was time consuming, but worth the effort. Then we stuffed a lot of "polyfill" (part cotton) inside the cavity. The result is a much more satisfying "thud" when rapping on the hatch.
all of this
up here
and here
and a few more sheets on the rear of the car - yes, i also see the spot on the driver's side hatch that could use a bit more to even out the panel, not that it would make a difference at this point, we still have two more flat boxes of BXT II left so i'll be done.
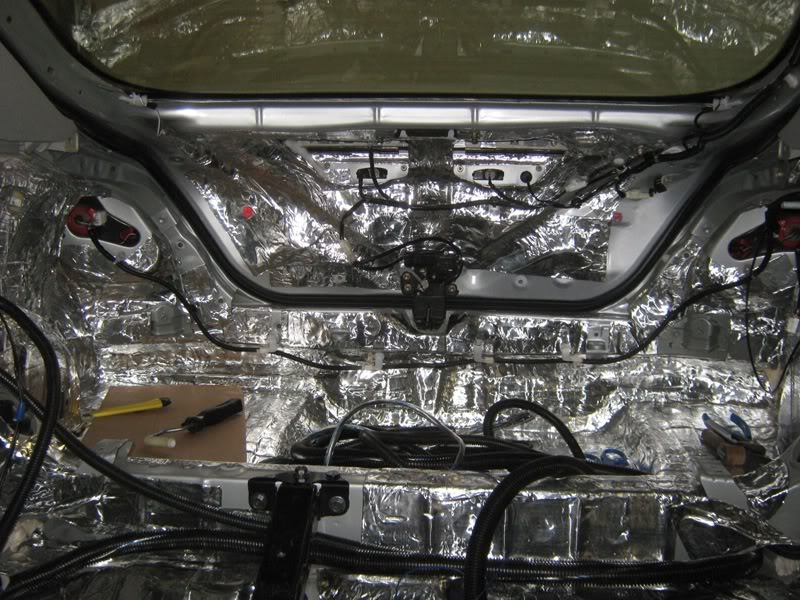
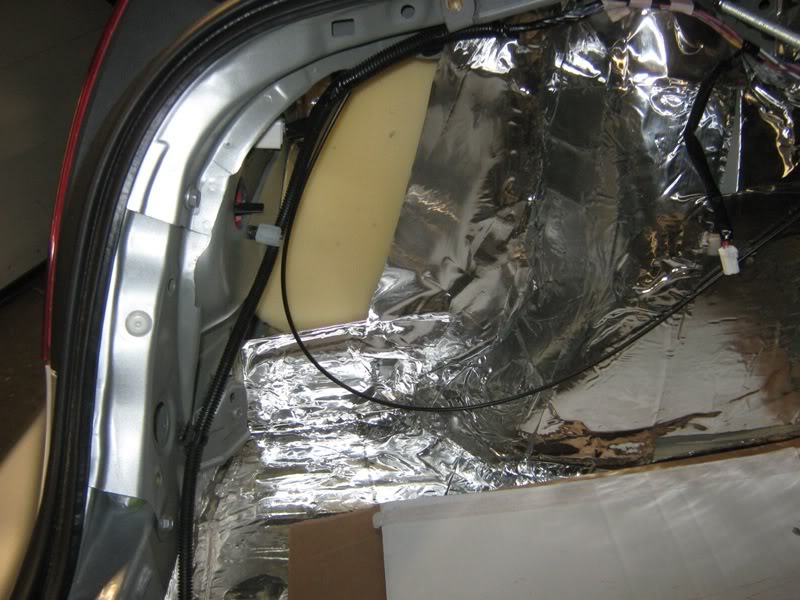
we also stuffed the rear quarters with open cell foam and deadened over the opening. 3-4 layers of BXT II made for a nice covering. i wanted to eliminate that cavity as a source of audible resonance, which should be low enough now to not cause issues.
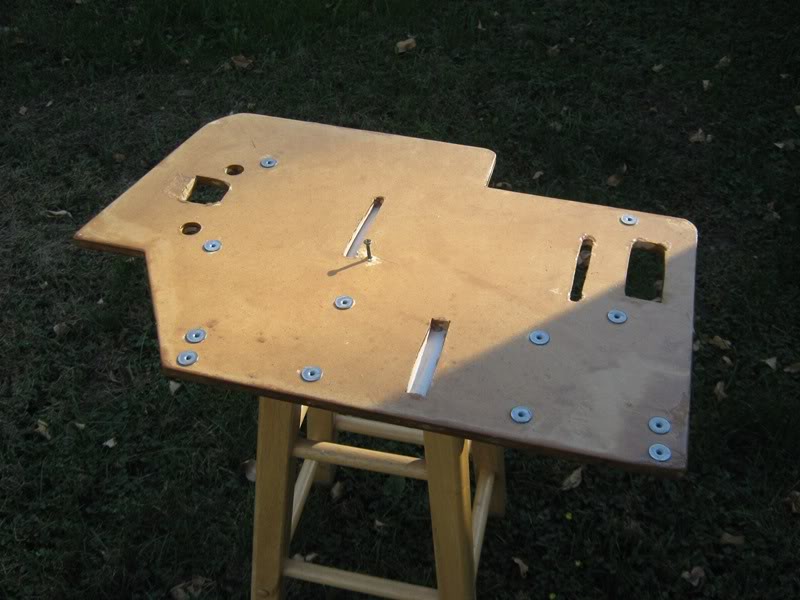
then we carpeted the amp rack, cut out holes for mounting bolts, cables, and venting. the amp rack will have L-brackets on bottom (even have hurricane nuts for those) with a 3/8" threaded rod secured to the vehicle framing, through a factory trunk light opening, and through the panel.
tip for carpeting a panel with mounting holes -you don't want carpet in the threads.
start by carpeting the outside (visible) side with room for overlap.
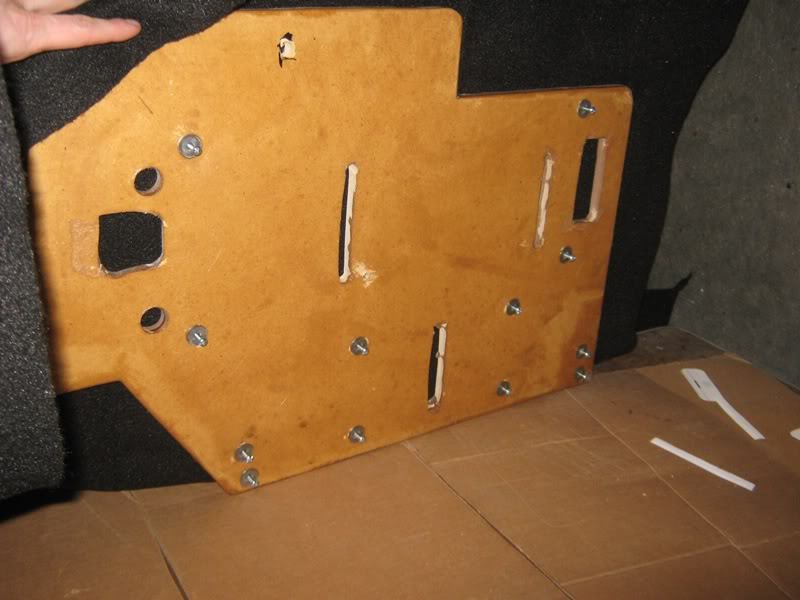
drive screws through the hurricane nuts (or t-nuts) to expose them on the carpeted side (as bumps)

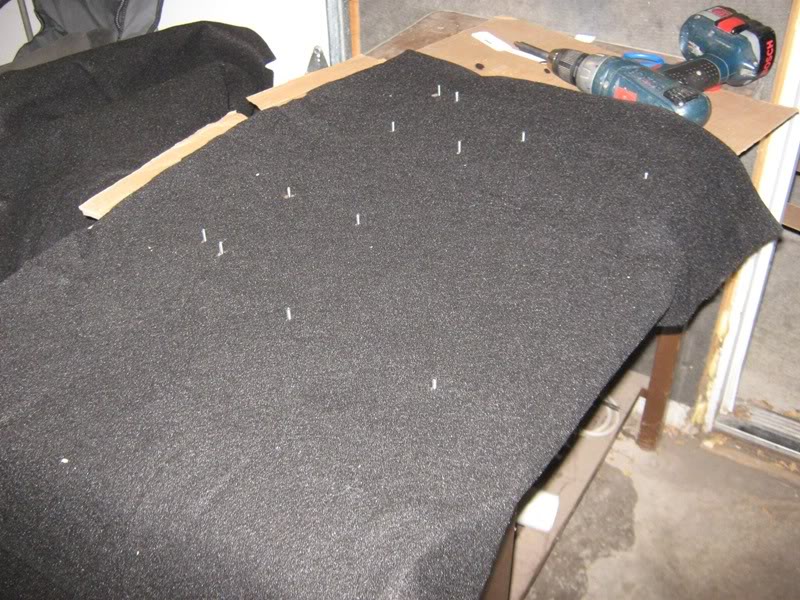
now back out the screws, one at a time, and cut off the hump. now you have exposed all of the screws and you won't have issues with carpet
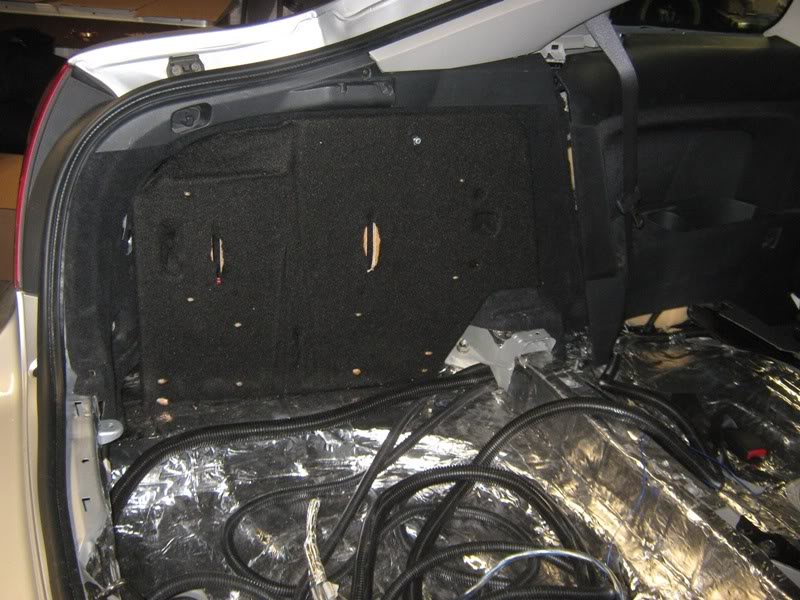
amp rack placed in the car - even this won't be visible as we will build a beauty panel to hide everything once we are finished.
all of this
up here
and here
and a few more sheets on the rear of the car - yes, i also see the spot on the driver's side hatch that could use a bit more to even out the panel, not that it would make a difference at this point, we still have two more flat boxes of BXT II left so i'll be done.
we also stuffed the rear quarters with open cell foam and deadened over the opening. 3-4 layers of BXT II made for a nice covering. i wanted to eliminate that cavity as a source of audible resonance, which should be low enough now to not cause issues.
then we carpeted the amp rack, cut out holes for mounting bolts, cables, and venting. the amp rack will have L-brackets on bottom (even have hurricane nuts for those) with a 3/8" threaded rod secured to the vehicle framing, through a factory trunk light opening, and through the panel.
tip for carpeting a panel with mounting holes -you don't want carpet in the threads.
start by carpeting the outside (visible) side with room for overlap.
drive screws through the hurricane nuts (or t-nuts) to expose them on the carpeted side (as bumps)
now back out the screws, one at a time, and cut off the hump. now you have exposed all of the screws and you won't have issues with carpet
amp rack placed in the car - even this won't be visible as we will build a beauty panel to hide everything once we are finished.
#20
11-04-2010, 09:43 PM
Join Date: Dec 2009
Location: Quad Cities, IL
Posts: 3,279
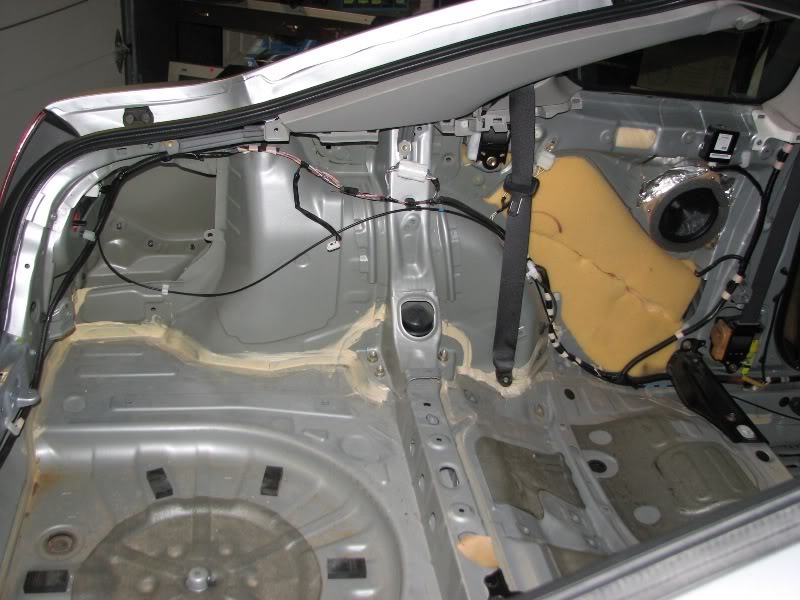
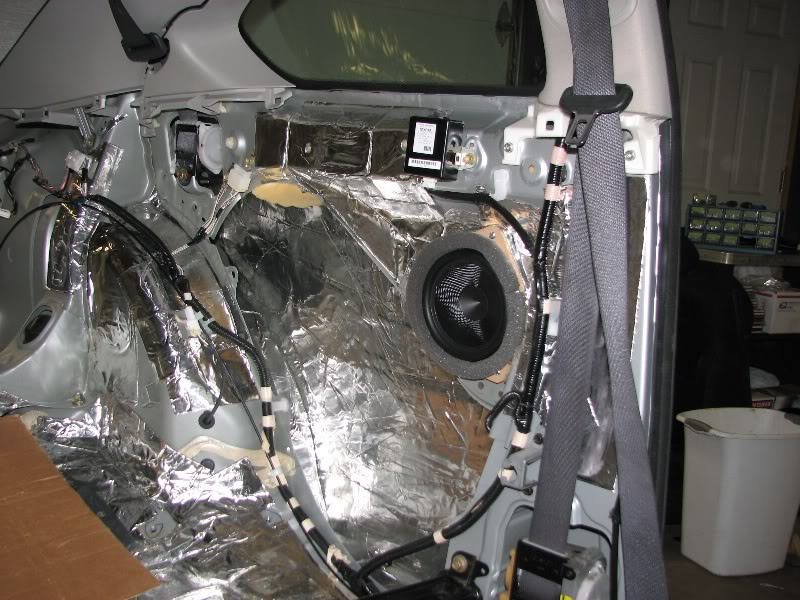
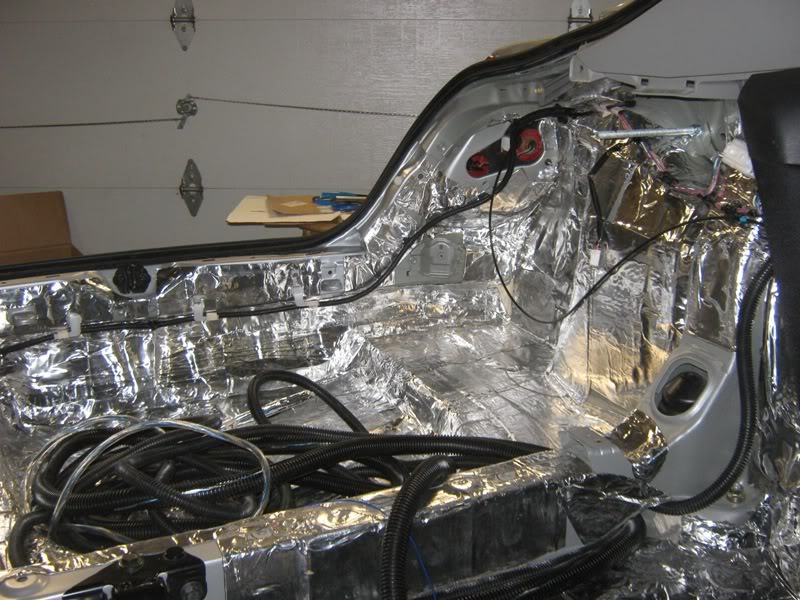
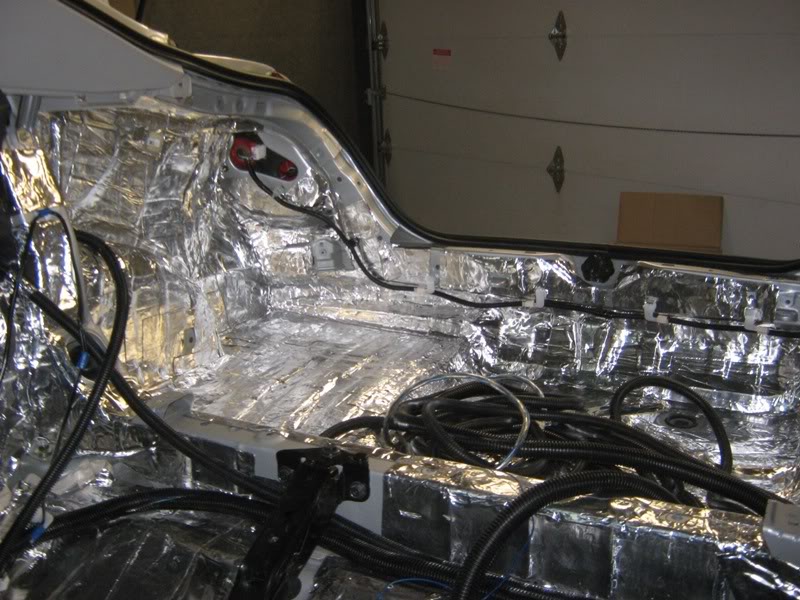
pics of wire routing and amp rack.
all wiring in split loom then taped to car using aluminum foil tape. Streetwires 1/0 on drivers side, remote on driver's side. Four 12awg wire pairs on passenger side, 6 channel Monster Cable RCA's down passenger side (along transmission hump). In all cases, signal cables are separate and only cross at 90deg angles for any noise rejection.
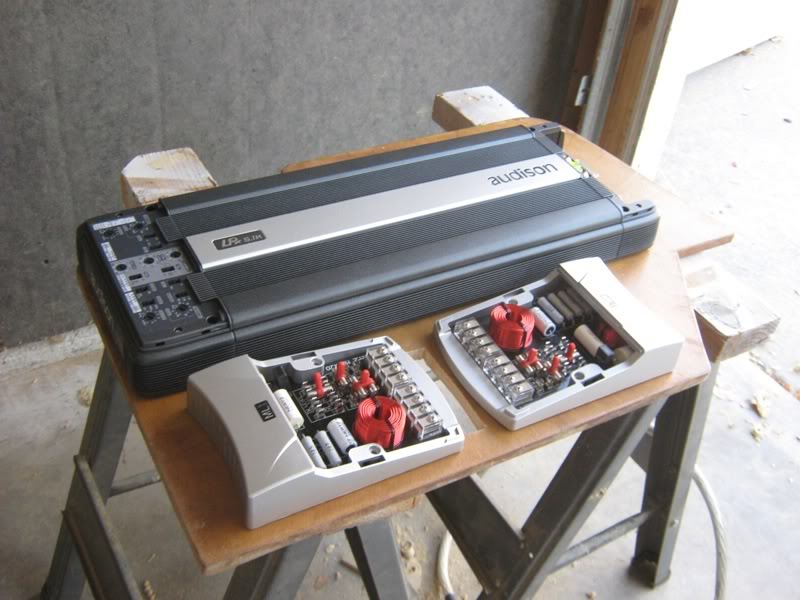
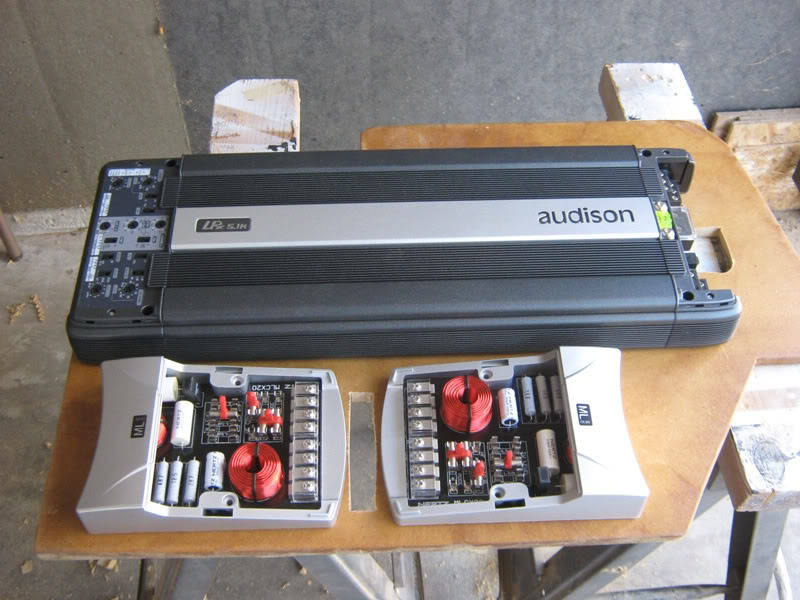
amp rack is 1/2" MDF coated in resin. Here we see the Audison LRx5.1k and the Hertz MLK-165 crossovers on the board. this will be mounted on the driver's side and allows for access to tail lights
8-32 Hurricane nuts are used for all mounting
all wiring in split loom then taped to car using aluminum foil tape. Streetwires 1/0 on drivers side, remote on driver's side. Four 12awg wire pairs on passenger side, 6 channel Monster Cable RCA's down passenger side (along transmission hump). In all cases, signal cables are separate and only cross at 90deg angles for any noise rejection.
amp rack is 1/2" MDF coated in resin. Here we see the Audison LRx5.1k and the Hertz MLK-165 crossovers on the board. this will be mounted on the driver's side and allows for access to tail lights
8-32 Hurricane nuts are used for all mounting