KHA 2014 Accord Sport SQ Build
#21
 05-29-2014, 12:55 AM


Join Date: Dec 2009
Location: Quad Cities, IL
Posts: 3,279
when taking the car apart, looking at exploded diagrams ahead of time helps me identify clips and screw locations

did some deadening of the driver's door tonight. three sheets so 6 sq. ft. so far.


i put the factory barrier back on and reinstalled the door panel. door is noticeably more dead/damped than the passenger door.
you will not see 100% or 200% coverage with this car. i will add until i feel resonance is minimized then move on. certainly, 200% coverage will be more damped but with my other methods this should suffice.
there is about 2 sq. ft. you cannot see that is on the backside of the inner panel. i didn't want to cover up the factory adhesive ring at this time since i reused the factory barrier.
the openings are large - obviously. i haven't finalized a covering material yet. rigidity is preferred as that will help stiffen the inner door panel. i can stick with aluminum and probably be ok
And the Mille fits with simple Scosche adapters! No cutting required!

did some deadening of the driver's door tonight. three sheets so 6 sq. ft. so far.
i put the factory barrier back on and reinstalled the door panel. door is noticeably more dead/damped than the passenger door.
you will not see 100% or 200% coverage with this car. i will add until i feel resonance is minimized then move on. certainly, 200% coverage will be more damped but with my other methods this should suffice.
there is about 2 sq. ft. you cannot see that is on the backside of the inner panel. i didn't want to cover up the factory adhesive ring at this time since i reused the factory barrier.
the openings are large - obviously. i haven't finalized a covering material yet. rigidity is preferred as that will help stiffen the inner door panel. i can stick with aluminum and probably be ok
And the Mille fits with simple Scosche adapters! No cutting required!
#22
05-29-2014, 01:08 AM
Join Date: Dec 2009
Location: Quad Cities, IL
Posts: 3,279
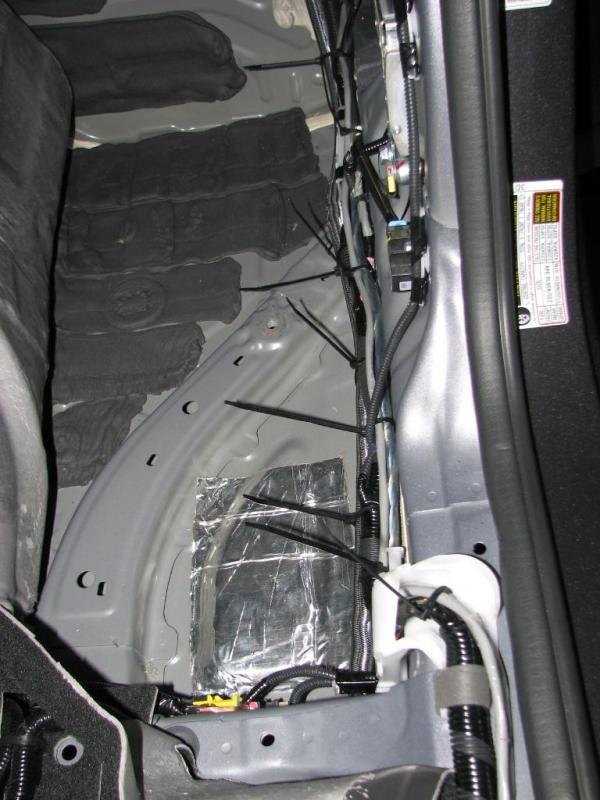
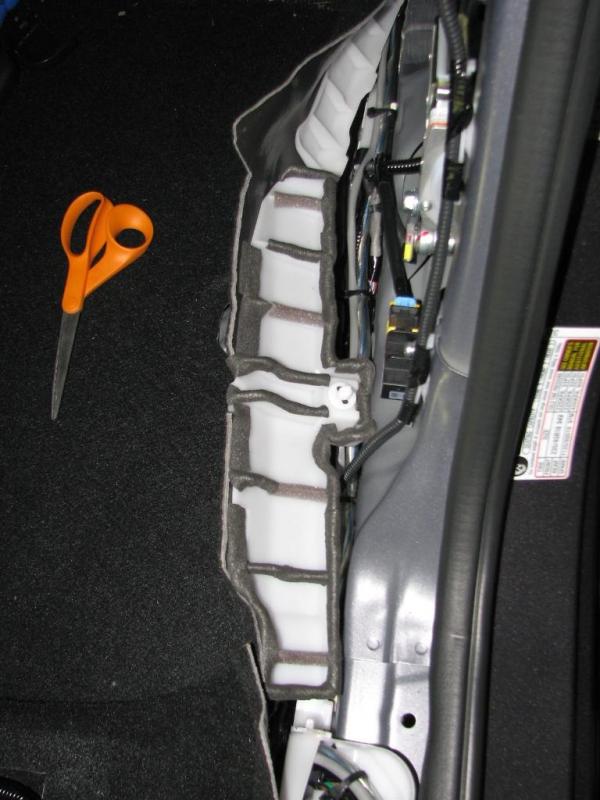
I didn't set out to run power wire tonight. I wanted to look more into the door wiring and it turns out that Honda has been gracious as of late. While they do use a Molex plug for the door, it is not tight to the frame so you can easily run wire through the factory grommet. While looking at that I saw two spare grommets located next to the hood latch wire and grommet.

Inside, the routing is fairly simple. I think I can fit it along the sill on the opposite side of the factory wiring, then follow a factory path down to the floor through a white channel.

Turns out this is a very quick and easy route for power wiring and likely a route used for the Touring Accord's Cruise Control Radar wiring. jacked up the front corner of the car and I removed 5-6 of the inner fender lining to gain access.

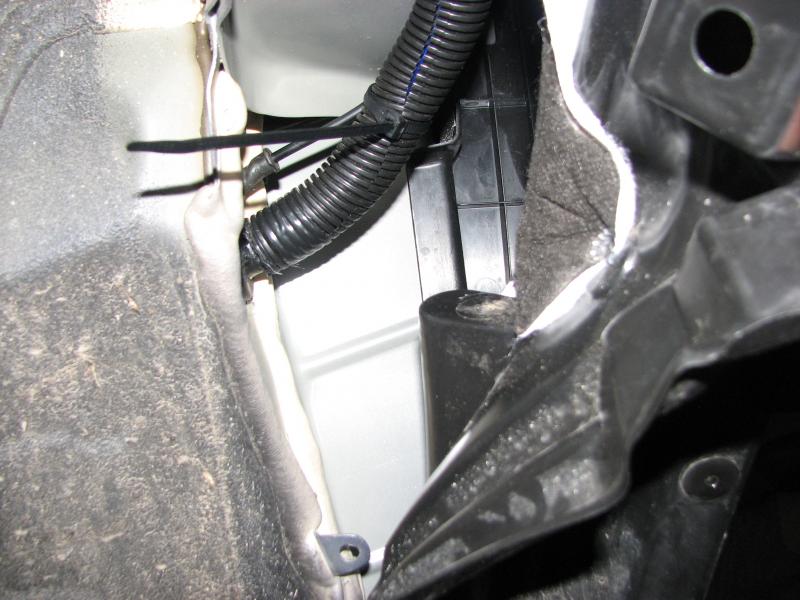
I secured the power wire every 5-6" using zip ties to the hood latch cable. The power wire is protected in split loom while inside the fender and engine bay then protected by techflex while inside the cabin.
Besides pulling the 1/0 power wire, I also pulled 9 other wires through the second grommet. These wires will be used for alarm and other functions.


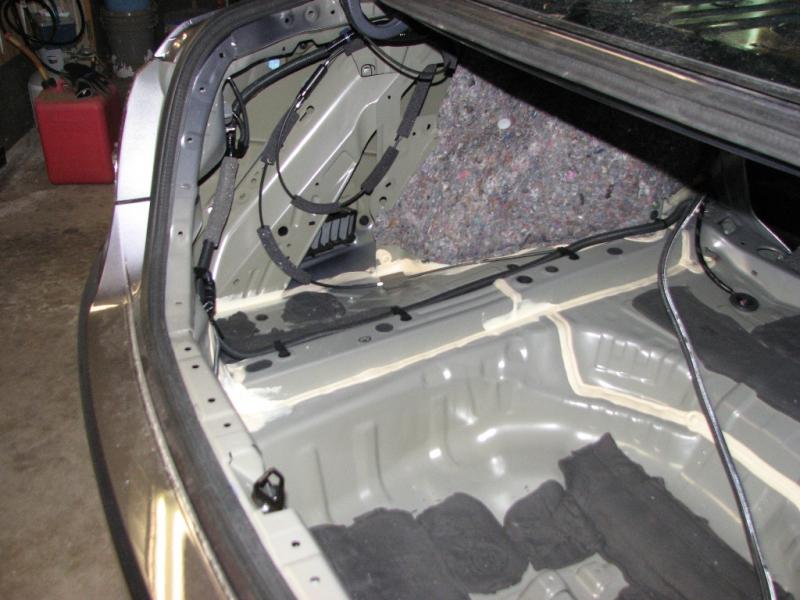
i really like how Honda put sound absorption on the backside of every panel.

it's even inside the inner fender.
Inside, the routing is fairly simple. I think I can fit it along the sill on the opposite side of the factory wiring, then follow a factory path down to the floor through a white channel.
Turns out this is a very quick and easy route for power wiring and likely a route used for the Touring Accord's Cruise Control Radar wiring. jacked up the front corner of the car and I removed 5-6 of the inner fender lining to gain access.
I secured the power wire every 5-6" using zip ties to the hood latch cable. The power wire is protected in split loom while inside the fender and engine bay then protected by techflex while inside the cabin.
Besides pulling the 1/0 power wire, I also pulled 9 other wires through the second grommet. These wires will be used for alarm and other functions.
i really like how Honda put sound absorption on the backside of every panel.
it's even inside the inner fender.
Last edited by keep_hope_alive; 05-29-2014 at 01:34 AM.
#23
05-31-2014, 03:48 PM
Join Date: Dec 2009
Location: Quad Cities, IL
Posts: 3,279


how about a 2" thick floor pad?


rear lights removed for more deadening access

and all 50 cu. ft. of this insulation will be crammed in every void in the car
Last edited by keep_hope_alive; 06-02-2014 at 05:56 PM.

#26
06-02-2014, 05:53 PM
Join Date: Dec 2009
Location: Quad Cities, IL
Posts: 3,279
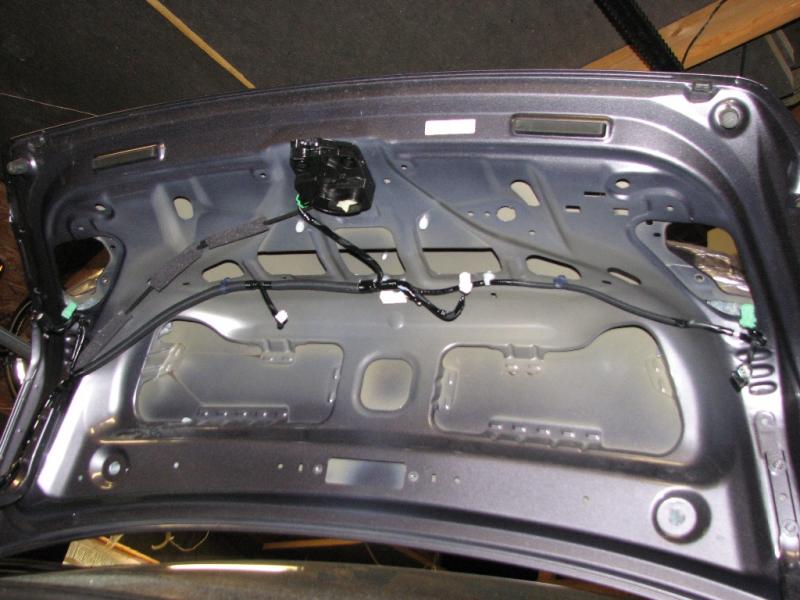
trunk lid deadened and stuffed - it's rock solid now

outer sides deadened and stuffed (still need to treat what's left)


rear cavity stuffed

rear deck deadened and stuffed


I got a lot more deadening to do, but the rear is already sounding better.
outer sides deadened and stuffed (still need to treat what's left)
rear cavity stuffed
rear deck deadened and stuffed
I got a lot more deadening to do, but the rear is already sounding better.
#27
06-02-2014, 05:55 PM
Join Date: Dec 2009
Location: Quad Cities, IL
Posts: 3,279
tonight i will put a layer of ensolite on the rear deck and put deadener and acoustic fill into the c-pillar area. then i will re-assemble the rear deck and c-pillars.
the wife and kids head out of town Wednesday evening and may take my car. if so, then i'll get all of the interior panels reinstalled tomorrow. if they take the Camry then tomorrow I will look to run speaker wires from the doors to the rear and start thinking/fabricating amplifier locations.
Last edited by keep_hope_alive; 06-02-2014 at 06:01 PM.
#28
06-04-2014, 12:02 AM
Join Date: Dec 2009
Location: Quad Cities, IL
Posts: 3,279
disassembly guides:
removing shift ****
Leather Shift **** - 54130-T2A-L52ZA: College Hills Honda
for instructions on disassembly of your car, Honda offers install guides for accessories that may require removal of interior panels
2013-2014 Genuine Honda Accord Sedan Accessories: College Hills Honda
Honda Accessory Install Guides Honda Parts at HondaPartsDeals.com: Honda Accessory, Honda Car Parts, Honda Auto Parts, Honda Accord Parts
for a pillar trim removal (and the airbag clip) the install instructions for the auto day/night mirror is a good resource
http://www.collegehillshonda.com/ins...ightmirror.pdf
#29
07-22-2014, 11:59 AM
Join Date: Dec 2009
Location: Quad Cities, IL
Posts: 3,279
amp rack is 3/4" MDF because I wanted to add rigidity and density to the rear deck to counteract the drum head effect that the large, thin factory deck has.
i started with a basic shape then modified it as needed to fit in the rear deck

i decided i wanted sides on the rack to not only hide the equipment from trunk views but to provide mounting points for the beauty panel

the ultra caps posed a challenge because it choked the space for wiring and a fuse block

so i chose to offset them

the amp ground will connect at the cap ground (where two empty ring terminals are shown). a 1/0 ground will continue from the cap to a suitable location. 1/0 power wire (sized for voltage drop, not current) will connect at the fuse block. 4 awg will run to the amp. The fuse holder uses MAXI fuses, both will be 100A.

some test fits showed the trunk lid supports in conflict, so i had to do some trimming to clear them. i also painted the rack because i avoid bare wood. i haven't decided how i want to cover this. the beauty panel will match the factory colors with vinyl and will have windows for the amp, caps (with plexi), and fuses. i have 3/4" spacers for the amp that not only help with cooling but provide a path for speaker wires. security screws are used where necessary.
passenger side with rack mounted (viewed from inside cabin with rear seat down) - RCA's and speaker wires will be here.

driver side - power and ground will be here.

view from outside trunk

i started with a basic shape then modified it as needed to fit in the rear deck
i decided i wanted sides on the rack to not only hide the equipment from trunk views but to provide mounting points for the beauty panel
the ultra caps posed a challenge because it choked the space for wiring and a fuse block
so i chose to offset them
the amp ground will connect at the cap ground (where two empty ring terminals are shown). a 1/0 ground will continue from the cap to a suitable location. 1/0 power wire (sized for voltage drop, not current) will connect at the fuse block. 4 awg will run to the amp. The fuse holder uses MAXI fuses, both will be 100A.
some test fits showed the trunk lid supports in conflict, so i had to do some trimming to clear them. i also painted the rack because i avoid bare wood. i haven't decided how i want to cover this. the beauty panel will match the factory colors with vinyl and will have windows for the amp, caps (with plexi), and fuses. i have 3/4" spacers for the amp that not only help with cooling but provide a path for speaker wires. security screws are used where necessary.
passenger side with rack mounted (viewed from inside cabin with rear seat down) - RCA's and speaker wires will be here.
driver side - power and ground will be here.
view from outside trunk
#30
07-22-2014, 12:00 PM
Join Date: Dec 2009
Location: Quad Cities, IL
Posts: 3,279
started thinking i was going to "rush" the install to get the amp and Mille's installed for a road trip. then i realized i cannot half *** anything because i had to route the speaker wiring to my standards. ah well. interior is reinstalled and ready for a 4-day trip on a stock system. at least the speaker wiring is done.
the new Accords have a plug in the door boot but it is removable and there is room for wire to pass through. finally!

only a matter of minutes to pull wire. i have 12 awg for the woofers and 16-4 for tweeters and to snag stock front output.

same on passenger. inside the door the wiring is in split loom and tied to factory wiring every 4" or so.

passenger side routing


driver side routing

- - - Updated - - -
also took the time to foam these plastic pieces that help form the carpet. they press against metal and i imagine they will make noise in time.
driver's side before

half done
both done

passenger side

the new Accords have a plug in the door boot but it is removable and there is room for wire to pass through. finally!
only a matter of minutes to pull wire. i have 12 awg for the woofers and 16-4 for tweeters and to snag stock front output.
same on passenger. inside the door the wiring is in split loom and tied to factory wiring every 4" or so.
passenger side routing
driver side routing
- - - Updated - - -
also took the time to foam these plastic pieces that help form the carpet. they press against metal and i imagine they will make noise in time.
driver's side before
half done
both done
passenger side