Run door speaker wire thru Molex connectors - 5th Gen
#1
 11-01-2012, 06:09 PM


Join Date: Jul 2011
Location: Denver
Posts: 1,008
Looking on the web, couldn't find any Accord-specific threads addressing door speaker wiring through the existing Molex connectors. I did find a couple of Prelude threads with great pics:
Predlude Power
North Texas Prelude Owners Group
This job is a PITA unless you have very small hands.
The male connector is in the door, the female plug(s) are attached to a two-piece rubber boot that terminates behind the kick panels. The driver's side has two plugs, the passenger's just one (on my power window/power locks car.)
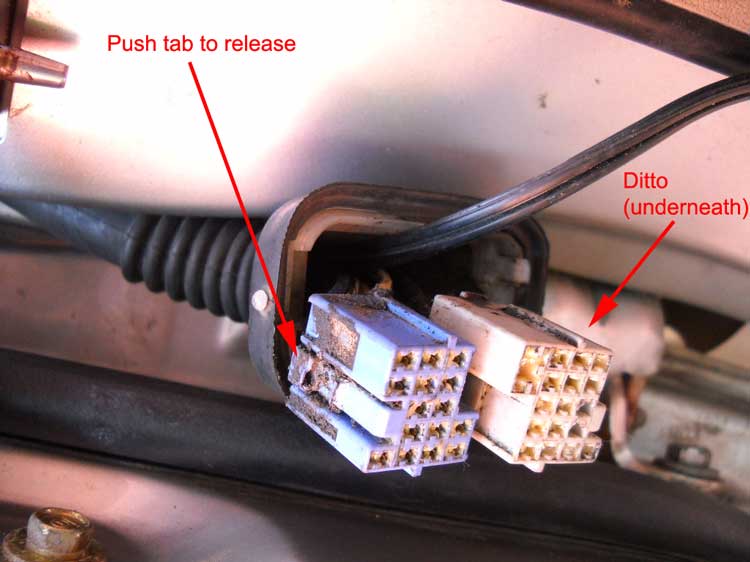
Take the female plugs out of the door connector. Push the tabs in with a screwdriver & pull the connectors out. On the driver's side the blue one is easier to get out so you may want to start with it.
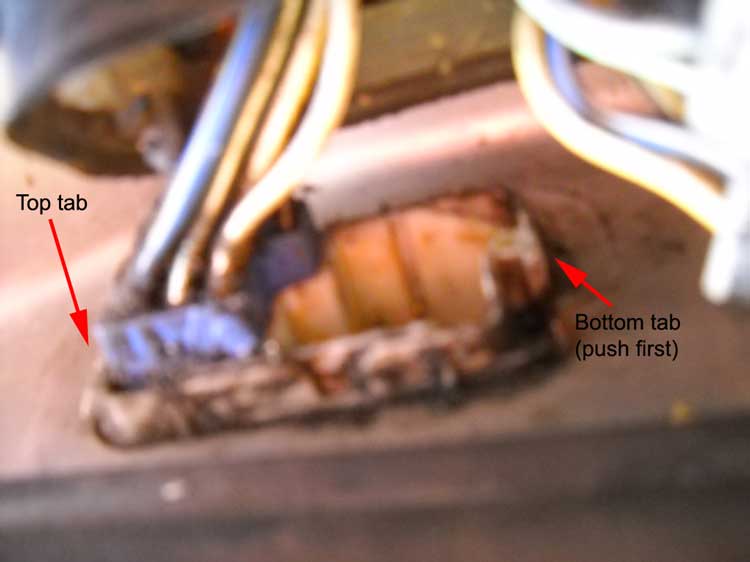
Pull the male connector out of the door. I ended up putting a small screwdriver on the door-side of the bottom of the connector, inside the door panel, and pushing down. That released the bottom tab. Then tilt the bottom in and slide the connector down so it clears the top tab.
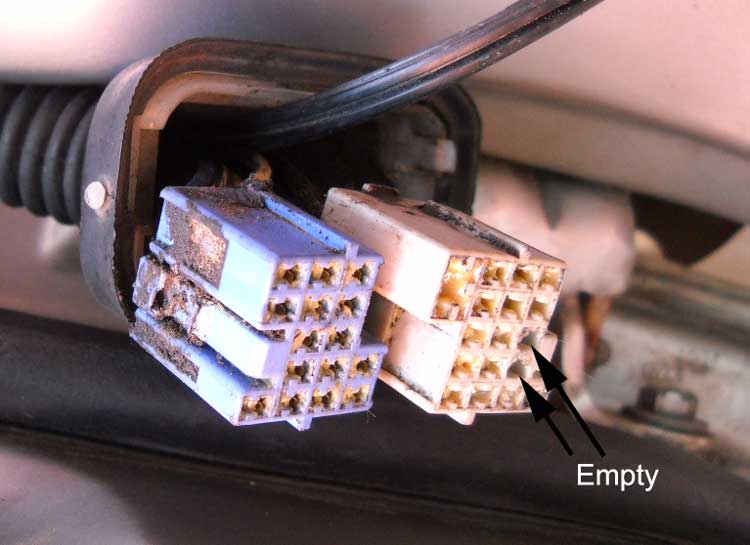
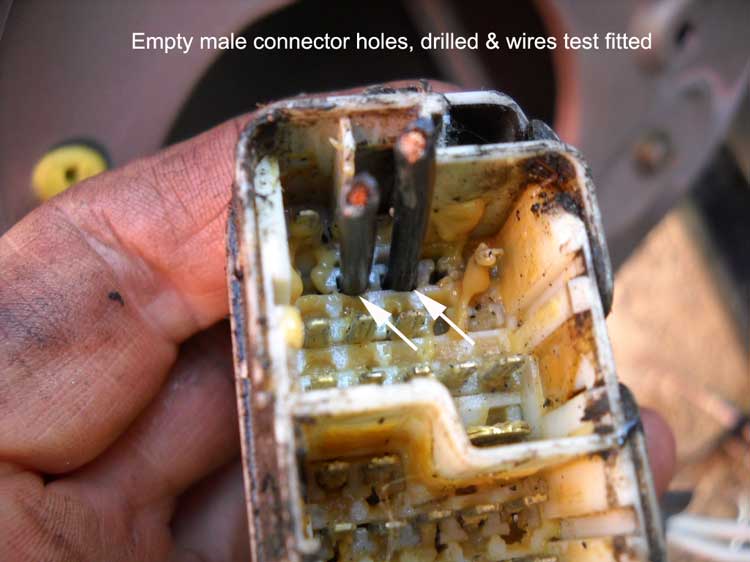
Driver's side, locate two adjacent empty holes in the white plug. Mine were here but everything's covered with dielectric grease so it's hard to tell where they are. Look on the backside to see which ones don't have wires running to them. Clean out the grease and drill these two holes out so your wires will fit through them. A 1/8" bit worked for the 16 gauge zip cord I was using.
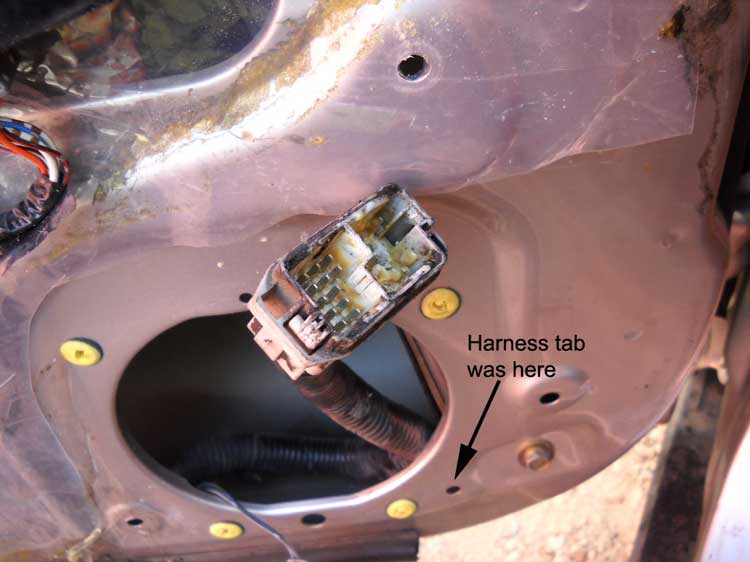
Release the tab that holds the connector harness to the door and pull the connector out of the speaker hole.
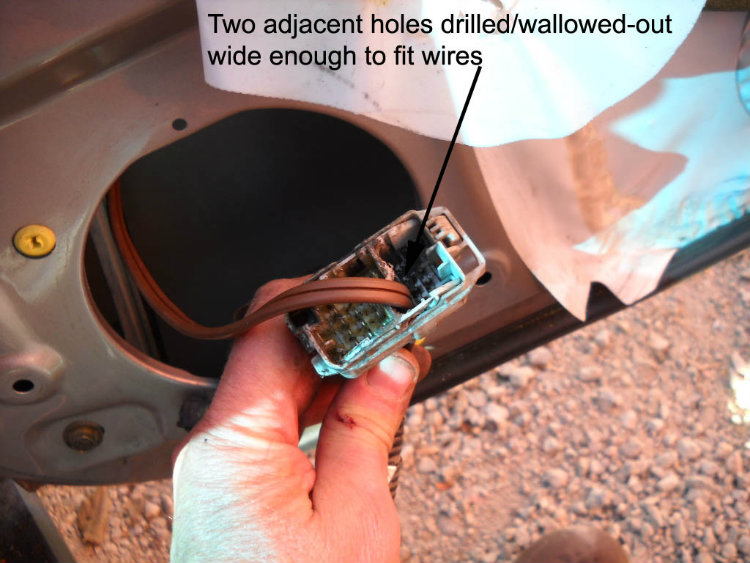
Find the matching holes on the connector and do the same.
Passenger side has just one plug so drill out two adjacent holes in the unused connector; wires don't have to go through a plug:
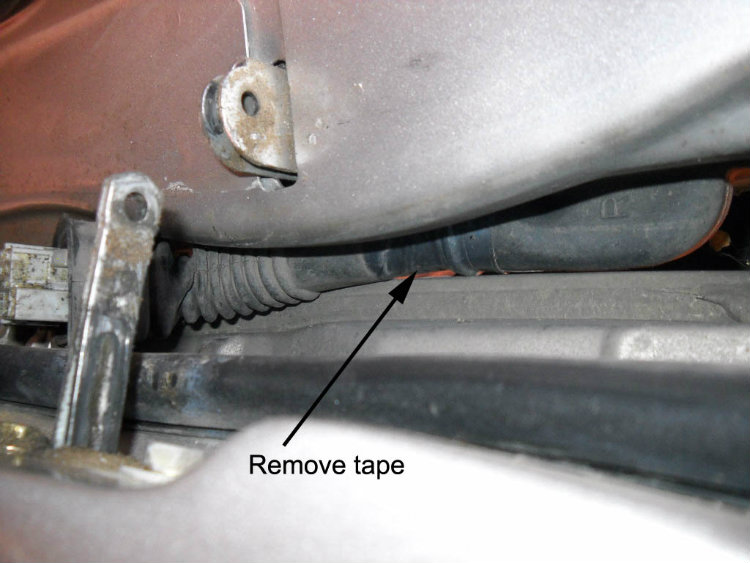
The two-piece boot is taped together. Remove the tape and separate the inner boot from the outer:
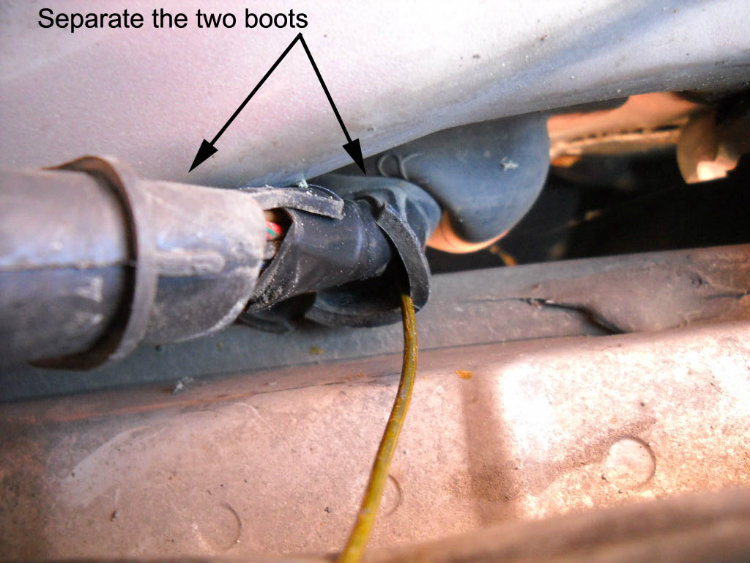
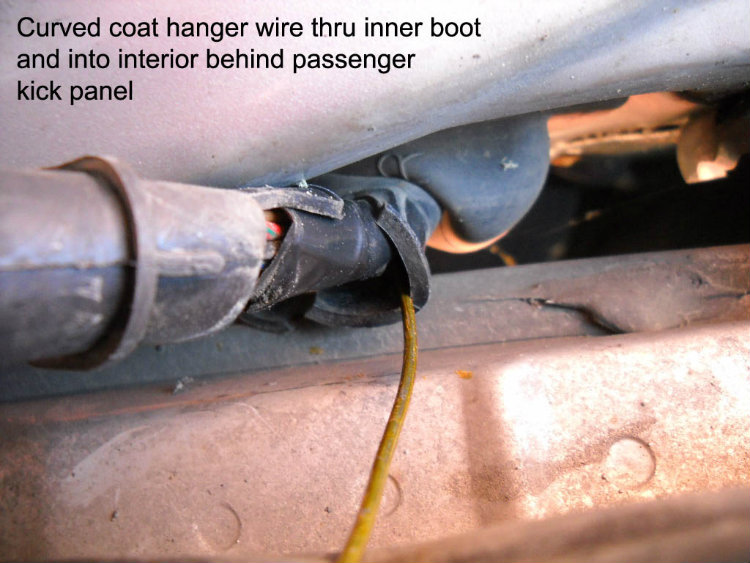
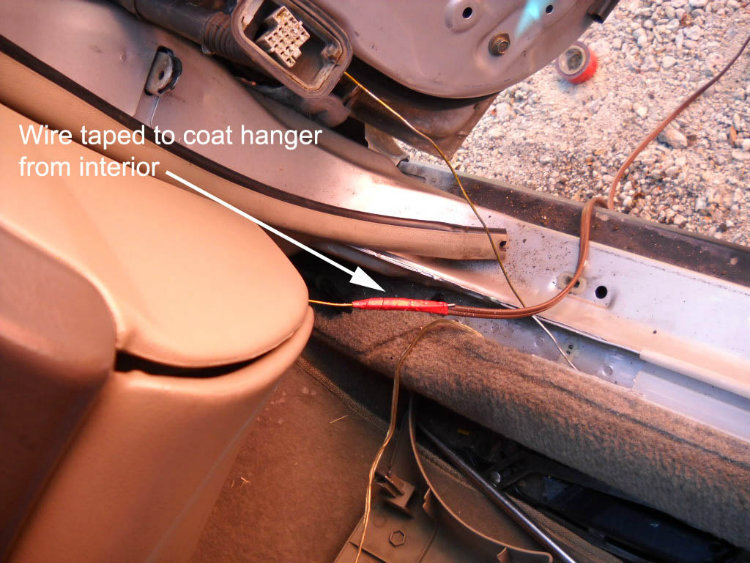
Remove the fuse box cover and kick panels. Push a straightened out coat hanger through the inner boot to the interior. On the driver's side it's a pretty straight shot if the coat hanger it started between the open door and the fender. On the passenger side the coat hanger has to be curved to push it from behind the door. Tape the speaker wires to the inside end of the coat hanger and pull them through that boot. Untape the wires, push the coat hanger though the outer boot, tape, and pull the wires through it:
On the drivers side, using zip cord, I had to separate the two wires. Push each wire through a drilled-out hole from the back of the white plug. Then, making damn sure the wires aren't twisted, push the wires through the front of the connector, pulling them into the door panel. Snap the connector back onto the door. Pull the wires in so the white plug can snap into the connector, then snap the blue plug into the connector.
No need to separate the zip cord on on the passenger side.
The Prelude threads say to tape the two boots back together. I don't see how that's possible on a 5th Gen Accord unless the fenders (or doors) are taken off. I just pushed the sleeves of the boots back together as best I could and left them untaped.
Predlude Power
North Texas Prelude Owners Group
This job is a PITA unless you have very small hands.
The male connector is in the door, the female plug(s) are attached to a two-piece rubber boot that terminates behind the kick panels. The driver's side has two plugs, the passenger's just one (on my power window/power locks car.)
Take the female plugs out of the door connector. Push the tabs in with a screwdriver & pull the connectors out. On the driver's side the blue one is easier to get out so you may want to start with it.
Pull the male connector out of the door. I ended up putting a small screwdriver on the door-side of the bottom of the connector, inside the door panel, and pushing down. That released the bottom tab. Then tilt the bottom in and slide the connector down so it clears the top tab.
Driver's side, locate two adjacent empty holes in the white plug. Mine were here but everything's covered with dielectric grease so it's hard to tell where they are. Look on the backside to see which ones don't have wires running to them. Clean out the grease and drill these two holes out so your wires will fit through them. A 1/8" bit worked for the 16 gauge zip cord I was using.
Release the tab that holds the connector harness to the door and pull the connector out of the speaker hole.
Find the matching holes on the connector and do the same.
Passenger side has just one plug so drill out two adjacent holes in the unused connector; wires don't have to go through a plug:
The two-piece boot is taped together. Remove the tape and separate the inner boot from the outer:
Remove the fuse box cover and kick panels. Push a straightened out coat hanger through the inner boot to the interior. On the driver's side it's a pretty straight shot if the coat hanger it started between the open door and the fender. On the passenger side the coat hanger has to be curved to push it from behind the door. Tape the speaker wires to the inside end of the coat hanger and pull them through that boot. Untape the wires, push the coat hanger though the outer boot, tape, and pull the wires through it:
On the drivers side, using zip cord, I had to separate the two wires. Push each wire through a drilled-out hole from the back of the white plug. Then, making damn sure the wires aren't twisted, push the wires through the front of the connector, pulling them into the door panel. Snap the connector back onto the door. Pull the wires in so the white plug can snap into the connector, then snap the blue plug into the connector.
No need to separate the zip cord on on the passenger side.
The Prelude threads say to tape the two boots back together. I don't see how that's possible on a 5th Gen Accord unless the fenders (or doors) are taken off. I just pushed the sleeves of the boots back together as best I could and left them untaped.
Last edited by Roader; 11-12-2012 at 12:02 PM. Reason: Add passenger side, typo


Thread
Thread Starter
Forum
Replies
Last Post
fjpthree
Audio/Visual Electronics
11
04-04-2013 10:28 PM
Aratyhq
Audio/Visual Electronics
3
03-03-2013 09:18 PM