Average Joe's CV Axle (and more) Replacement
#1
 04-16-2013, 07:59 PM


Hey All,
I watched a good number of YouTube versions of CV Axle replacement and have the following to say: Bullsh*t.
I feel it necessary to now enlighten most of the regular folks to the realities of subjecting yourself to the replacement of your 175,000 mile, 2001 Honda Accord LX 5-speed ULEV (to hell with California...anyways...).
First, despite my vehicle being a "Florida vehicle," rust. RUST. Recommendation? Liquid Wrench.
Buy it.
Love it.
Drink it.
Scratch that, don't drink it. But use it on everything, everywhere, all the time. It just might save your spleen.
If you've made it this far, I apologize for the terrible rhetoric and promise to get to the contribution.
First, what I had available:
Sockets (non-impact, but you should REALLY get impact so your breaker bar doesn't break them): 16mm, 17mm, 19mm, 36mm (spindle, I think).
Screw Driver(s)
Chisel(s)
Metal Drill Bits (or not, and suffer like me)
Heavy Mallet
Wimpy Hammer (and swing for ages)
Socket Wrench(es)
Ramps
Jack
Jack Stands
25" Breaker Bar
Vice Grips
Also, I was borrowing a friend's garage. It took me 3 weeks. Lucky him.
Ok. The procedure. First: DRENCH WITH PB BLASTER (liquid wrench).
Let it sit. To clarify, on this model, you need to loosen the wheel nuts while on the floor, jack up the car, take off the wheel nuts, remove the hub cap, put the wheel nuts back on (somewhat tight), lower the car, tighten wheel nuts. This is just if you don't want your friend to ruin your master cylinder by pushing too hard on the pedal while you try and get the spindle nut off without the tire. But anyways...
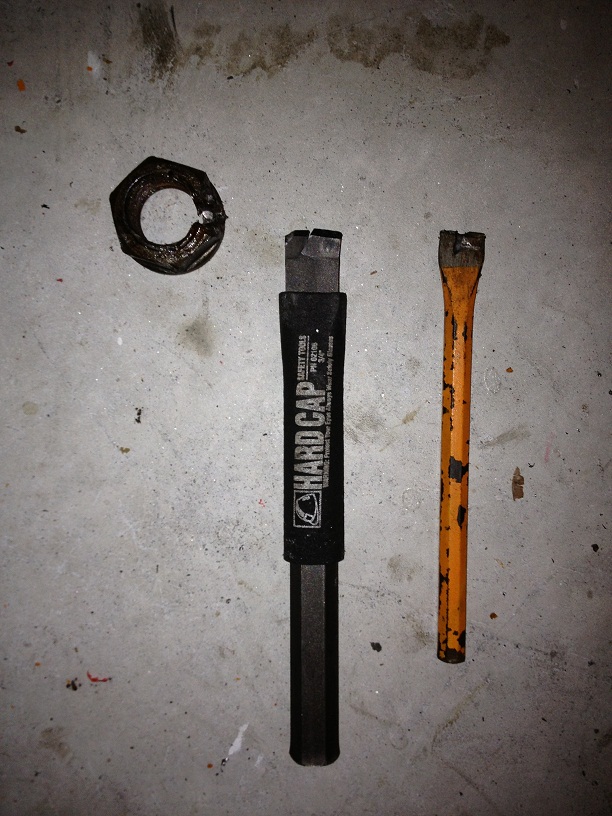
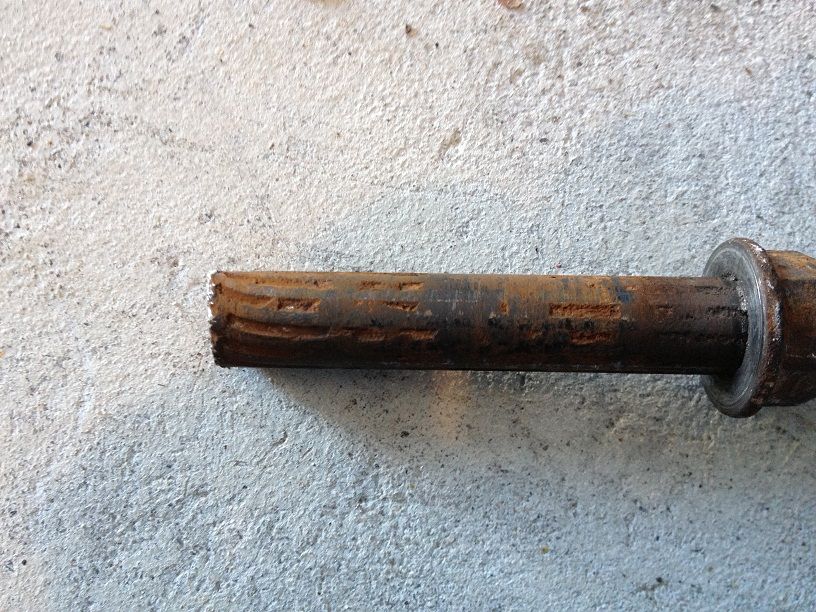
You now have access to the spindle nut. Un-stake the nut (for those like me who had no idea what this meant, read: use a round punch to take the divot out of the small section of the nut. DO NOT USE A SCREWDRIVER. Unless you want to wedge it on. Like me. And have to chisel/drill the SOB off.).
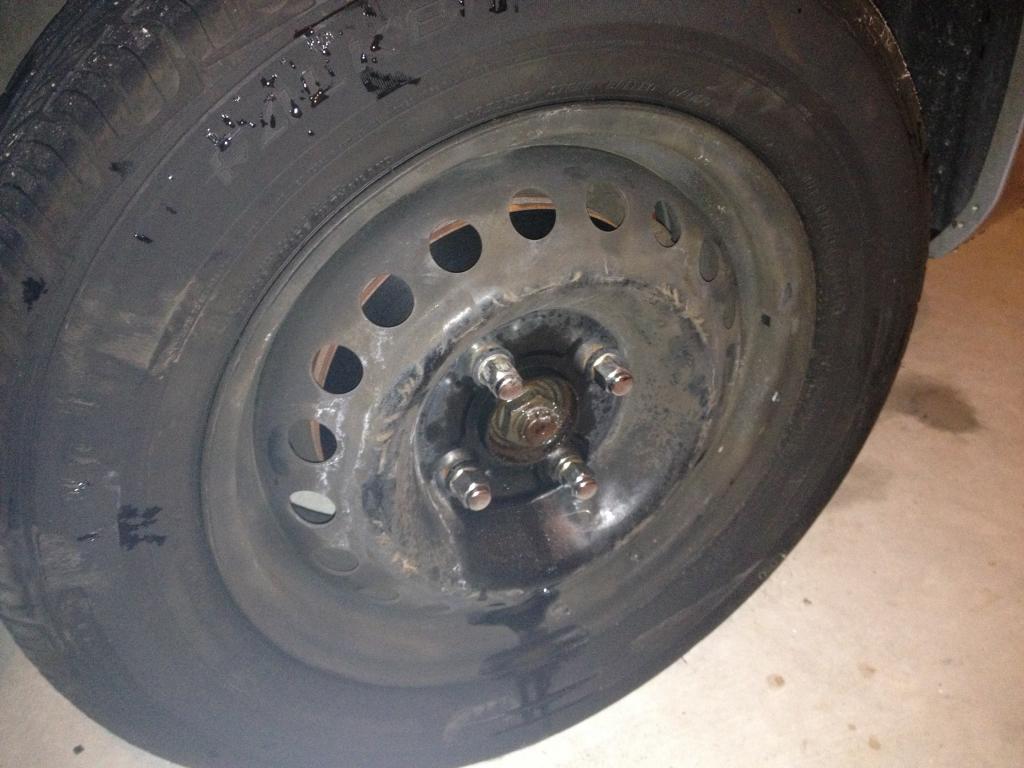
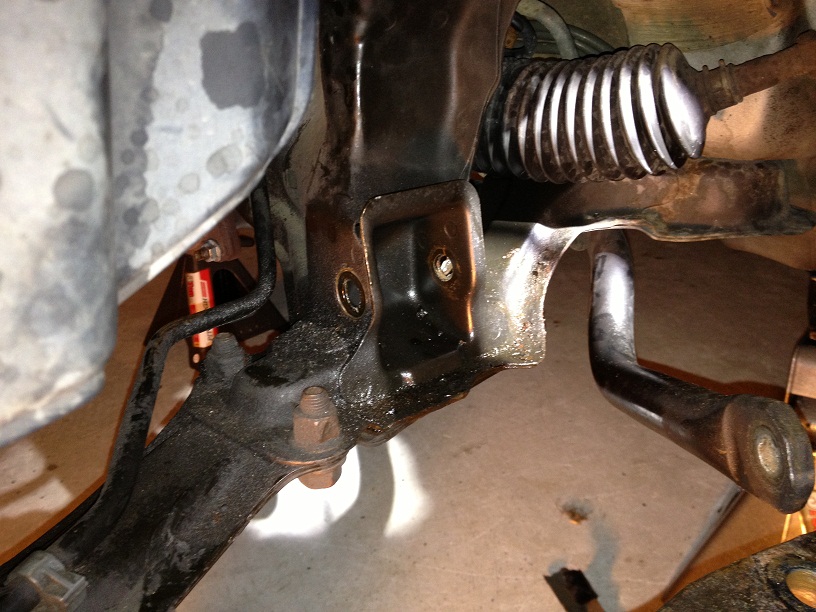
Use your breaker bar to loosen the nut counterclockwise. Then put the vehicle on jack stands and remove the tire. It should look like this:
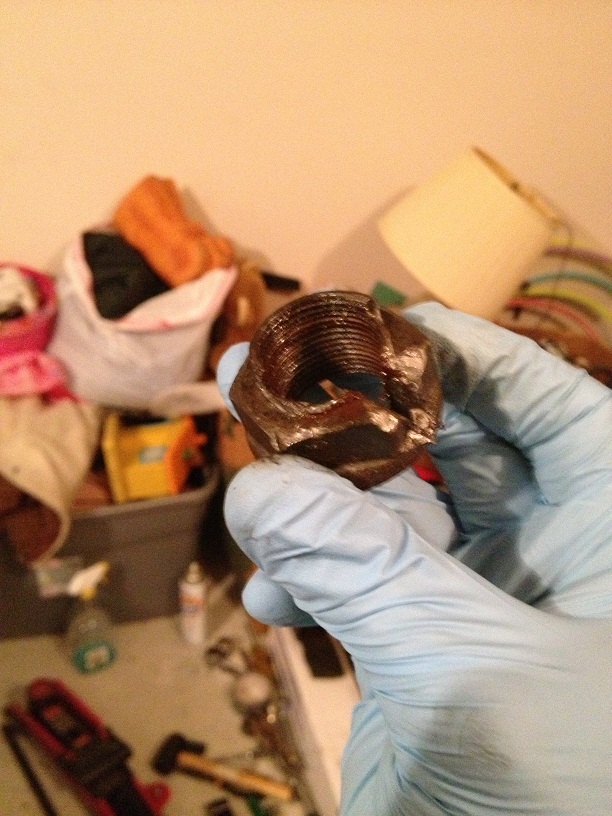
If you used a screw driver despite me saying not to, you may have to do this:
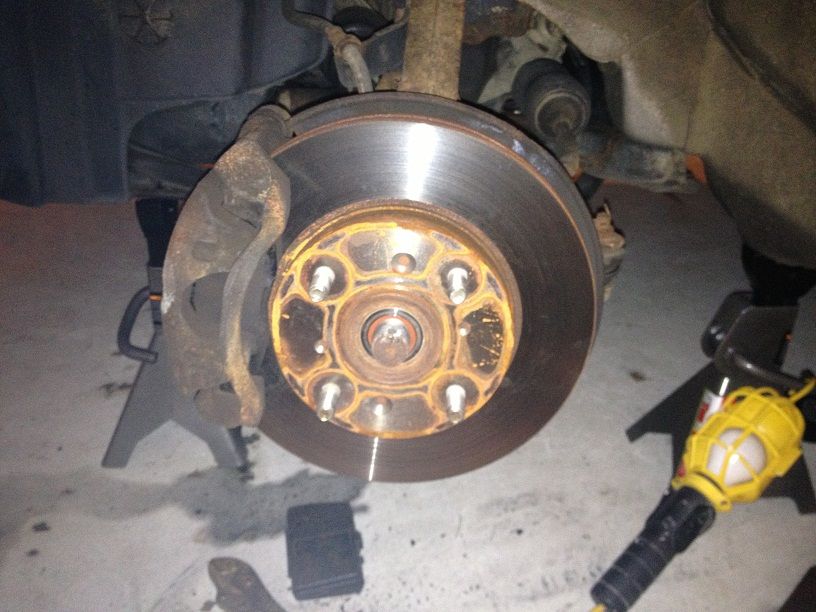
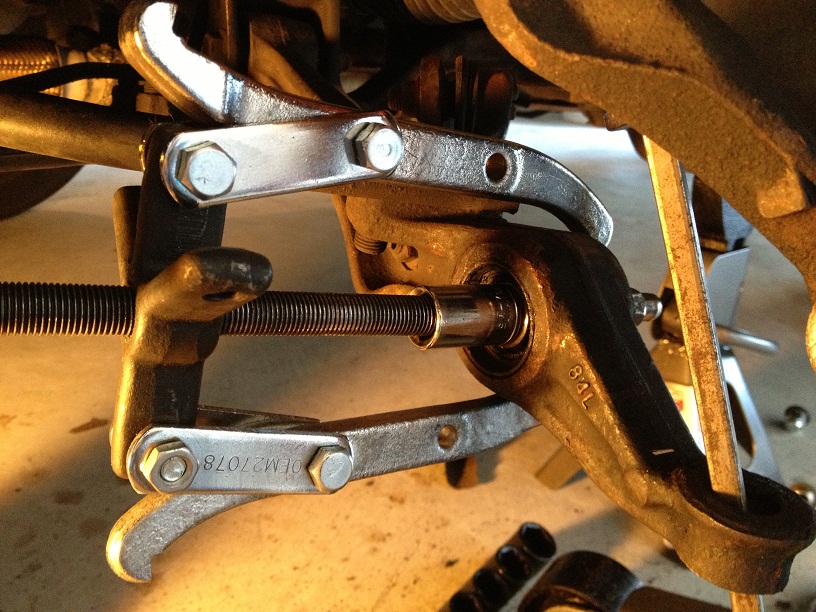
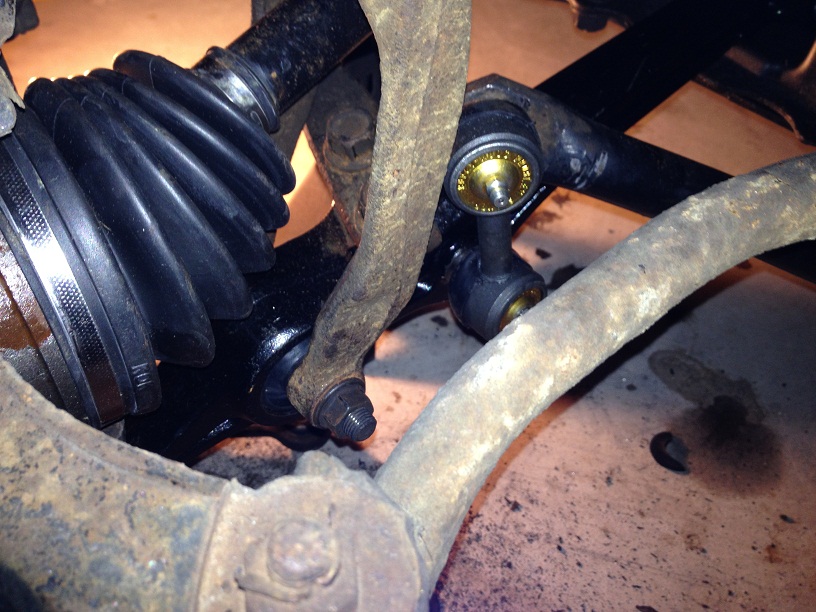
Now you need to remove the lower ball joint castle nut. It looks like this:
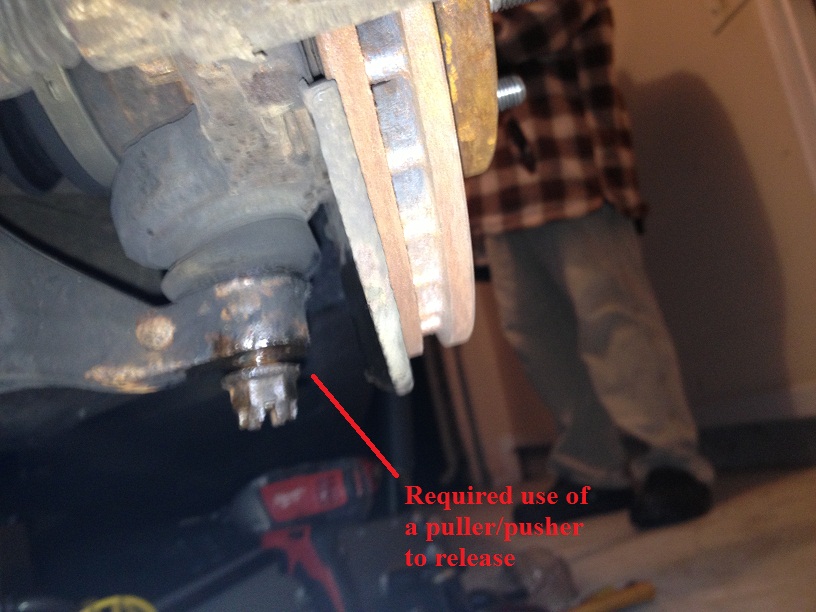
I had to DRILL the cotter pin out. This means buying new ones. Some folks say you can re-use the old ones, but not when you hog them out. I think a 1/8" drill bit worked. But it may have been smaller. Just be careful.
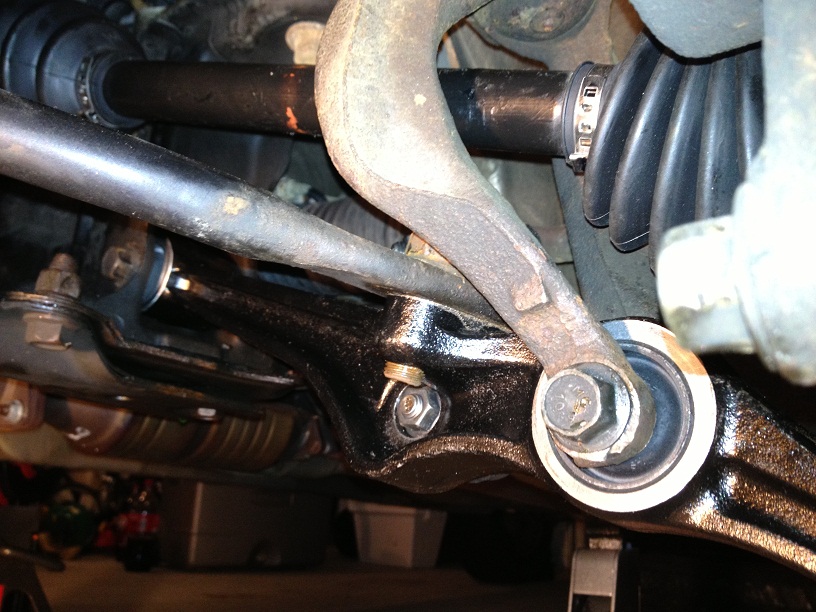
As the caption says, my castle nut needed a puller despite wailing on it like crazy. Once that is off, you can move the wheel hub assembly away from the CV Axle and Wishbone assembly by carefully tapping the end of the CV Axle out of the hub.

You may notice...the CV Axle won't fit through the Wishbone. Joy.
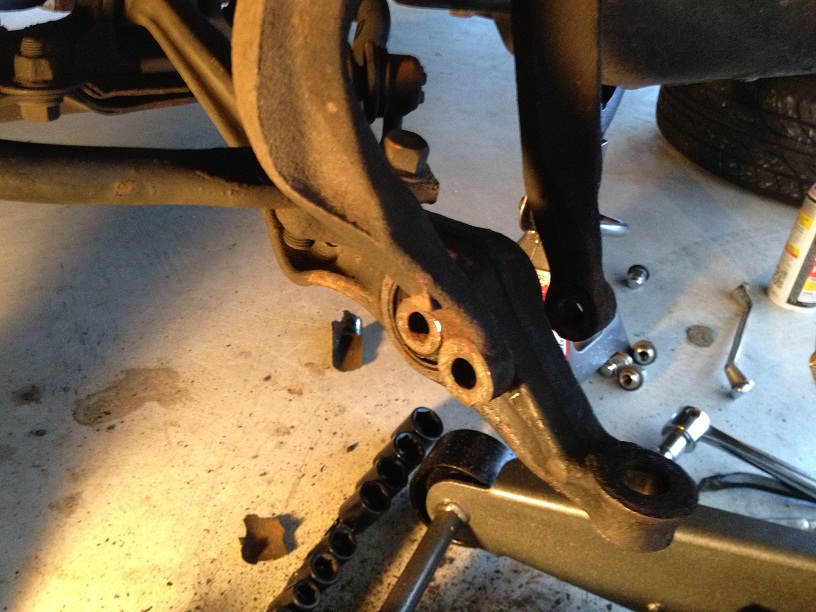
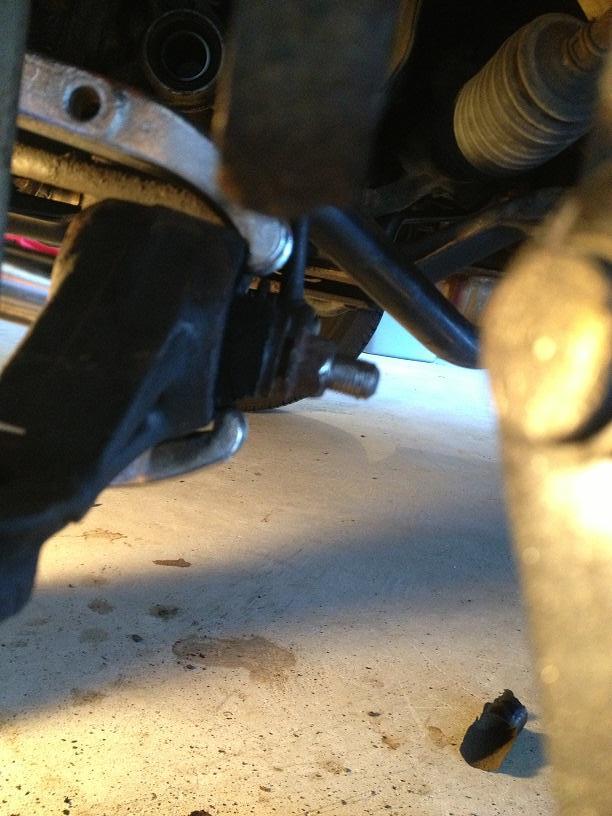
You now need to remove the Lower Control Arm from the Wishbone. Remember that liquid wrench? No? Then you broke the bolt. Like me.

Yes, that's a screw driver separating the end of a broken bolt from the Wishbone. Word of advice, it didn't help. The bushing was so seized, I TIGHTENED the nut at the other end until it broke loose.
Notice the TWIST near where the head of the bolt used to be. Yes. It was that stuck.
Congrats! Bolt removed!
Now you can get your CV Axle out!
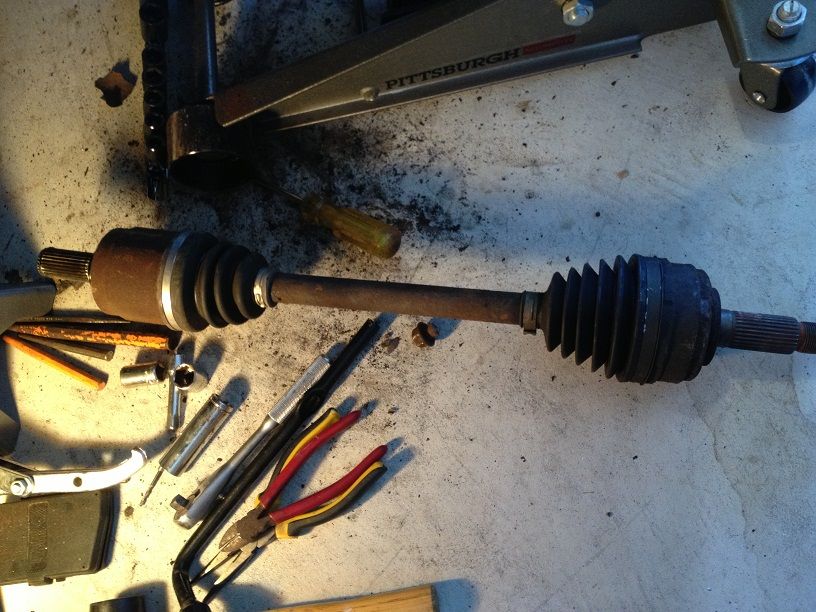
EDIT: I should clarify, removal is best done using a screwdriver (or a handy pry bar if one of those is around) to pry the end connected to the half-shaft (or transaxle) carfully out. If you pull on the CV Axle, chances are the boot and bearings will separate and it'll get messy.
Oh wait, you destroyed the bushing with a lot of heat, fire, and hammering? Sad, cause the puller didn't work either.
Then your friend's son tells you that the lower control arm is $40, and the bushing you are fighting is $20. Since the lower control arm has 2 bushings, and may as well be replaced with the other, sounds pretty simple.
And since you have to remove the sway bar from the lower control arm, may as well do the links! Though the stock ones are dumb, and require lots of vice gripping and liquid wrench.
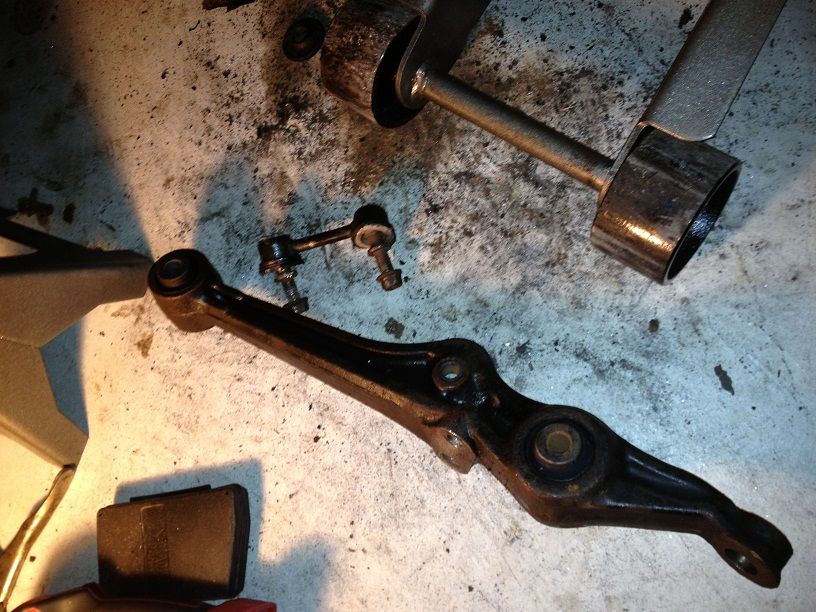
Some holes after disassembly:
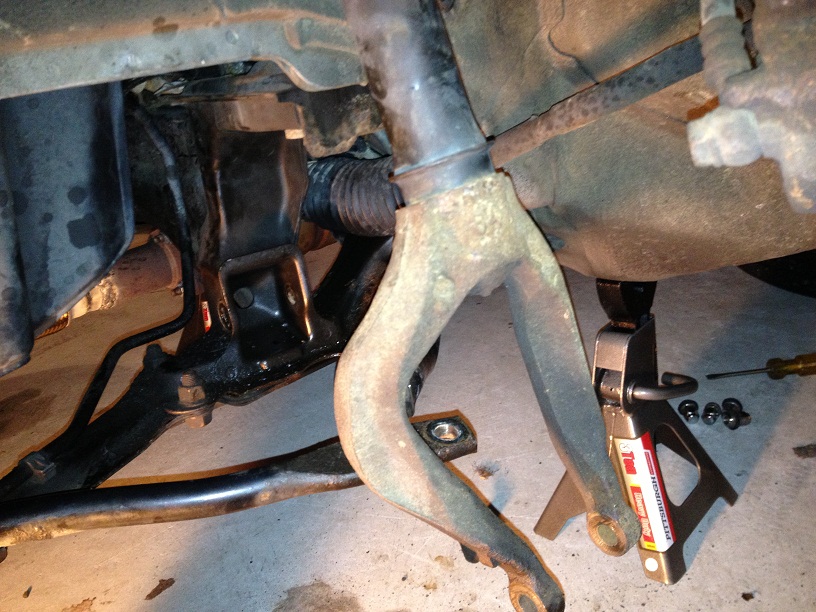
Now, assembly is reverse of disassembly, minus the drinking, the anger, and the waiting on the parts you didn't think you'd need. Oh, and a good tip: loosely assembly the lower control arm, radius arm, wishbone, and sway bar BEFORE you tighten ANY bolts on ANY of those components! Or you destroy the new bushings you replaced to make life easier. Like me. Once everything is in the right location, tighten all bolts to specified torque in your manual/web site/forum, etc.
EDIT: It should also be noted that putting the CV Axles back in took a good bit of grunting and force. My suggestion is taps with the heavy hammer on the end of the CV Axle with a wood block between the two.
Nicely done! 2.5 weeks later the driver's side is finished!
To give you an idea of how much liquid wrench and some know-how helps? The passenger side (the one that needed the spindle nut DRILLED off) took an evening. 4 hours. That's it. 2.5 weeks vs. 4 hours. You decide.
Anyway, I hope this was somewhat helpful. Learn from 3 weeks of pain and use lots of liquid wrench! And air tools are nice. Real. Nice. But if you don't have them, things are doable! Oh, and if you are curious about the passenger's side: Transaxle says HI!
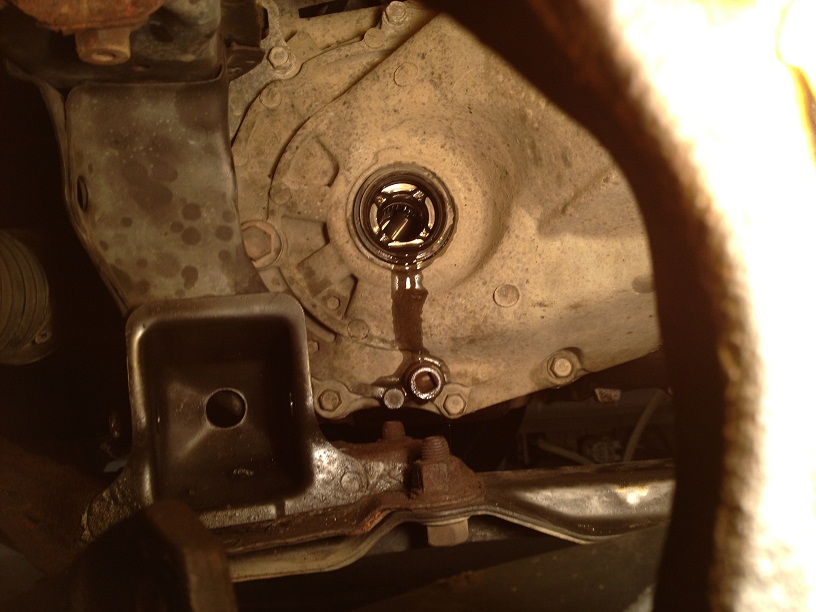
Have a bucket. It will leak. Don't drive it for 2k miles before topping off. Like me.
Oh, and my rant about California emissions is only due to a $2700 repair bill for the emission's system. But I digress.
I hope this was helpful, at the very least mildly amusing and a good waste of 20 minutes of your time. Write any questions and I will attempt to remember what I did. It's been a few months. Nothing has fallen off yet.
-Brian
I watched a good number of YouTube versions of CV Axle replacement and have the following to say: Bullsh*t.
I feel it necessary to now enlighten most of the regular folks to the realities of subjecting yourself to the replacement of your 175,000 mile, 2001 Honda Accord LX 5-speed ULEV (to hell with California...anyways...).
First, despite my vehicle being a "Florida vehicle," rust. RUST. Recommendation? Liquid Wrench.
Buy it.
Love it.
Drink it.
Scratch that, don't drink it. But use it on everything, everywhere, all the time. It just might save your spleen.
If you've made it this far, I apologize for the terrible rhetoric and promise to get to the contribution.
First, what I had available:
Sockets (non-impact, but you should REALLY get impact so your breaker bar doesn't break them): 16mm, 17mm, 19mm, 36mm (spindle, I think).
Screw Driver(s)
Chisel(s)
Metal Drill Bits (or not, and suffer like me)
Heavy Mallet
Wimpy Hammer (and swing for ages)
Socket Wrench(es)
Ramps
Jack
Jack Stands
25" Breaker Bar
Vice Grips
Also, I was borrowing a friend's garage. It took me 3 weeks. Lucky him.
Ok. The procedure. First: DRENCH WITH PB BLASTER (liquid wrench).
Let it sit. To clarify, on this model, you need to loosen the wheel nuts while on the floor, jack up the car, take off the wheel nuts, remove the hub cap, put the wheel nuts back on (somewhat tight), lower the car, tighten wheel nuts. This is just if you don't want your friend to ruin your master cylinder by pushing too hard on the pedal while you try and get the spindle nut off without the tire. But anyways...
You now have access to the spindle nut. Un-stake the nut (for those like me who had no idea what this meant, read: use a round punch to take the divot out of the small section of the nut. DO NOT USE A SCREWDRIVER. Unless you want to wedge it on. Like me. And have to chisel/drill the SOB off.).
Use your breaker bar to loosen the nut counterclockwise. Then put the vehicle on jack stands and remove the tire. It should look like this:
If you used a screw driver despite me saying not to, you may have to do this:
Now you need to remove the lower ball joint castle nut. It looks like this:
I had to DRILL the cotter pin out. This means buying new ones. Some folks say you can re-use the old ones, but not when you hog them out. I think a 1/8" drill bit worked. But it may have been smaller. Just be careful.
As the caption says, my castle nut needed a puller despite wailing on it like crazy. Once that is off, you can move the wheel hub assembly away from the CV Axle and Wishbone assembly by carefully tapping the end of the CV Axle out of the hub.
You may notice...the CV Axle won't fit through the Wishbone. Joy.
You now need to remove the Lower Control Arm from the Wishbone. Remember that liquid wrench? No? Then you broke the bolt. Like me.
Yes, that's a screw driver separating the end of a broken bolt from the Wishbone. Word of advice, it didn't help. The bushing was so seized, I TIGHTENED the nut at the other end until it broke loose.
Notice the TWIST near where the head of the bolt used to be. Yes. It was that stuck.
Congrats! Bolt removed!
Now you can get your CV Axle out!
EDIT: I should clarify, removal is best done using a screwdriver (or a handy pry bar if one of those is around) to pry the end connected to the half-shaft (or transaxle) carfully out. If you pull on the CV Axle, chances are the boot and bearings will separate and it'll get messy.
Oh wait, you destroyed the bushing with a lot of heat, fire, and hammering? Sad, cause the puller didn't work either.
Then your friend's son tells you that the lower control arm is $40, and the bushing you are fighting is $20. Since the lower control arm has 2 bushings, and may as well be replaced with the other, sounds pretty simple.
And since you have to remove the sway bar from the lower control arm, may as well do the links! Though the stock ones are dumb, and require lots of vice gripping and liquid wrench.
Some holes after disassembly:
Now, assembly is reverse of disassembly, minus the drinking, the anger, and the waiting on the parts you didn't think you'd need. Oh, and a good tip: loosely assembly the lower control arm, radius arm, wishbone, and sway bar BEFORE you tighten ANY bolts on ANY of those components! Or you destroy the new bushings you replaced to make life easier. Like me. Once everything is in the right location, tighten all bolts to specified torque in your manual/web site/forum, etc.
EDIT: It should also be noted that putting the CV Axles back in took a good bit of grunting and force. My suggestion is taps with the heavy hammer on the end of the CV Axle with a wood block between the two.
Nicely done! 2.5 weeks later the driver's side is finished!
To give you an idea of how much liquid wrench and some know-how helps? The passenger side (the one that needed the spindle nut DRILLED off) took an evening. 4 hours. That's it. 2.5 weeks vs. 4 hours. You decide.
Anyway, I hope this was somewhat helpful. Learn from 3 weeks of pain and use lots of liquid wrench! And air tools are nice. Real. Nice. But if you don't have them, things are doable! Oh, and if you are curious about the passenger's side: Transaxle says HI!
Have a bucket. It will leak. Don't drive it for 2k miles before topping off. Like me.
Oh, and my rant about California emissions is only due to a $2700 repair bill for the emission's system. But I digress.
I hope this was helpful, at the very least mildly amusing and a good waste of 20 minutes of your time. Write any questions and I will attempt to remember what I did. It's been a few months. Nothing has fallen off yet.
-Brian
Last edited by Colondo; 05-20-2013 at 12:26 PM. Reason: Typos, verbage, etc.
#2
04-16-2013, 08:09 PM
Forgot price:
CV Axles (AutoZone) -
Driver's side: $45 (+$75 core charge)
Passenger's Side: $45 (+$10 core charge)
Dorman Lower Control Arms and Moog Sway Bar Links (Rock Auto) - $122.45
Puller, spindle nut socket, and torque wrench rented from AutoZone as well.
CV Axles (AutoZone) -
Driver's side: $45 (+$75 core charge)
Passenger's Side: $45 (+$10 core charge)
Dorman Lower Control Arms and Moog Sway Bar Links (Rock Auto) - $122.45
Puller, spindle nut socket, and torque wrench rented from AutoZone as well.

#4
04-19-2013, 06:54 PM

Don't you just wish you did this every day for a living? Everyone should have to do one of these jobs before criticising mechanics.
I once had to button up, cry "calf-roped" and get a local mechanic to help me bust the crankshaft pulley bolt to enable timng belt job. Even he had problems, which are chronicled somewhere on this site,...I think.
My all-time worst job was evaporator replacement on a Jeep Grand Cherokee. It took a solid week of effort and more frustration than I've ever had on a job. I was about ready to light a match and torch the b**ch.
good luck
#5
04-29-2013, 08:08 AM

The bolt can stay in the lower control arm. Just buy a inner joint big clamp. Take the inner joint off the shaft put in the control arm and install the inner joint with the new clamp. Finish the job and drink beer!
#6
05-14-2013, 10:13 PM

There is an axle replacement in my future and this is what I'm thinking of doing. It seems like it turns the job from being a potential nightmare into something you can do fairly easily start to finish..
#7
05-16-2013, 12:18 PM
I'm not sure what an inner joint big clamp is. Is it just for changing out the inner CV shaft? There wasn't a way for me to remove the outer CV axle without taking the outer wishbone-to-control arm bolt. I went further and replaced the whole lower control arm because I demolished the bushing, but other than that I think that one bolt has to come out.
#8
05-16-2013, 01:00 PM

Administrator
Colondo..Great write up with pictures.
I;m sure some of our members will use your post and pictures to complete their job some day.
We all Thank You for your post and good information..
WheelBrokerAng
I;m sure some of our members will use your post and pictures to complete their job some day.
We all Thank You for your post and good information..
WheelBrokerAng
#9
05-17-2013, 10:35 AM
I'm not sure what an inner joint big clamp is. Is it just for changing out the inner CV shaft? There wasn't a way for me to remove the outer CV axle without taking the outer wishbone-to-control arm bolt. I went further and replaced the whole lower control arm because I demolished the bushing, but other than that I think that one bolt has to come out.
Look at the below video. Particularly at the 8:00 mark - and up thru about 9:30:
Last edited by scoostraw; 05-17-2013 at 12:03 PM.
#10
05-20-2013, 12:23 PM
Ahhh that's right. In the end I wasn't upset I re-did the lower control arms because the car has 170k+ on it anyway. But yeah, if you are comfortable just popping the boot off and putting another clamp on the new axle, should be much less terrible.