
water filled tail-light signal
#1
 12-15-2014, 12:45 PM

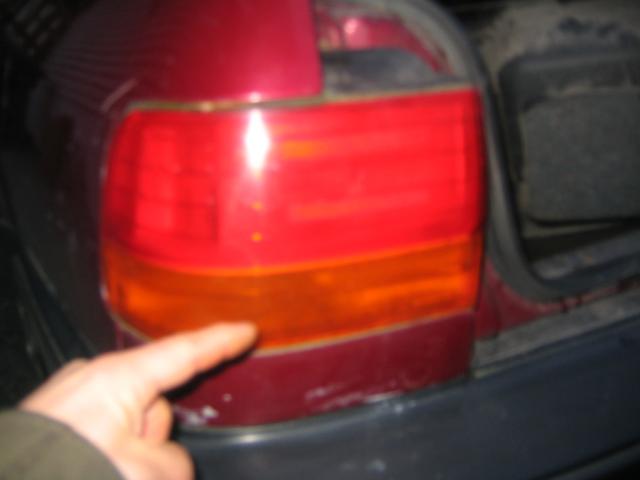
I was kind of wondering why the rear driver-side turn signal amber light area on my 92 Accord seemed dimmer than that of the right side. Upon examination I discovered it's because the lens is filled with water just up to the level of the bulb. Not good. Pointing to it in next photo:
So looks as if access to the rear light business is through the panel in the open trunk here:

And here's a close-up of where I noticed some obvious wet evidence of trickling/leak entry location, where I'm pointing:

So I'll need to figure out how exactly to get the light fixture/lens loose/out of there so I can drain the water out of it. Then I'll need to somehow figure a way to find out how that water is making it's way there; there's no obvious difference or damage or anything on that side as compared to the other side that doesn't have any such leak issue. Some kind of compromise with the seal or something I suppose. Any comments/advice/suggestions would be appreciated before I get myself out there and start off trying to fix it. The Haynes repair manual I have for the car seems to tell me how to replace the bulbs but not really how to get that whole lens/fixture business removed/reinstalled.
So looks as if access to the rear light business is through the panel in the open trunk here:
And here's a close-up of where I noticed some obvious wet evidence of trickling/leak entry location, where I'm pointing:
So I'll need to figure out how exactly to get the light fixture/lens loose/out of there so I can drain the water out of it. Then I'll need to somehow figure a way to find out how that water is making it's way there; there's no obvious difference or damage or anything on that side as compared to the other side that doesn't have any such leak issue. Some kind of compromise with the seal or something I suppose. Any comments/advice/suggestions would be appreciated before I get myself out there and start off trying to fix it. The Haynes repair manual I have for the car seems to tell me how to replace the bulbs but not really how to get that whole lens/fixture business removed/reinstalled.
#2
12-15-2014, 01:26 PM

What you are getting is somewhat common on that generation. To get the light assembly out you need to remove the twist locks for each bulb (turn counter clockwise and then pull out each connector). Then if you look at he third photo in your post you will see two nuts towards the trunk side. Remove those two nuts. Now from the outside of the vehicle you need to pull and gently pry the light assembly out. Note that there are two alignment pins located towards the fender well that you will not see at first and they are often rusted, so using a large flat head screwdriver often works well, but wrap some electrical tape around the end of the screwdriver in order to protect the paint and body. Once removed you can dry it out with compressed air or just leave it in a warm place for a day to two. Once that is solved the reason for your water leak is most commonly the seal between the light assembly and the body. At first thought you would think it is best to replace the seal, but that usually does not work. I have done many of these for the same problem you have. The best option that we have found is simply to dry out the old seal and caulk each side of the seal with a black RTV silicone, then re-install after cleaning up where the gasket meets the body. Re-install bulbs and trim. Note that the hardest part of this job should be getting the light assembly out as the two pins that you can't see are often hard to get sliding out. Also, the light assembly will pull straight back/out if you are wonder how it comes out. Good luck! Just take your time as that is all this job really takes.
#3
12-15-2014, 01:27 PM

I had related problem some time ago on 90 Accord EX, water was entering rear of car. Replacing the foam gasket fixed the problem.
In your case, the lens may have developed seam leaks allowing water in. I had this on a Acura TL and fixed by drilling a drain hole.
good luck
In your case, the lens may have developed seam leaks allowing water in. I had this on a Acura TL and fixed by drilling a drain hole.
good luck
#4
12-15-2014, 01:34 PM
Drilling a hole is such a simple yet affective idea. I always sealed the seams with clear silicone. I guess I was not thinking with my dipstick "jimmy." I loved the commercial...
#5
12-15-2014, 01:37 PM

It should be 4 nuts holding on the tail light. If you only remove 2 nuts and try to pry, you'll probably break something. It usually is due to a worn out gasket.

Last edited by redbull-1; 12-15-2014 at 01:40 PM.
#6
12-15-2014, 01:48 PM
Great. Thanks everyone for the very helpful replies and especially the wishes of good luck because I'll need that too. I'll post back here, hopefully with a success story to report. thanks again
#7
12-15-2014, 06:29 PM


#8
12-15-2014, 07:01 PM
Take two small flat head screwdrivers, one on each side and pry if up off the bolt. Or, you can disconnect the wire harness from the tab and spin if off like you would a nut. They are just press on by hand and are there to keep the wire harness from rubbing on the body.
#10
12-15-2014, 11:58 PM
Okay, got it unclipped, nuts off, and removed from the car. Quite a bit of water I could dump out from the back by simply tipping it up, but a significant amount seems to be remaining within the "sealed" lens, trapped.
Below is a photo of it. The foam seal looks fine/intact, not particularly damaged, but of course could be worn out and probably is. Notice the rusty bulb socket; in fact I tried to twist that bulb out but it doesn't wanna budge. It still lighted though, somehow. Will probably put a little penetrating oil there though and see if I can work it loose and clean up the socket/connection at least. Notice how I decided to show my tube of black RTV also there, at the ready to use on the foam gasket, per suggestion.

Below is the area I suppose I'd apply the black RTV after cleaning up where the gasket meets the body, especially around the topside I suppose:

^Yep, probably worn although as I mentioned it doesn't look (obviously anyway) particulary worn/bad.
Below is a photo that shows (sort of) the water that seems to be remained "trapped" inside that doesn't seem to want to drain out of the "sealed" lens. My lens must have indeed developed seam leaks as per quote above. I really think I'll go ahead and drill out a drain hole. If I be careful maybe I won't crack/bust the lens all up.

At first thought you would think it is best to replace the seal, but that usually does not work.
The best option that we have found is simply to dry out the old seal and caulk each side of the seal with a black RTV silicone, then re-install after cleaning up where the gasket meets the body.
It usually is due to a worn out gasket.
I had related problem some time ago on 90 Accord EX, water was entering rear of car. Replacing the foam gasket fixed the problem.*In your case, the lens may have developed seam leaks allowing water in. I had this on a Acura TL and fixed by drilling a drain hole.