
Recent bondo job.


Thread Starter
|
Almost A Senior Member
Joined: Nov 2009
Posts: 279
From: WV
This was my first time applying body filler to a car. I read and read as much as I could possibly read online before doing it. Even watched a few videos.
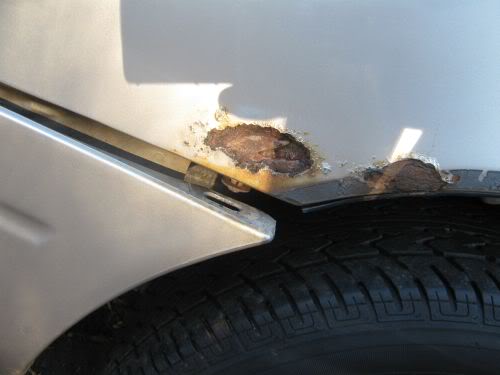
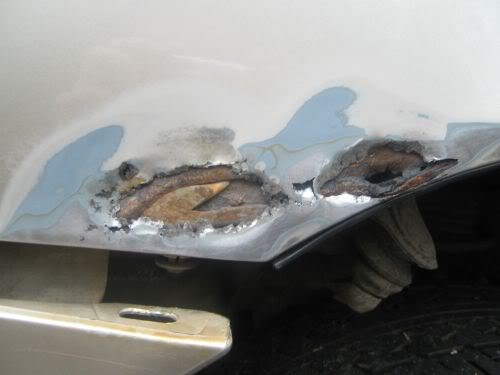
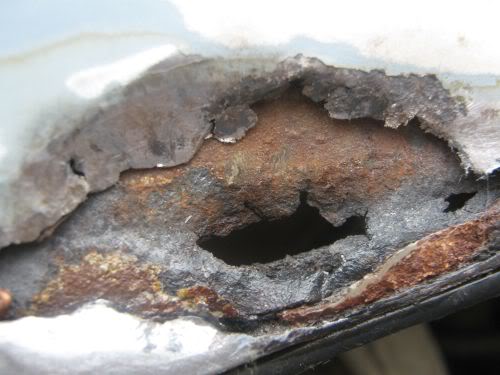
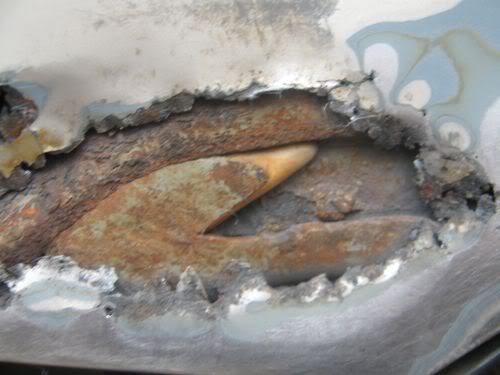
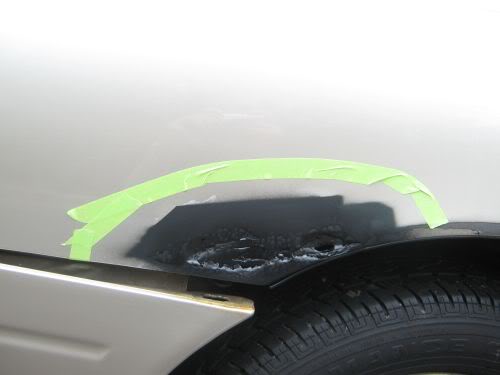
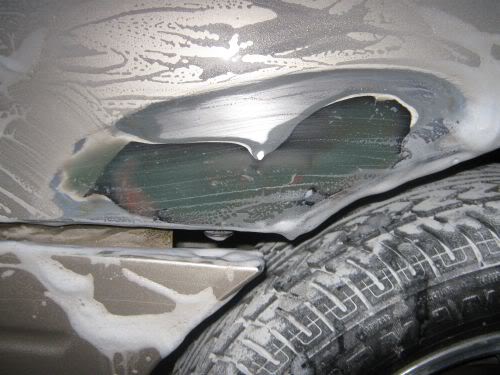
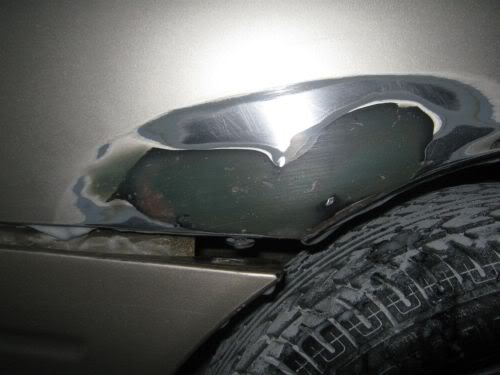
This is what the rust spots looked like (Located on the right quarter panel) before and after sanding some of the rust off. Using the rounded side of a ball-peen hammer, I gently pounded the edges of the rust in, as shown in picture #2, 3, and 4. After the first four pictures, I sanded a little more to get to bare metal around the rust and to remove as much rust as possible.
After sanding as much rust off as I could, and realizing I couldn't reach all of the rust, I sprayed the remaining rust with a rust reformer. I used Rustoleum brand, but you don't have to use that brand. BEFORE applying the rust reformer, I blew away as much dust and rust debrew as I could. You can use an air compressor or a little can of 3M dust remover (Or something similar.). After blowing away the dust, wipe the area down with a wax and grease remover. You CAN use rubbing alcohol, but you will need to use more and wipe a little longer.
After two coats of rust reformer, I applied two layers of Bondo body filler (There are other brands other than Bondo that work fine). It's best to put the body filler on in multiple thin layers than one thick layer.
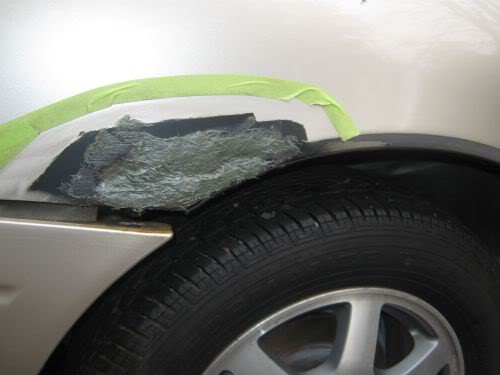
I added one more layer after the picture above, but forgot to take a picture, sorry. After the third layer I sanded with 80 grit sandpaper, only to reveal a few holes where air pockets had gotten underneath the filler.
Applied the fourth layer. I added extra hardener, which is why it's really read in this picture.
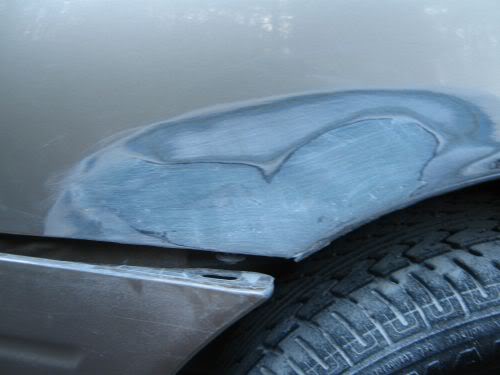
I sanded a little more with the 80 grit sandpaper until I got it level and found no holes. I then began wet sanding using 800 grit sandpaper and a bucket of car soap and cool water.
After 30 minutes (This was my first time.) of wet sanding, I dried it off and remove all grease and wax.
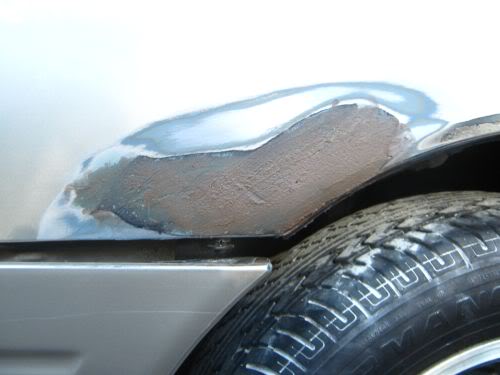
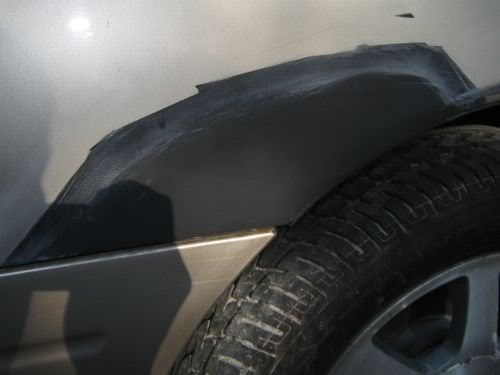
After wet sanding, I again cleaned the area of ll oils and grease to help the primer stick. After two coats of automotive primer, I wet sanded, and added a third coat. As you can see from the picture, I then wet sanded the edges so that the primer layer would smoothly blend in in with the rest of the metal. You don't HAVE to do this, but I wanted to, as you probably would.
For the record. I used 800 grit paper for wetsanding. In my opinion that's fine for wetsanding body filler and primer. If you're going to wet sand paint or the clear top coat, you should use something along the lines of 2000 grit.
This is what the rust spots looked like (Located on the right quarter panel) before and after sanding some of the rust off. Using the rounded side of a ball-peen hammer, I gently pounded the edges of the rust in, as shown in picture #2, 3, and 4. After the first four pictures, I sanded a little more to get to bare metal around the rust and to remove as much rust as possible.

After sanding as much rust off as I could, and realizing I couldn't reach all of the rust, I sprayed the remaining rust with a rust reformer. I used Rustoleum brand, but you don't have to use that brand. BEFORE applying the rust reformer, I blew away as much dust and rust debrew as I could. You can use an air compressor or a little can of 3M dust remover (Or something similar.). After blowing away the dust, wipe the area down with a wax and grease remover. You CAN use rubbing alcohol, but you will need to use more and wipe a little longer.
After two coats of rust reformer, I applied two layers of Bondo body filler (There are other brands other than Bondo that work fine). It's best to put the body filler on in multiple thin layers than one thick layer.
I added one more layer after the picture above, but forgot to take a picture, sorry. After the third layer I sanded with 80 grit sandpaper, only to reveal a few holes where air pockets had gotten underneath the filler.
Applied the fourth layer. I added extra hardener, which is why it's really read in this picture.
I sanded a little more with the 80 grit sandpaper until I got it level and found no holes. I then began wet sanding using 800 grit sandpaper and a bucket of car soap and cool water.
After 30 minutes (This was my first time.) of wet sanding, I dried it off and remove all grease and wax.
After wet sanding, I again cleaned the area of ll oils and grease to help the primer stick. After two coats of automotive primer, I wet sanded, and added a third coat. As you can see from the picture, I then wet sanded the edges so that the primer layer would smoothly blend in in with the rest of the metal. You don't HAVE to do this, but I wanted to, as you probably would.
For the record. I used 800 grit paper for wetsanding. In my opinion that's fine for wetsanding body filler and primer. If you're going to wet sand paint or the clear top coat, you should use something along the lines of 2000 grit.
Last edited by HondaAccordEX94; Apr 1, 2010 at 04:44 PM.

Thread
Thread Starter
Forum
Replies
Last Post
HondaAccordEX94
General Tech Help
4
Mar 16, 2010 06:56 AM