
My F22a1 Rebuild


Thread Starter
|
Newest Of Newbies
Joined: Jun 2012
Posts: 13
From: Southern utah
I'm rebuilding my 1990 honda accords f22a1 engine, and decided it would be fun/ hopefully helpful to others interested in rebuilding their engine, if I were to post it all up online.
Honestly I've done a lot of the work already and am just to the point were I'm done disassembling everything, the block is at the machine shop, I'm cleaning all the parts, and I'm waiting for my engine kit to be shipped to my house.
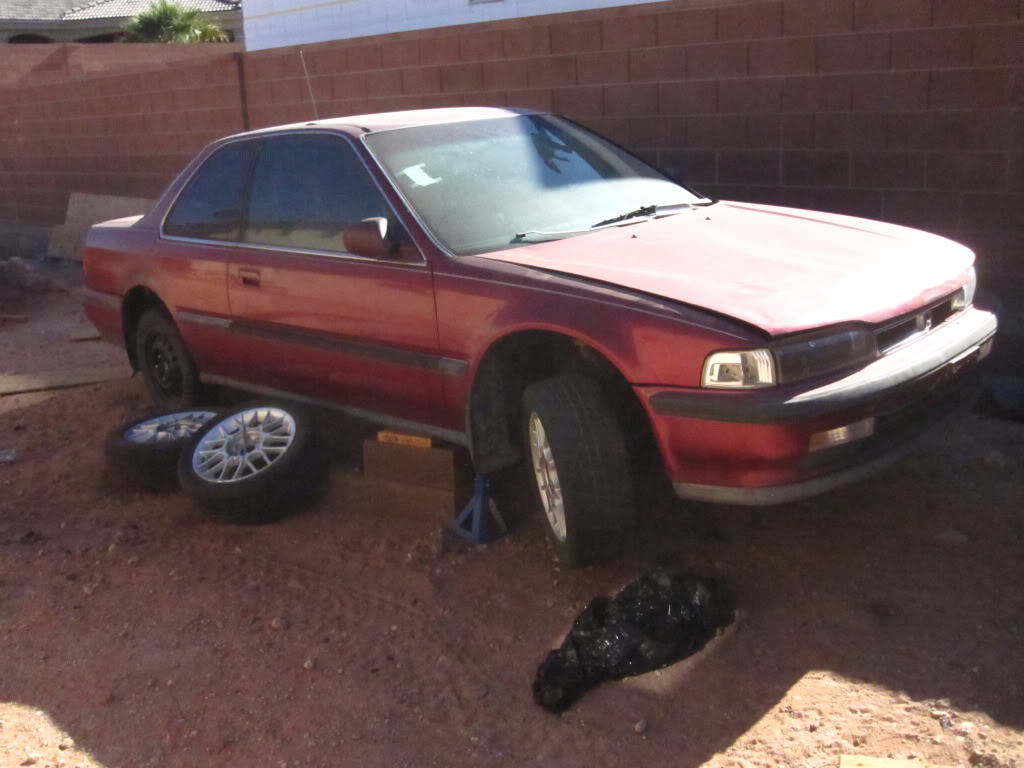
I bought the car as a project car, with a goal to make it a reliable car that will run for the next 15year and then some. it had been sitting for a while and the owner said that it had bad rod bearings when he parked it and sure enough when I clean and replaced a few parts in the fuel system it started and sounded like a gnome was in the engine hitting on something with a hammer.
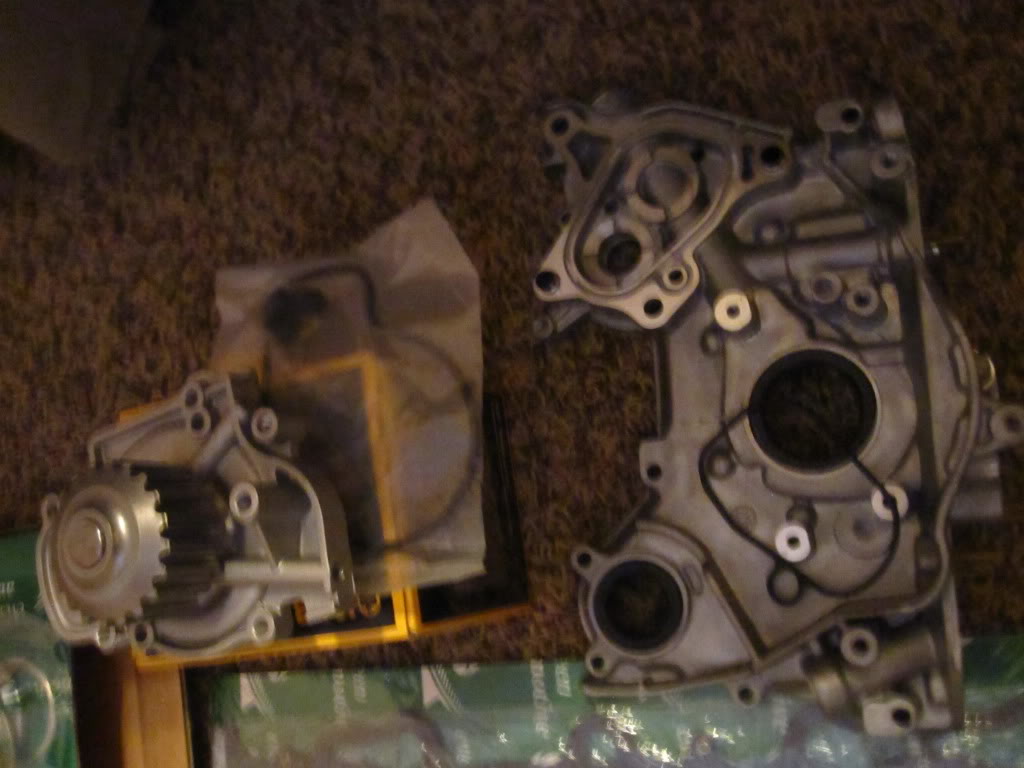
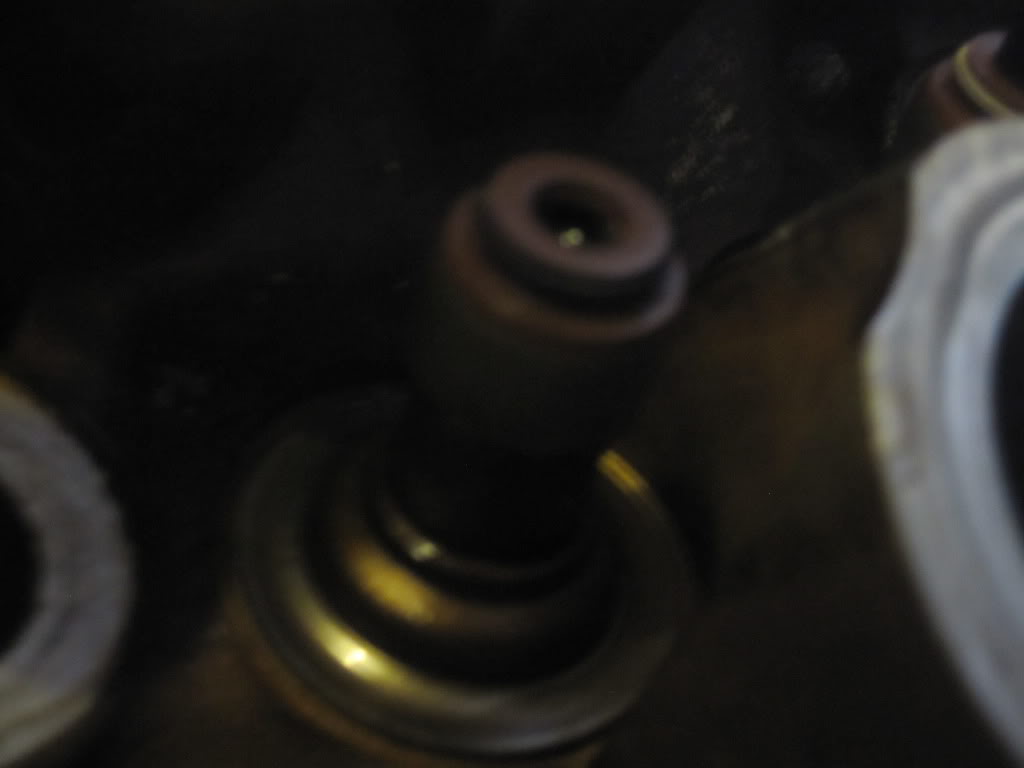
I started out pulling the oil pan on the car and found this
'
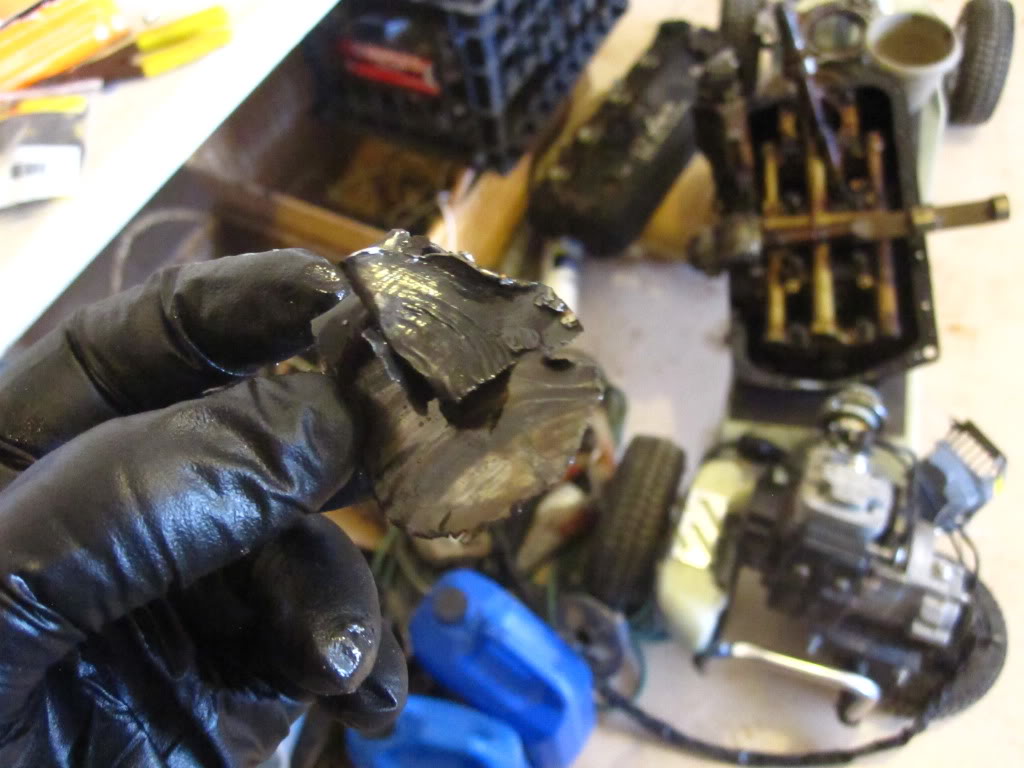
ya time for a different engine, this ones crank is probably scratch to bits and its a 170$ to turn it, so i picked one up from the guy i got the accord from for a 100$ as long as he gets one of the cylinder heads back to fix his other accord(snapped timing belt, poor guy i feel bad)
Put the spare engine on an engine stand that I borrowed from a friend and started dissembling and accidentally let a rod slide back down and hit the crank pretty hard and I about had a heart attack, but luckily no scratches.
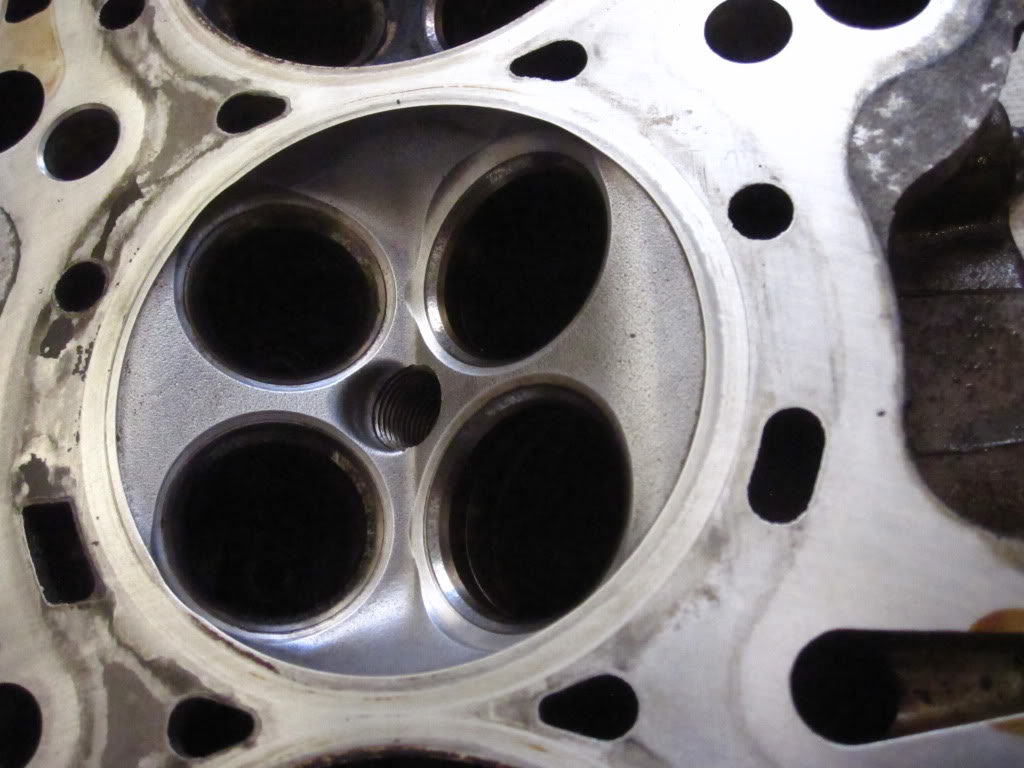
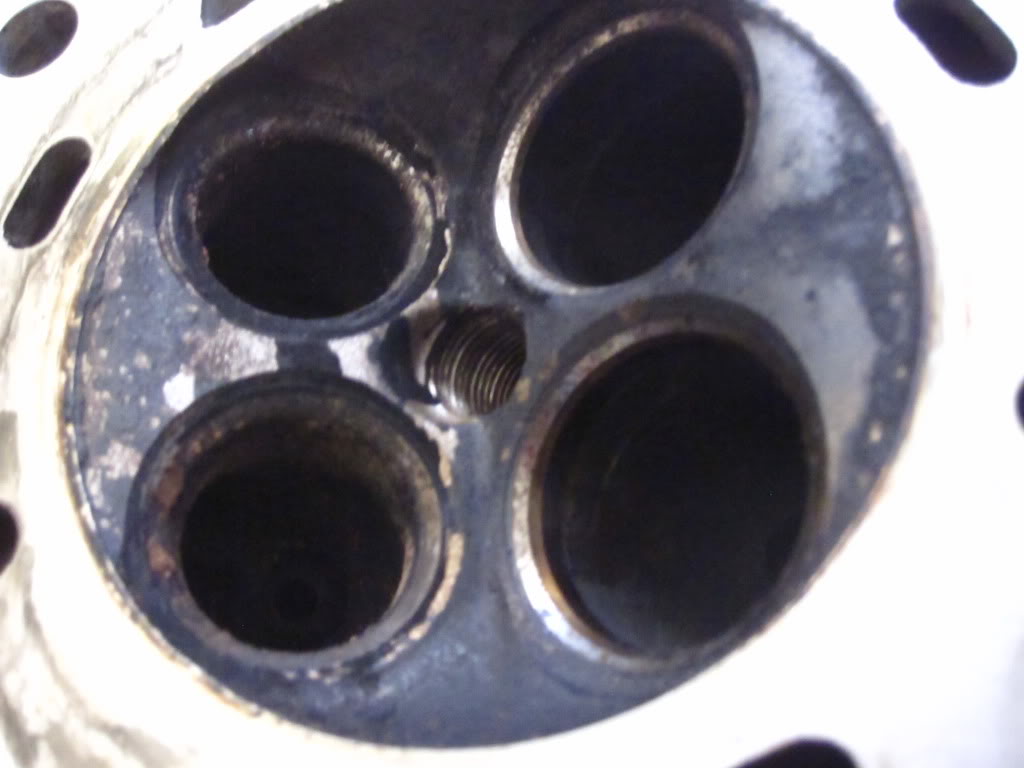
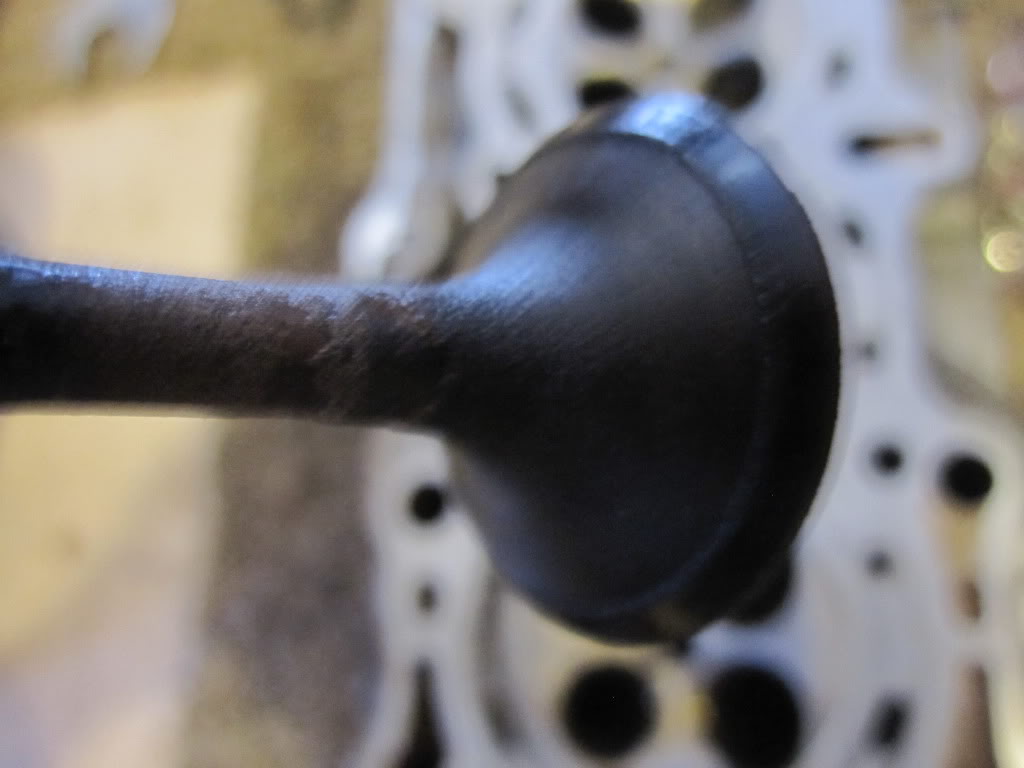
so this is where I'm at now taking the head apart and cleaning everything, the engine kit comes with new valve seals which will be nice if i can figure out how to remove the old ones, I'm sure I can find a way but if you guys have any cool tricks let me know if not I'll find some youtube video or use my manual that came with car(which assumes that you have a fully armed autoshop, which i don't)
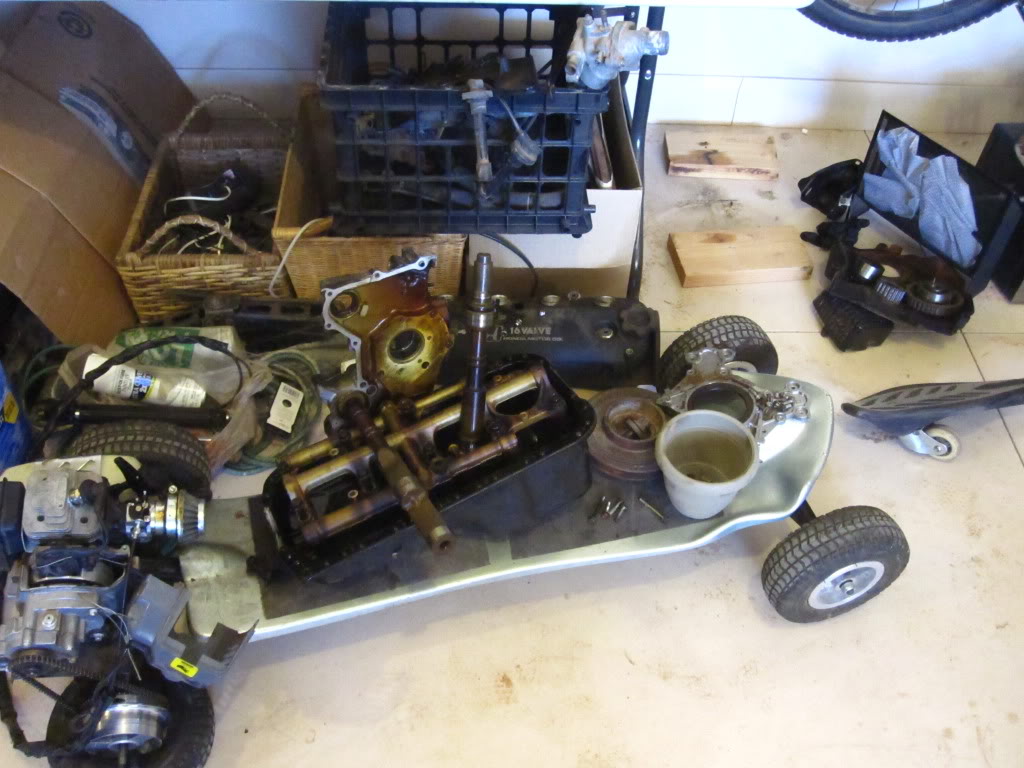
I know its a disaster, but I know where everything is and thats what counts.
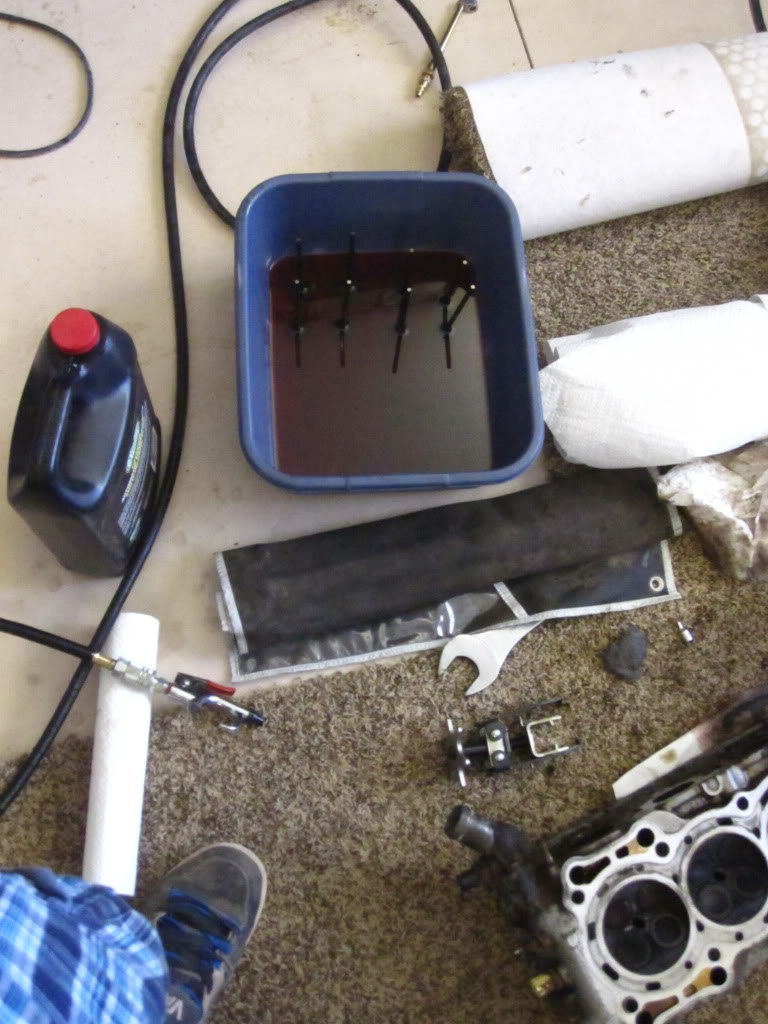
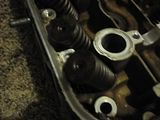
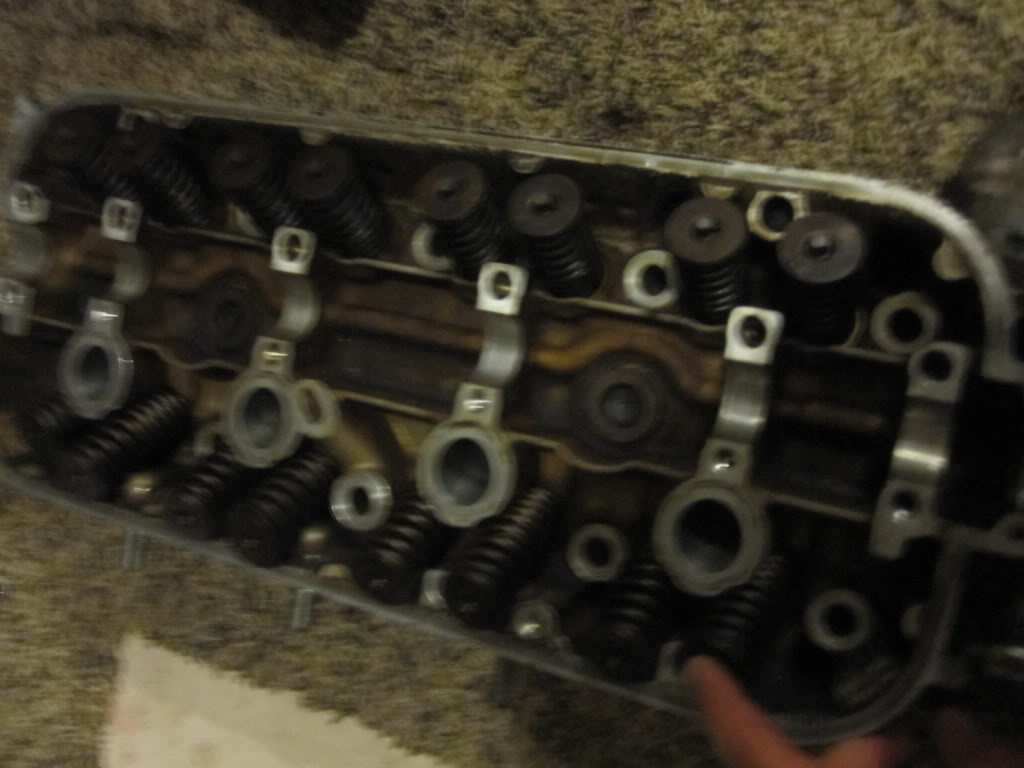
This is the progress I've made on the head, using a ghetto valve spring remover from checkers and ATF with very fine steel wool for cleaning things, brake cleaner for washing things off and air hose for drying everything. and yes steel wool bits are getting everywhere but its working extremely well.
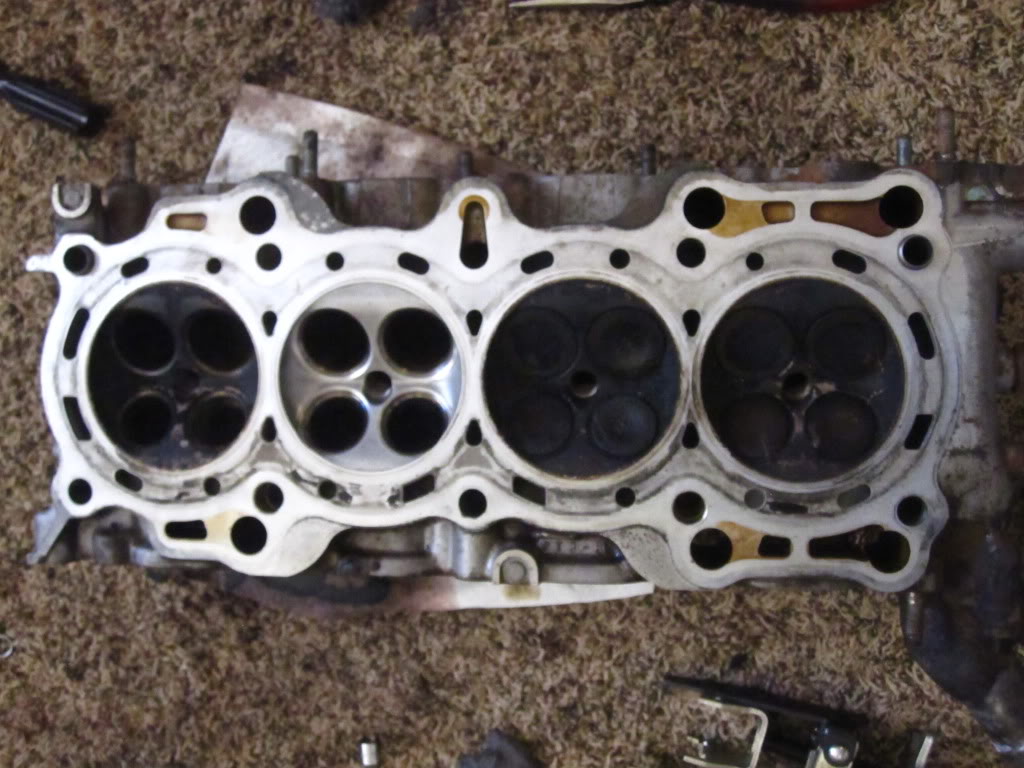
vavles happily soaking in ATF
Also as I'm working on this I have a couple of questions I'm thinking about as i go if you have input please share but for now their not my main concern:
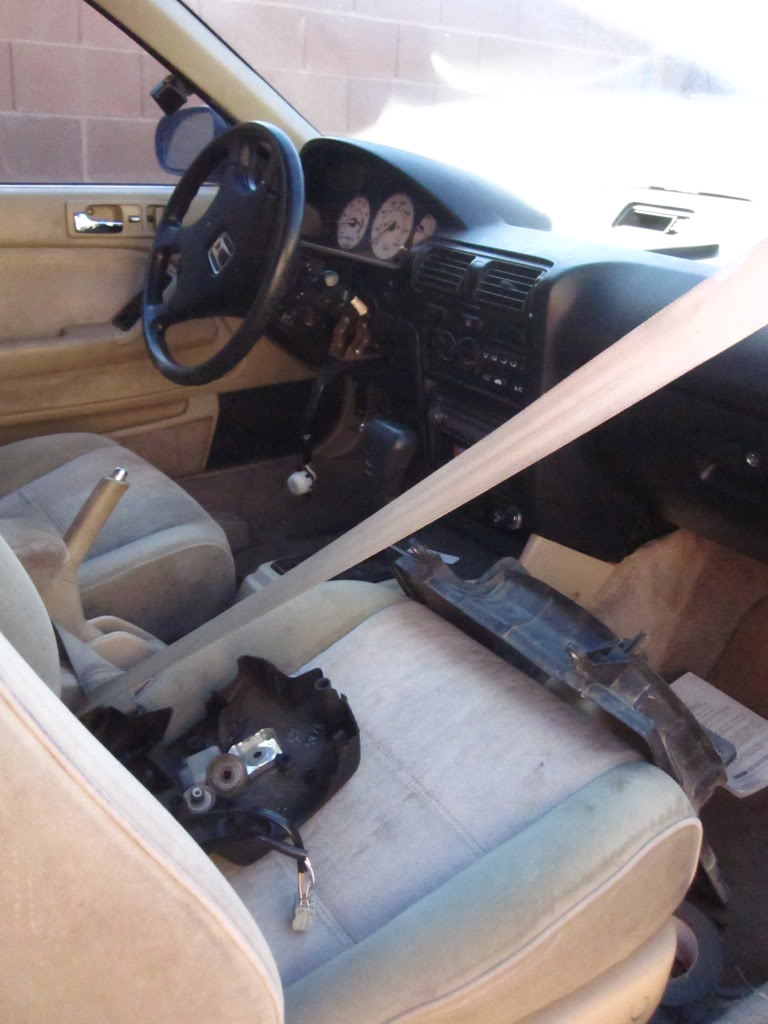
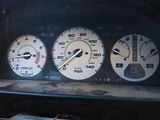
This entire instrument cluster isn't working. what could be keeping it from working? my thoughts so far: could be a fuse or somethings disconnected, and I can't imagine the entire thing being fried.
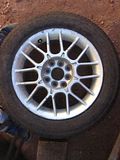
What color(s)/style could i redo these to match the maroon body and still have a clean JDM look(thats what I'm shooting for)? I really don't like the silver and I dislike chrome even more so with these rims. yuck!
Also any advice or comments would be awesome but this is where my project is at right now hopefully by the end of the week I'll have my block back the said if i brought them the new pistons they could use them to match the bore perfectly so I'm waiting on my engine kit which should be here on the 14th!
Honestly I've done a lot of the work already and am just to the point were I'm done disassembling everything, the block is at the machine shop, I'm cleaning all the parts, and I'm waiting for my engine kit to be shipped to my house.
I bought the car as a project car, with a goal to make it a reliable car that will run for the next 15year and then some. it had been sitting for a while and the owner said that it had bad rod bearings when he parked it and sure enough when I clean and replaced a few parts in the fuel system it started and sounded like a gnome was in the engine hitting on something with a hammer.
I started out pulling the oil pan on the car and found this
'
ya time for a different engine, this ones crank is probably scratch to bits and its a 170$ to turn it, so i picked one up from the guy i got the accord from for a 100$ as long as he gets one of the cylinder heads back to fix his other accord(snapped timing belt,
poor guy i feel bad) Put the spare engine on an engine stand that I borrowed from a friend and started dissembling and accidentally let a rod slide back down and hit the crank pretty hard and I about had a heart attack, but luckily no scratches.
so this is where I'm at now taking the head apart and cleaning everything, the engine kit comes with new valve seals which will be nice if i can figure out how to remove the old ones, I'm sure I can find a way but if you guys have any cool tricks let me know if not I'll find some youtube video or use my manual that came with car(which assumes that you have a fully armed autoshop, which i don't)
I know its a disaster, but I know where everything is and thats what counts.
This is the progress I've made on the head, using a ghetto valve spring remover from checkers and ATF with very fine steel wool for cleaning things, brake cleaner for washing things off and air hose for drying everything. and yes steel wool bits are getting everywhere but its working extremely well.
vavles happily soaking in ATF
Also as I'm working on this I have a couple of questions I'm thinking about as i go if you have input please share but for now their not my main concern:
This entire instrument cluster isn't working. what could be keeping it from working? my thoughts so far: could be a fuse or somethings disconnected, and I can't imagine the entire thing being fried.

What color(s)/style could i redo these to match the maroon body and still have a clean JDM look(thats what I'm shooting for)? I really don't like the silver and I dislike chrome even more so with these rims. yuck!

Also any advice or comments would be awesome but this is where my project is at right now hopefully by the end of the week I'll have my block back the said if i brought them the new pistons they could use them to match the bore perfectly so I'm waiting on my engine kit which should be here on the 14th!
Thread Starter
|
Newest Of Newbies
Joined: Jun 2012
Posts: 13
From: Southern utah
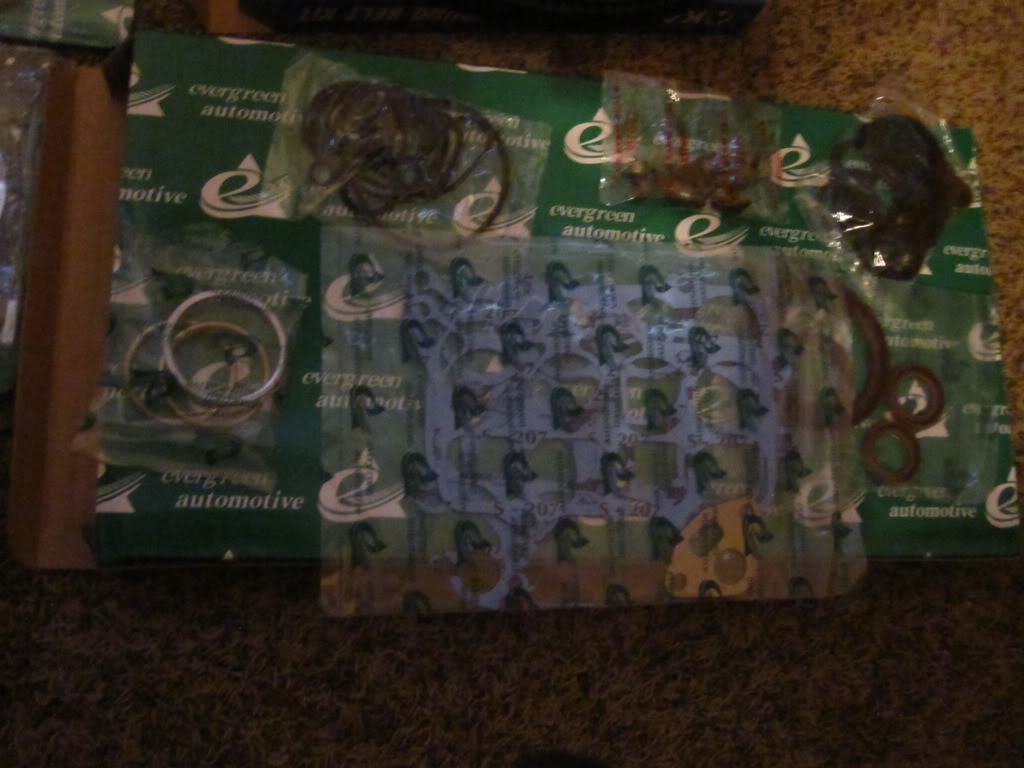
So for 260$ this is what I got.
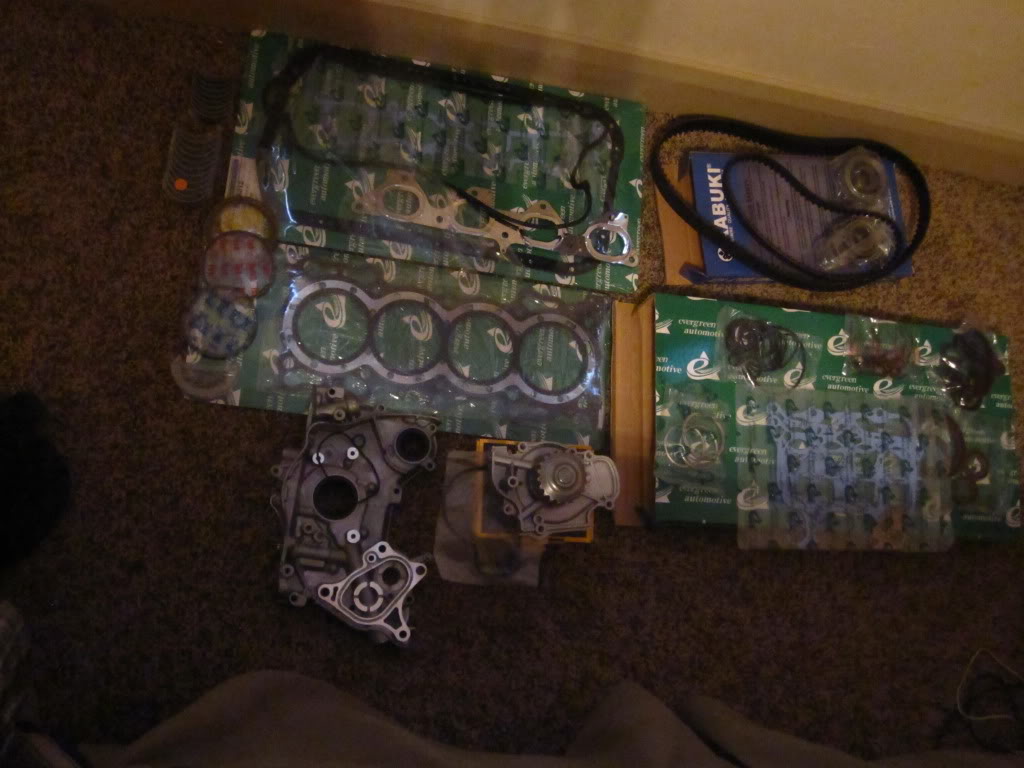
Main bearings, rod bearings and some other bearings I don't know what their called. pistons and rings other than my pistons and rods are at the machine shop being swapped since the pins were pressed in. :/
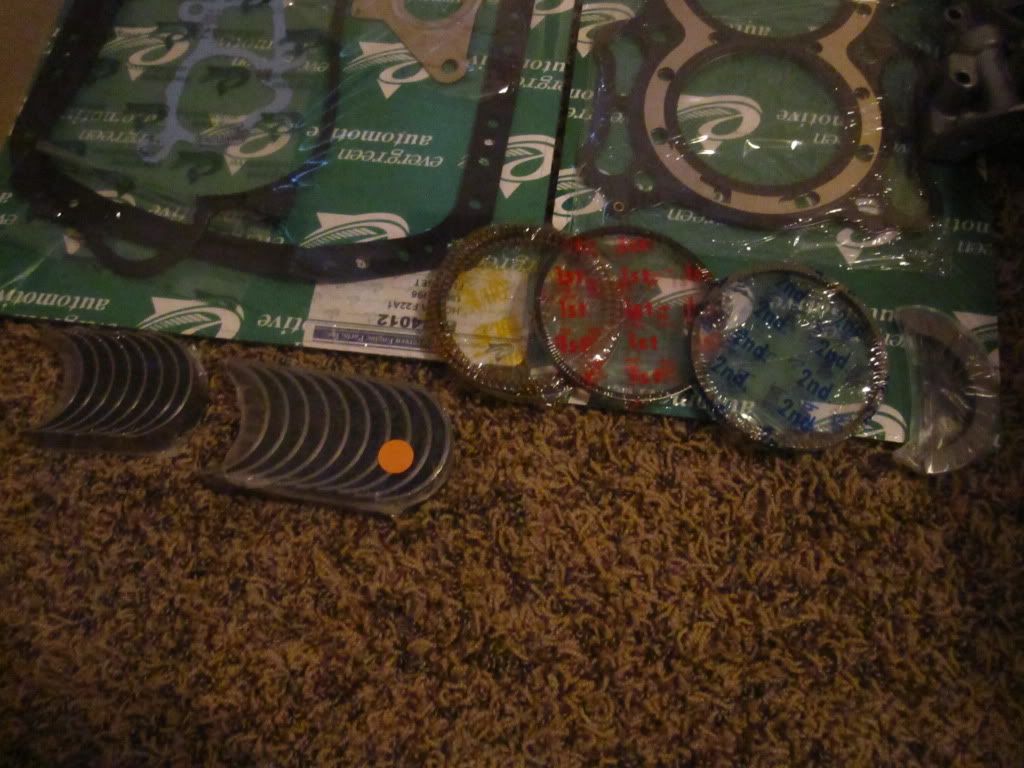
Oil pump and water pump and all there seals.
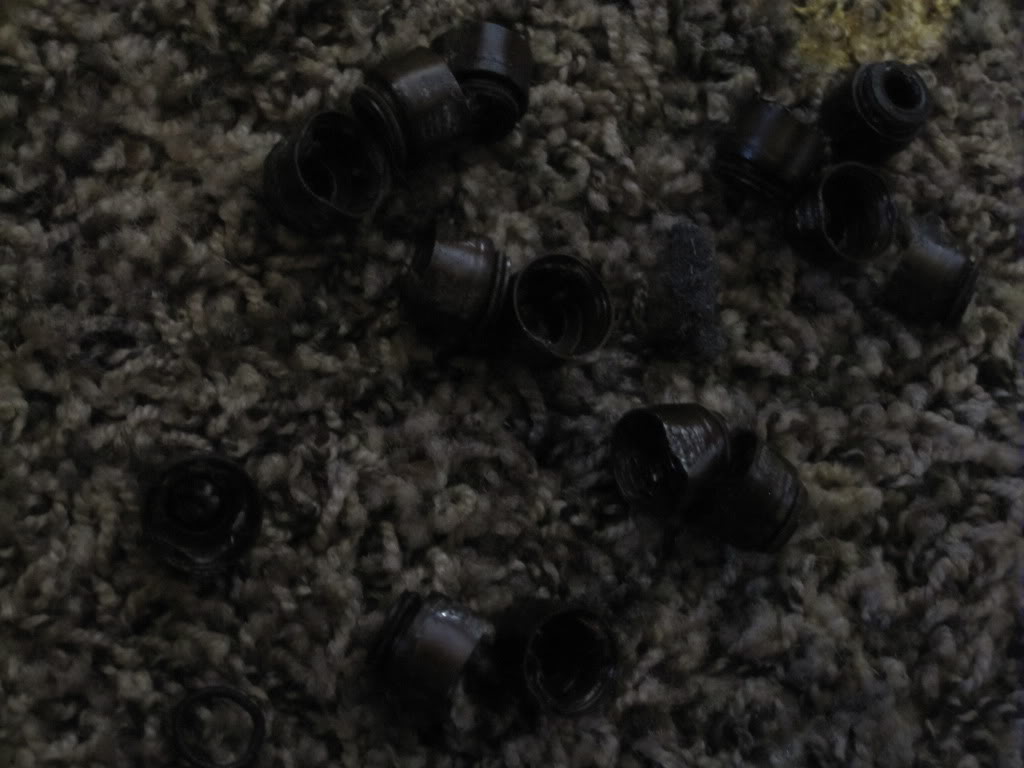
valve seals, intake manifold gaskets, some other seals, and a bunch of orings and other gaskets
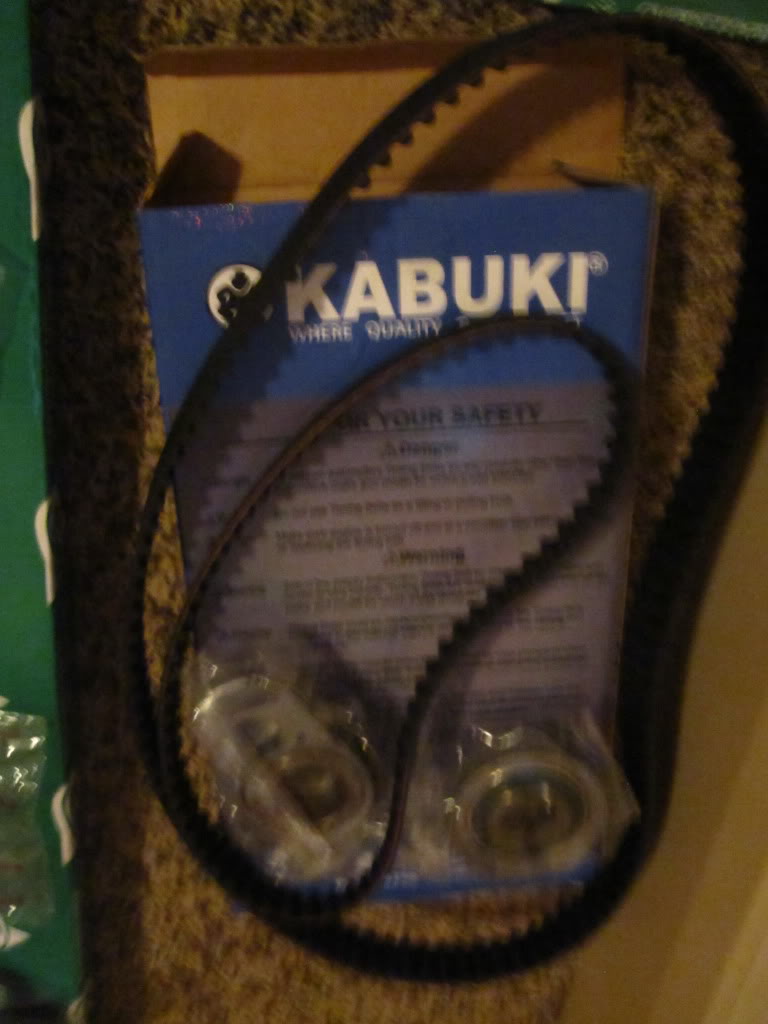
timing belts and tensioners, by the way is there a certain way that I have to time the second belt? I couldn't find any marks on it.
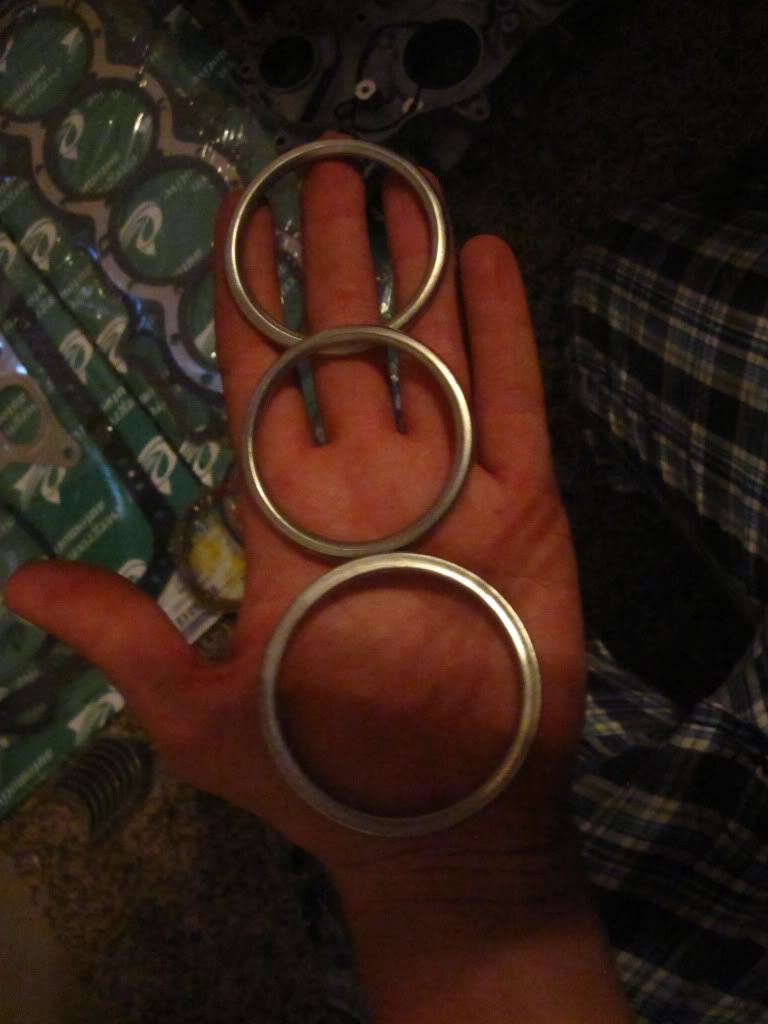
also what are these three compression washer things for I really hope they weren't on the block because I took it to a really good machine shop and I'm pretty sure their going to clean the block down to the block, and I'll never be able to find there place if thats the case.
My block and pistons should be done next Monday or Tuesday so I'll post pictures of that when it gets back. till then I'll be cleaning the head up and replacing the seals and stuff on it.
Main bearings, rod bearings and some other bearings I don't know what their called. pistons and rings other than my pistons and rods are at the machine shop being swapped since the pins were pressed in. :/
Oil pump and water pump and all there seals.
valve seals, intake manifold gaskets, some other seals, and a bunch of orings and other gaskets
timing belts and tensioners, by the way is there a certain way that I have to time the second belt? I couldn't find any marks on it.
also what are these three compression washer things for I really hope they weren't on the block because I took it to a really good machine shop and I'm pretty sure their going to clean the block down to the block, and I'll never be able to find there place if thats the case.
My block and pistons should be done next Monday or Tuesday so I'll post pictures of that when it gets back. till then I'll be cleaning the head up and replacing the seals and stuff on it.

When I was helping my father rebuild a 68 GTO we used a special strobe light to get the timing proper...but I am positive that it is different with these newer engines!
Best of luck with your rebuild, I'll be watching your progress for sure.
Oh, and I would be sure to follow the wiring from the instrument cluster. make sure that all the wires are intact. If it was sitting for a long time, was there any evidence of rodents taking up residence in the engine compartment or anywhere else? If that is the case be sure to check ALL of the wires, just to be on the safe side. Also...I love the instrument panel covers, been wanting those ever since I saw them for sale...if only I trusted myself to install them properly!
Last edited by rhamza161; Jun 14, 2012 at 10:32 PM. Reason: added some more information to possibly help.
Thread Starter
|
Newest Of Newbies
Joined: Jun 2012
Posts: 13
From: Southern utah
ya its slightly different with the newer engines, it has timing marks and stuff on it for the normal belt but this second belt is a balancing belt so I'm probably going to do quite a bit of research because I don't want to have to redo the timing when i get the engine in the car. i did find how to time the rear balancer and the front one seems to have a actual mark but I'm going to be 100% sure before i try anything.
also it doesn't seem to have any evidence of rodents but it did have evidence of spiders and the two black widows that the bug bomb didn't kill scared the crap out of me when I was changing the fuel pump. I almost bought a second accord for 400$ with a snap timing belt but it had been sitting for the same amount of time and i didn't want to deal with more spiders!
I'm thinking that ill still need to check the wires for the cluster since we had to disassemble the steering column to start the car ( didn't come with a key, got one at the dealership for 5$ though ) if its not wiring I'm hoping its a fuse I don't feel like tearing apart the dash just to fix it.
Thread Starter
|
Newest Of Newbies
Joined: Jun 2012
Posts: 13
From: Southern utah
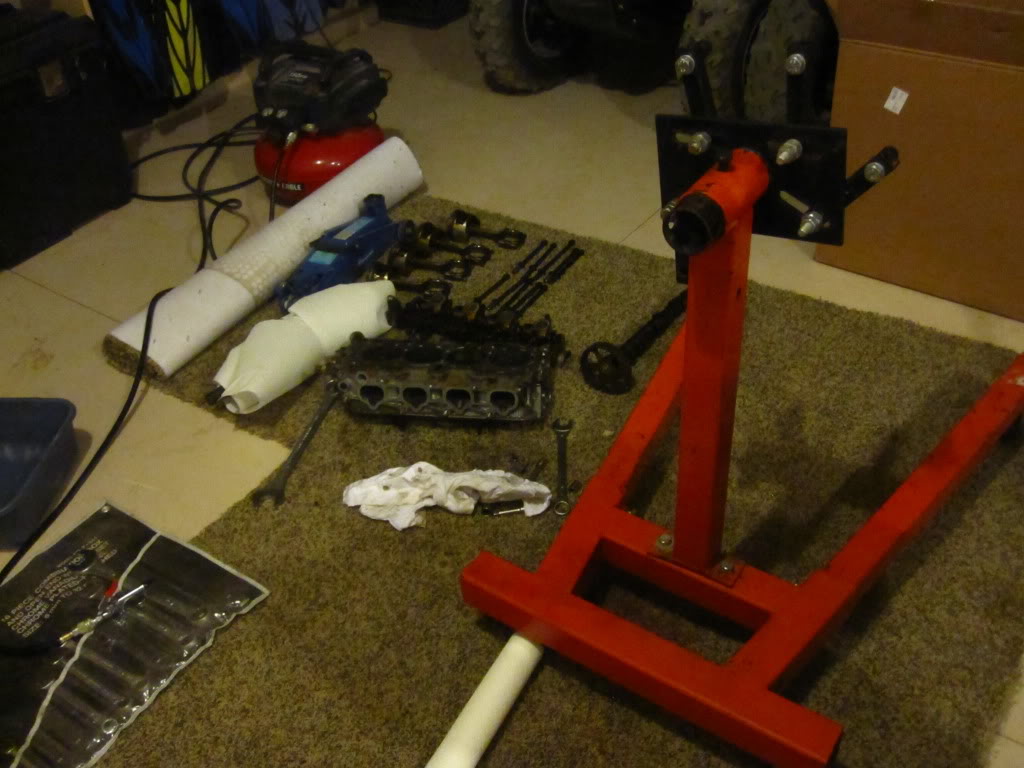
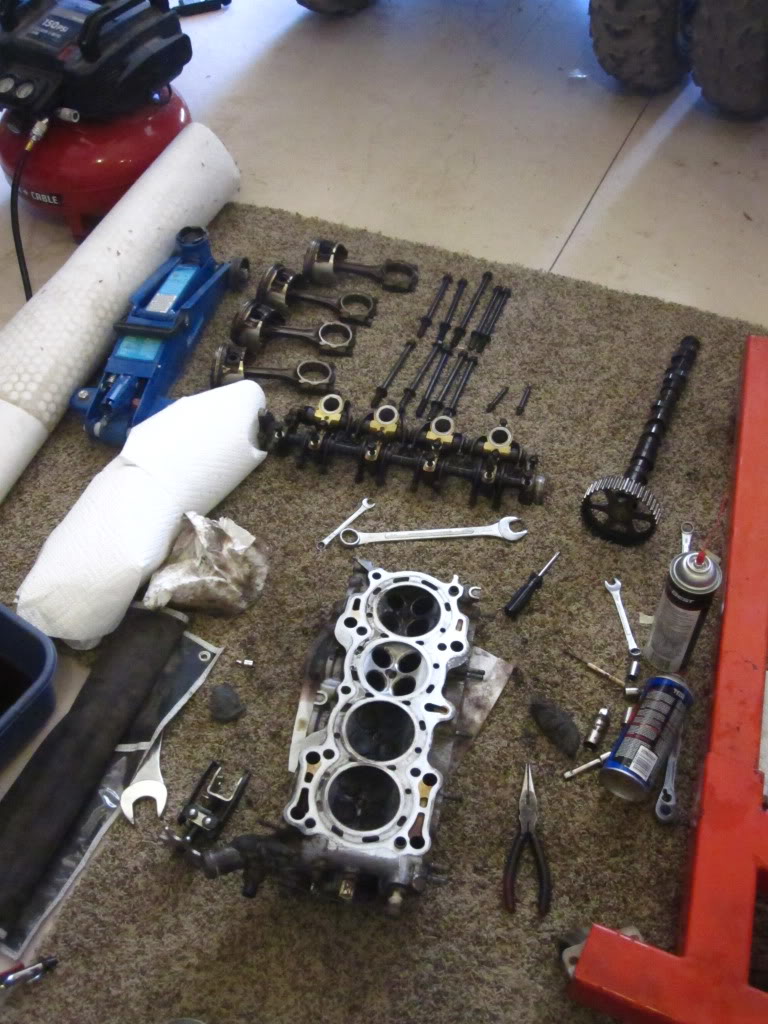
well to late to put everything in baggies i just sort of laid everything out on paper towels/carpet(extra from a house my dad built, not my bedrooms) in the order I took them off and have been cleaning things with ATF, a rag, and then air pressure right before I reinstall them.
The crank is fine, i bought a spare engine because the other one I'm almost positive is shot, I'll post pics after I'm done with rebuilding and swapping engines I'll pull the old one apart just to see how bad it really was, the guy before me drove the car 30 miles home with a really bad rod knock and who knows how long the people before him drove it with the bad bearings, I have a feeling its gonna be really ugly.
The engine rebuild kit i got came with new thrust bearings so the other ones are outside on the ground. the kit also came with new main and rod bearings so i think I'm good with bearings, unless there are more? and the kit also came with a new oil pump. well i guess the kit came with everything thats replaceable on the engine minus the rods, and a few other things that don't wear unless you don't maintain your car.
Also I'm finishing up the putting the head back together so I should have pics of it up later today.
Thread Starter
|
Newest Of Newbies
Joined: Jun 2012
Posts: 13
From: Southern utah
I wasn't able to finish the head today my tool that I got from checkers was total crap so I'm going to wait till monday moring 6am I'm going to the high school and the shop teacher is going to let me use the nicer tools for the job.
thats the ghetto tool and the tight spaces it cant reach...
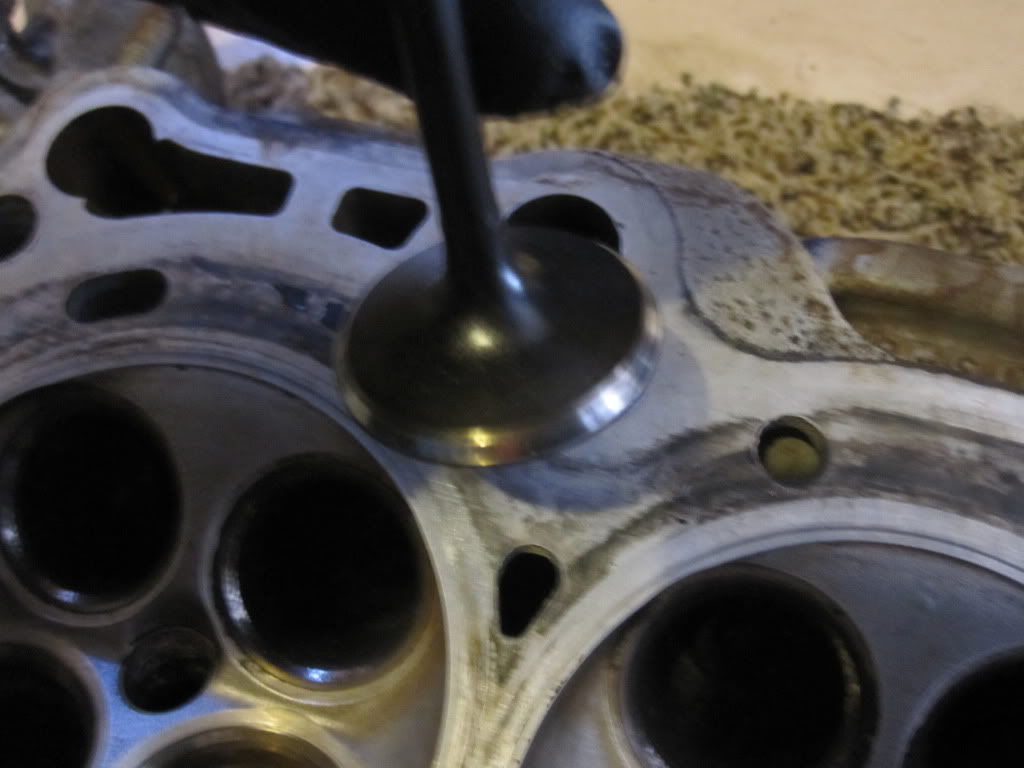
I was able to get all of the springs back on the other side but not the left side. And I also got all the valve cleaned and placed back in, along with all of the valve seals replaced.
sorry I get really shaky when I drink mountain dew.
thats the ghetto tool and the tight spaces it cant reach...


I was able to get all of the springs back on the other side but not the left side. And I also got all the valve cleaned and placed back in, along with all of the valve seals replaced.
sorry I get really shaky when I drink mountain dew.
Thread Starter
|
Newest Of Newbies
Joined: Jun 2012
Posts: 13
From: Southern utah
I called the machine shop today and they weren't finished yet.
they just need to finish honing the block so it should be done tomorrow... dang I forgot to ask them about my pistons too, those can't be that hard of a job so it should be done tomorrow too.although today I did get most of the head put back together other than I need to get a hold of my uncles torque wrench which I should have tomorrow, and then i can get it completely done.
also do you guys think spray paint will hold up on a valve cover? I did it with my 1995 VW jetta, guy that I sold it to was having trouble with it so i test drove it to see if i could help him and i forgot just how smooth of a car that was to drive takes no effort to shift and the clutch glides in, it puts my escort to shame... i miss it
. anyways its valve cover is still painted blue its made it about 4 months but in long term do you guys think it will hold or just start flaking from the heat?
Thread Starter
|
Newest Of Newbies
Joined: Jun 2012
Posts: 13
From: Southern utah
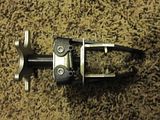
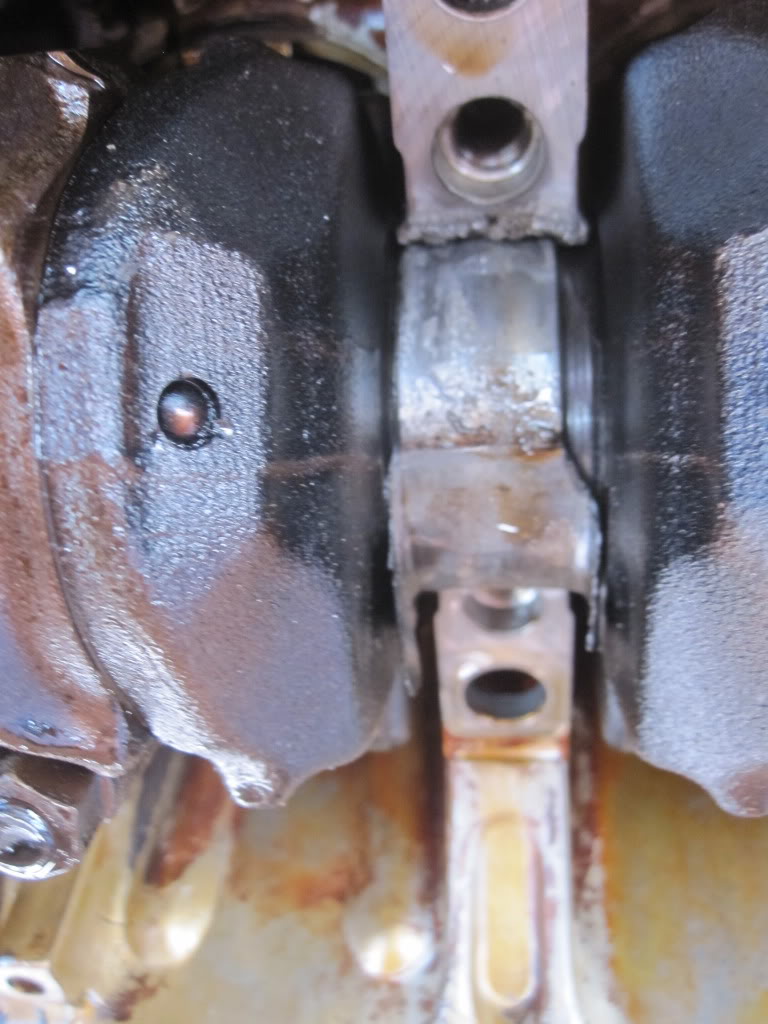
So while waiting for my block to be completed I've been getting the car ready for swapping the new engine in. I removed the exhaust manifold and the the bolts that connect the flexplate to the torque converter, and then out of curiosity I removed the oil squirters(I really have no idea what there called, but they carry oil inside the engine) to find this...


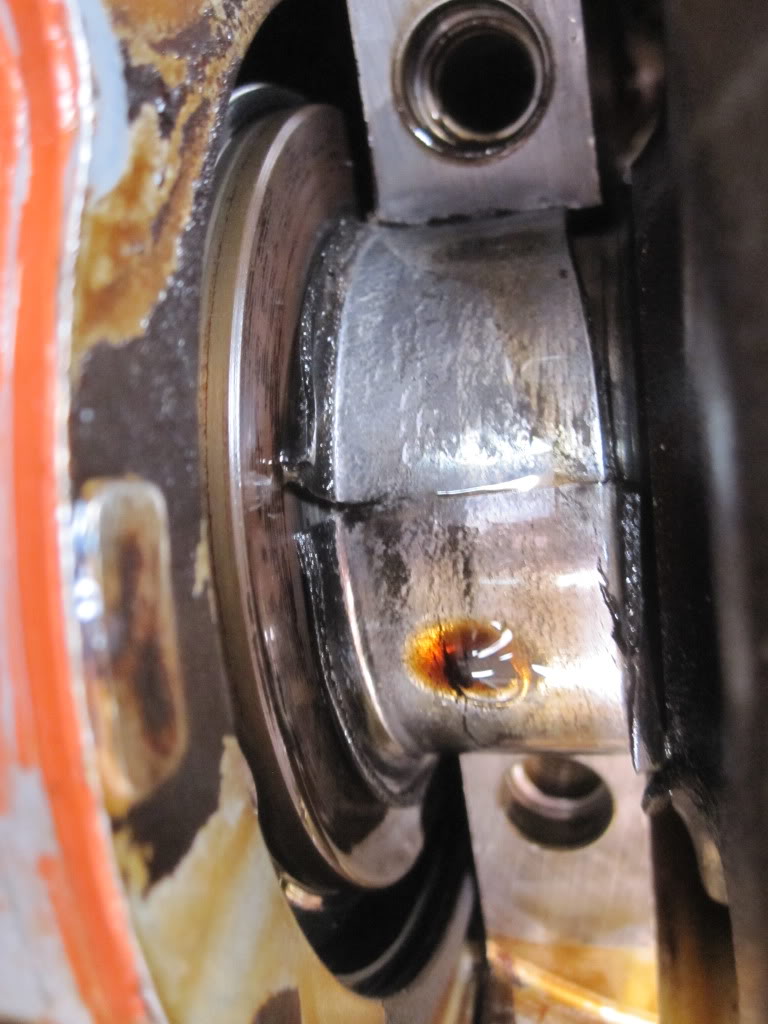
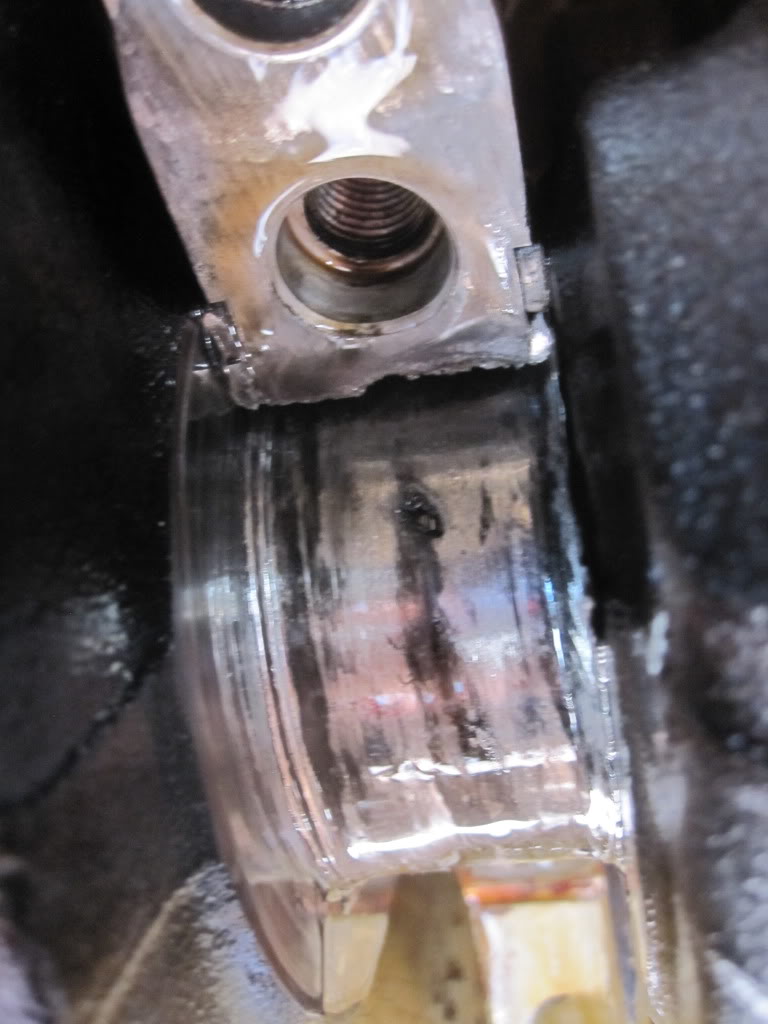
all I have to say is that this is just one more reason for me to believe for some women to never be allowed to drive a car, and only allow them to ride chinese scooters, since they will break down before needing and oil change or anything for that matter, so we don't have to worry about them ruining perfectly good cars.
all I have to say is that this is just one more reason for me to believe for some women to never be allowed to drive a car, and only allow them to ride chinese scooters, since they will break down before needing and oil change or anything for that matter, so we don't have to worry about them ruining perfectly good cars.

Super Moderator
Joined: May 2010
Posts: 11,834
From: Kenton, TN
Ouch! But at the same time, there are plenty of women out there that I would prefer them to take care of my car than some of the "guys" I know. I guess I missed the part about a "different" block/engine being used.
For the vc, I would use high heat paint. Be sure every bit of dirt/oil/ect is cleaned off of it.
For the vc, I would use high heat paint. Be sure every bit of dirt/oil/ect is cleaned off of it.