LOG IN
REGISTER
Forums
General
New Member Area
Off Topic
Sights n Sounds
General Tech Help
Do-It-Yourself Section
Ride Of The Month
HAF Regions
Honda News/Reviews
Your Ride
Appearance
Audio/Visual Electronics
Detailing
Engine & Internal
Headers, Intake, & Exhaust
Nitrous, Super Chargers, & Turbos
Suspension
Tires & Wheels
Sponsoring Vendors & Classifieds
Vendors Group And Special Buys
PRIVATE For Sale / Trade Classifieds
Private 'Wanted' Classifieds
Other
HAF Help & Suggestion Center
Marketplace
Vendor Directory
Become a Vendor
New Posts
Tools
Car Payment Calculator
Tire Rim Calculator
Recalls
Technical Service Bulletins (TSBs)
Members List
Live Feed
Gallery
View Dark Mode
Please register or login to enable Dark Mode.
Log In
Register
Threads
Google
Threads
Posts
Advanced
Dark Mode
Please register or login to enable Dark Mode.
Log In
Forgot your Password?
By logging into your account, you agree to our
Terms of Use
and
Privacy Policy
, and to the use of cookies as described therein.
Recent
Commented
Albums
My Pictures
Random Cheese's Photos
View Profile
Sort:
Commented
Most Recent
Most Comments
Albums
Photos
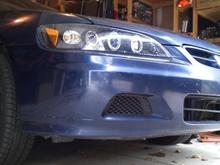
front lip installed
3
2013/02/02 12:44:32
Random Che
honda2
1
2012/11/14 08:41:06
Random Che
101 0042
1
2012/11/13 11:33:04
Random Che
new spoiler
0
2013/01/05 18:04:07
Random Che
new spoiler 2
0
2013/01/05 18:04:07
Random Che
new spoiler 3
0
2013/01/05 18:04:07
Random Che
The finished project.
0
2012/12/13 10:50:03
Random Che
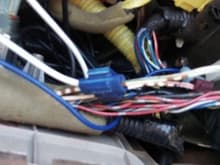
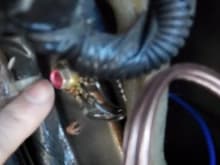
Tapping into the white/green constant hot wire with a solderless connector.
0
2012/12/13 10:50:03
Random Che
A handy grounding lug.
0
2012/12/13 10:50:03
Random Che
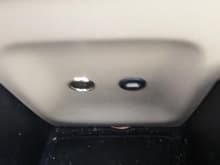
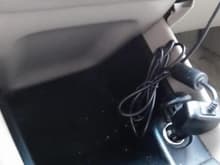
Power outlet and USB port mounting from the back.
0
2012/12/13 10:49:20
Random Che
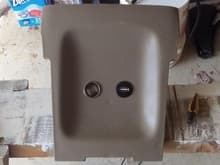
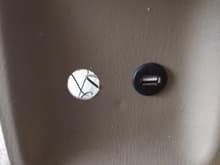
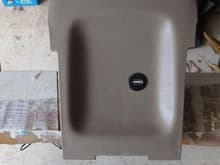
The power outlet and USB port mounted in the trim piece.
0
2012/12/13 10:49:20
Random Che
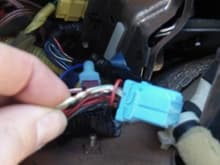
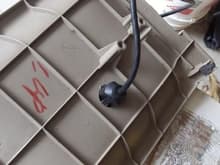
The plug for the radio. The white/green wire is hot all the time and is fused.
0
2012/12/13 10:49:20
Random Che
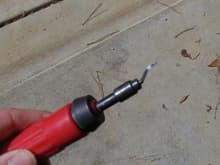
A deburring tool. I recommend one of these for any tool box. Especially if you're the kind of guy who uses wood bits on plastic.
0
2012/12/13 10:48:21
Random Che
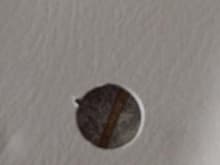
the (somewhat ragged) hole for the power outlet.
0
2012/12/13 10:48:21
Random Che
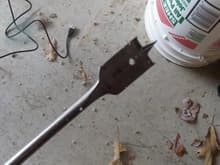
The hole for the power outlet needs to be 7/8". This is a wood bit but it can be used on plastic if you are very careful.
0
2012/12/13 10:48:21
Random Che
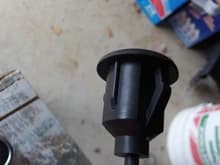
the back of the USB port. You can see the spring tabs that keep it snug against the trim piece.
0
2012/12/13 10:47:11
Random Che
the finished installation of the USB port.
0
2012/12/13 10:47:11
Random Che
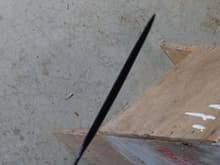
the file I used to make the slot.
0
2012/12/13 10:47:11
Random Che
filed a small orientation slot in the 3/4" hole. Be very careful when you file this slot 'cause once it's in, that's how your USB port will be oriented.
0
2012/12/13 10:46:13
Random Che
Close-up of the USB port. You can see an "orientation" tab on the assembly. This is to keep it from spinning once it is installed. We like this.
0
2012/12/13 10:46:13
Random Che
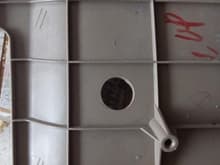
The 3/4" hole for the USB port.
0
2012/12/13 10:46:13
Random Che
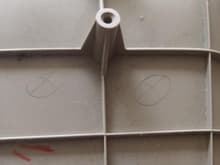
A look at the marked locations in context of the whole trim piece.
0
2012/12/13 10:45:33
Random Che
Locations marked for USB port and power outlet.
0
2012/12/13 10:45:33
Random Che
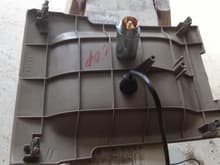
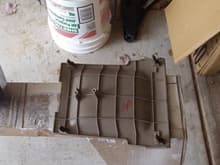
The "before" shot.
0
2012/12/13 10:45:33
Random Che
0
2012/12/03 06:23:16
Random Che
0
2012/12/03 06:20:38
Random Che
truck1
0
2012/12/03 06:16:32
Random Che
honda1
0
2012/11/14 08:41:06
Random Che
101 0042
0
2012/11/13 11:22:49
Random Che