
Installing door speakers and sound deadening and more


Thread Starter
|
Super Moderator
Joined: Dec 2009
Posts: 3,279
From: Quad Cities, IL
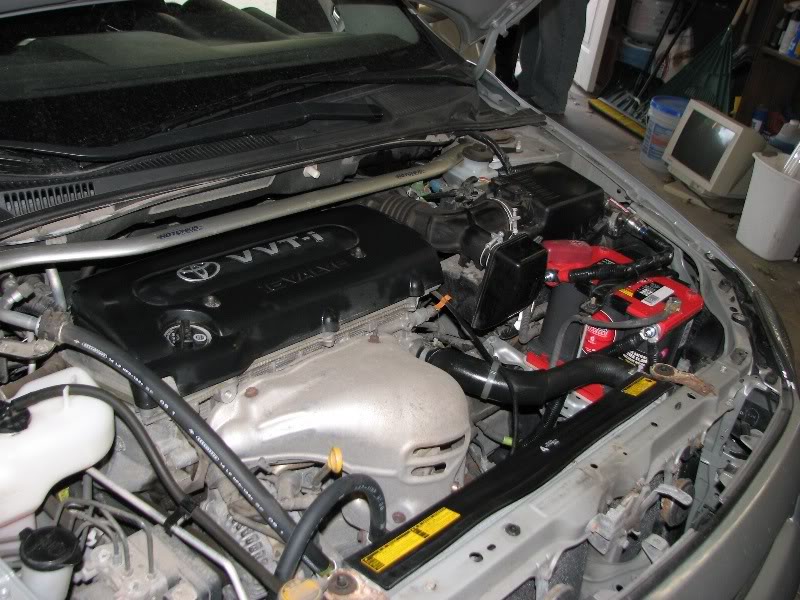
figured i'd update everyone on the progress for this build. we had to take a break while i had some things going on the past few weeks. next is big 3 wiring with a new optima red top battery. then closed cell foam on interior rear panels so we can get the amp rack mounted.

Thread Starter
|
Super Moderator
Joined: Dec 2009
Posts: 3,279
From: Quad Cities, IL
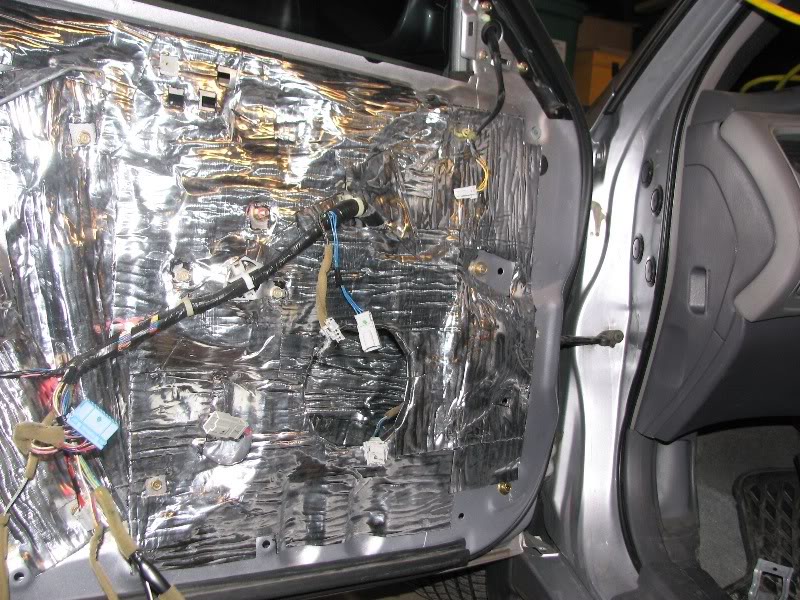
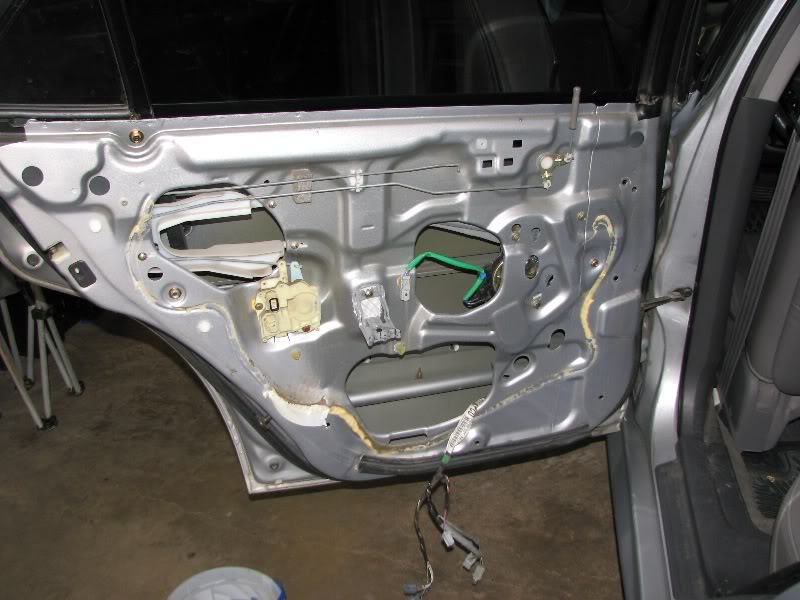
some updates have been made in other forums, but as for sealing up the door openings - not yet, we both ended up being quite busy. we have sheet metal that we will deaden and screw to the door to seal up the openings. it will be updated soon.
Last edited by keep_hope_alive; Dec 22, 2010 at 06:37 PM.
Thread Starter
|
Super Moderator
Joined: Dec 2009
Posts: 3,279
From: Quad Cities, IL
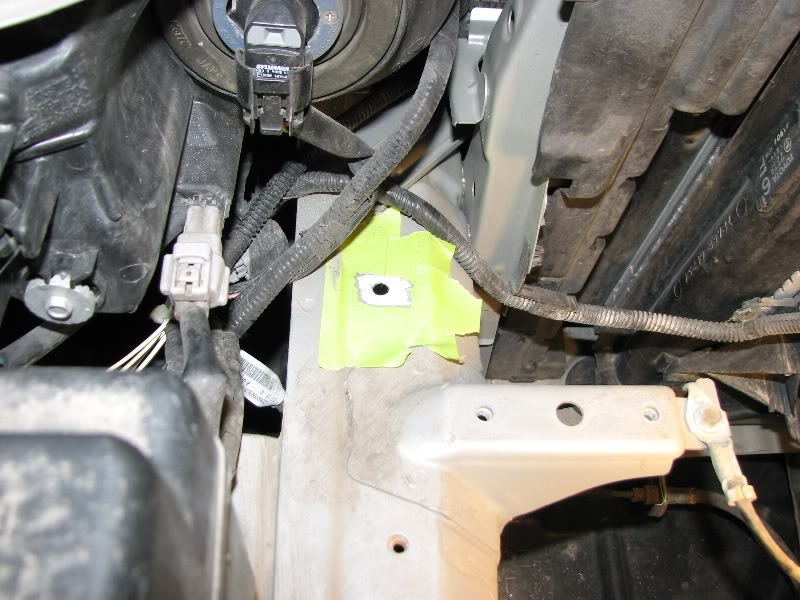
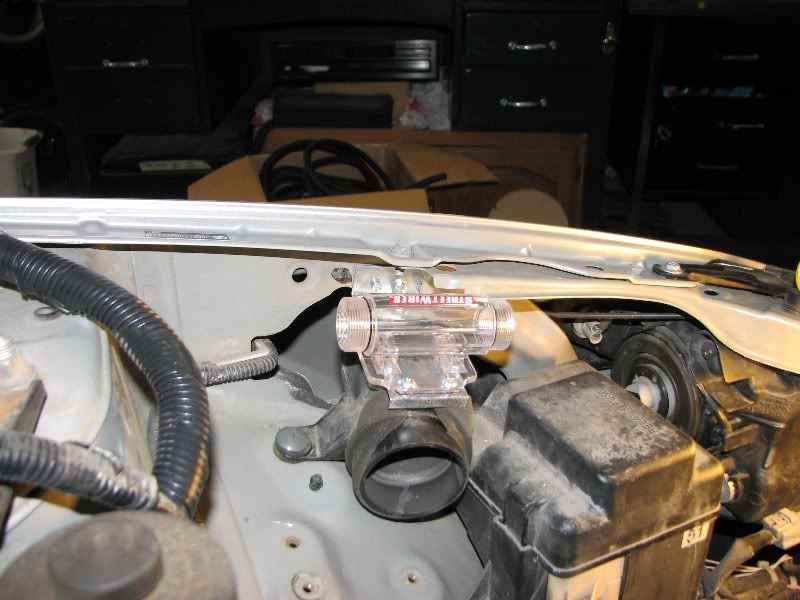
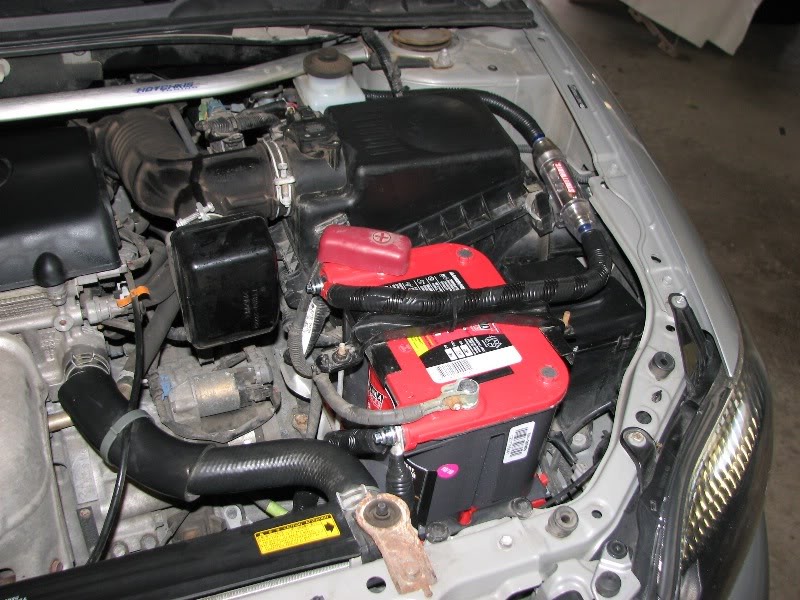
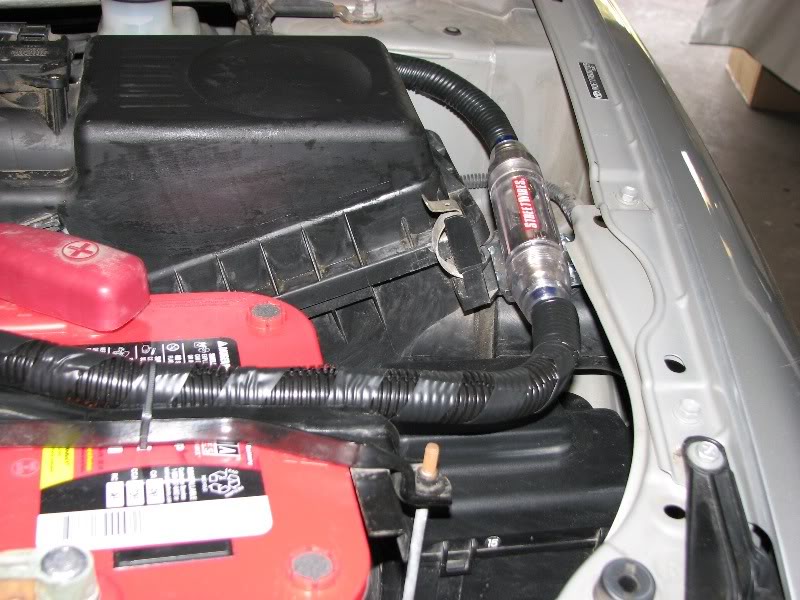
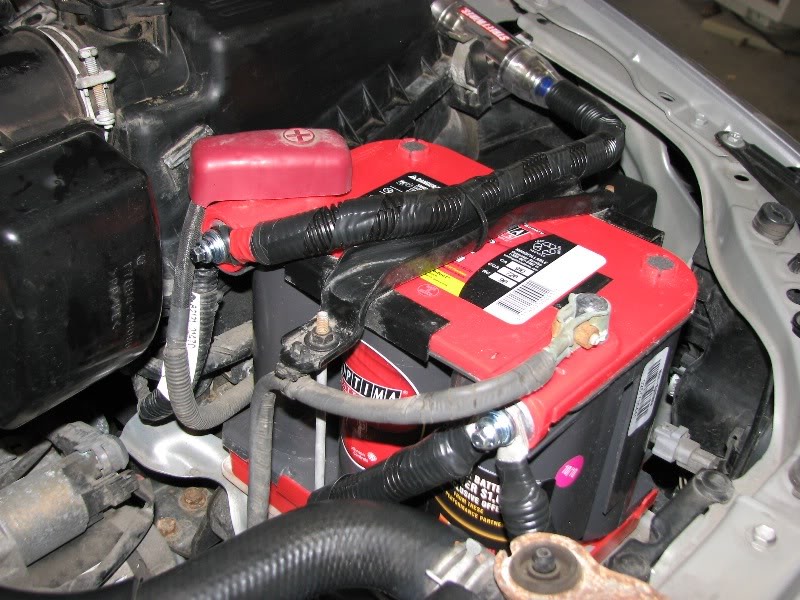
battery replacement, grounding for the big 3, fuse holder mounting
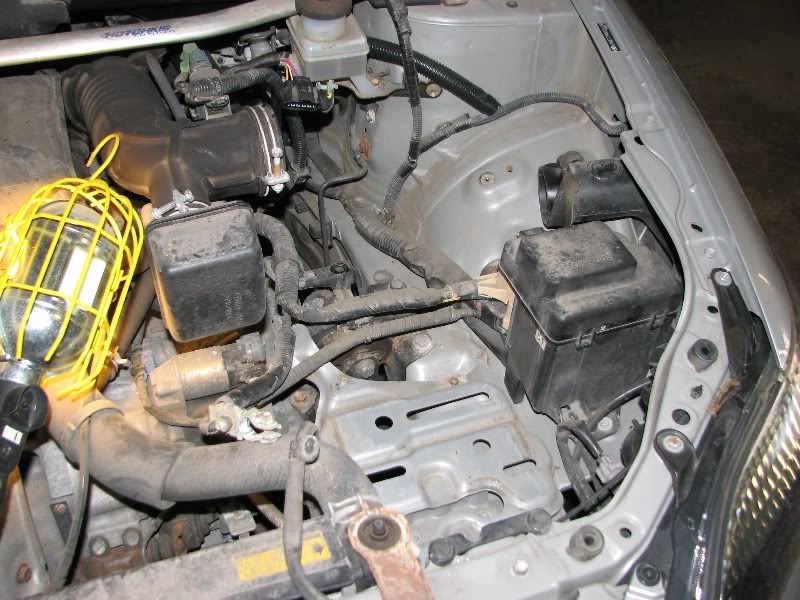
factory grounds - under battery and just below the starter
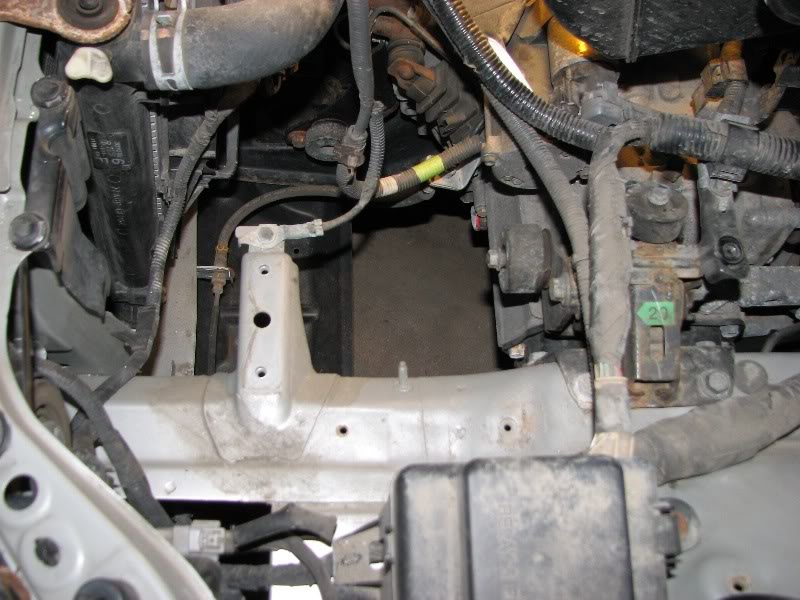
green tape identifies an empty threaded M10 - 1.5 location for a engine block ground
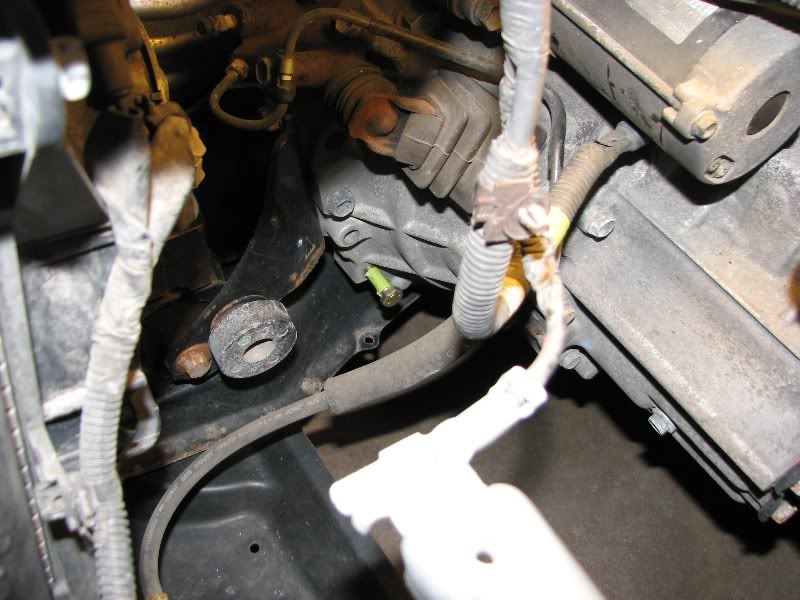
chassis ground to frame just under battery
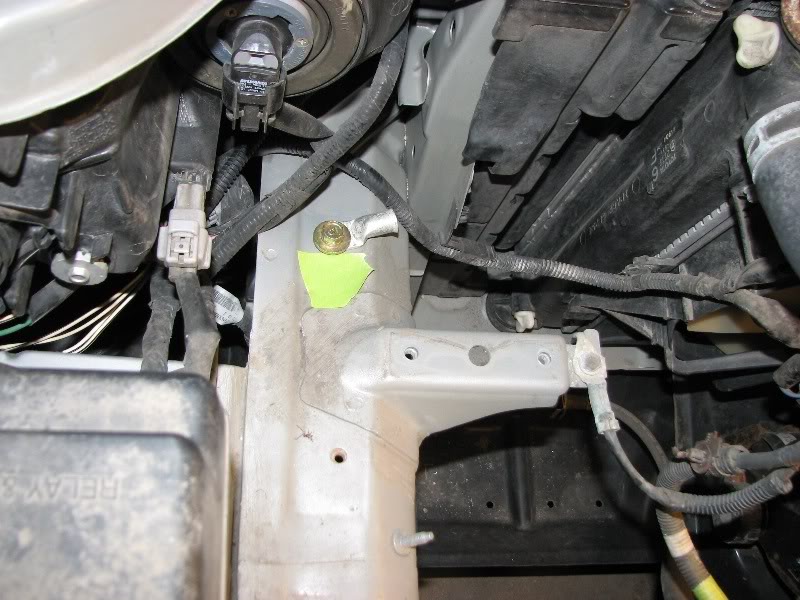
Grade 8 bolts used for grounding

paint sanded away
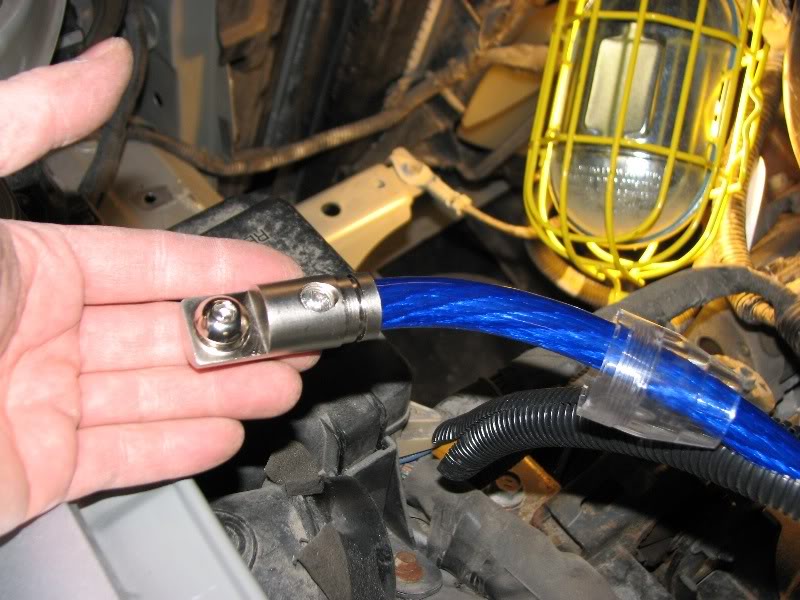
working on power wire fuse - Streetwires 1/0

I like Streetwires fuse holders
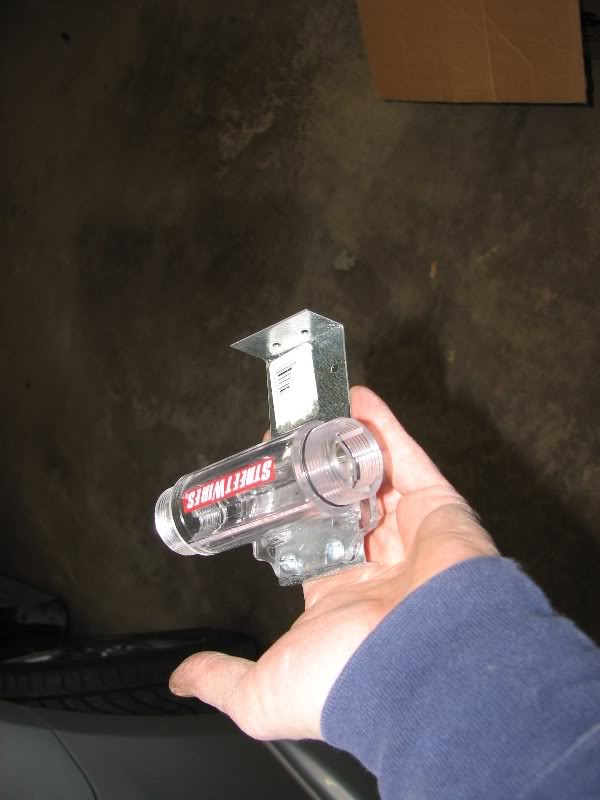
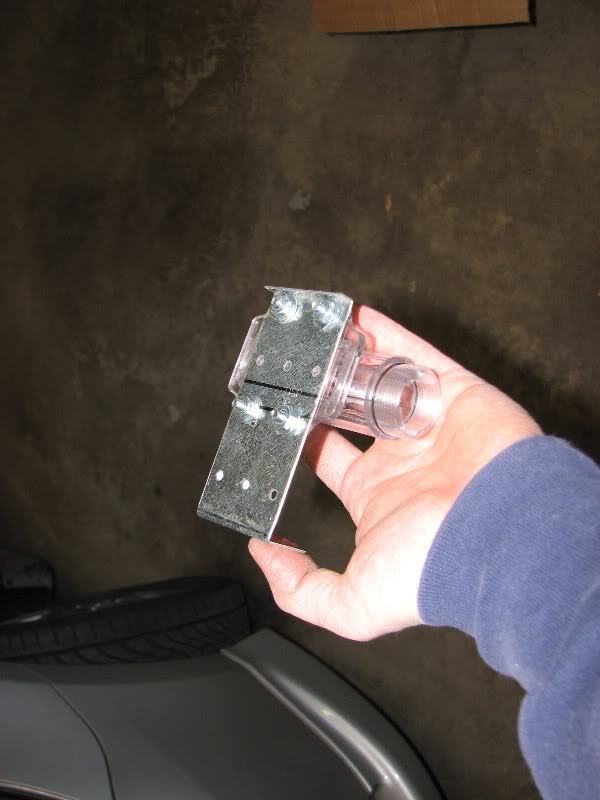
i made a custom bracket for the fuse holder
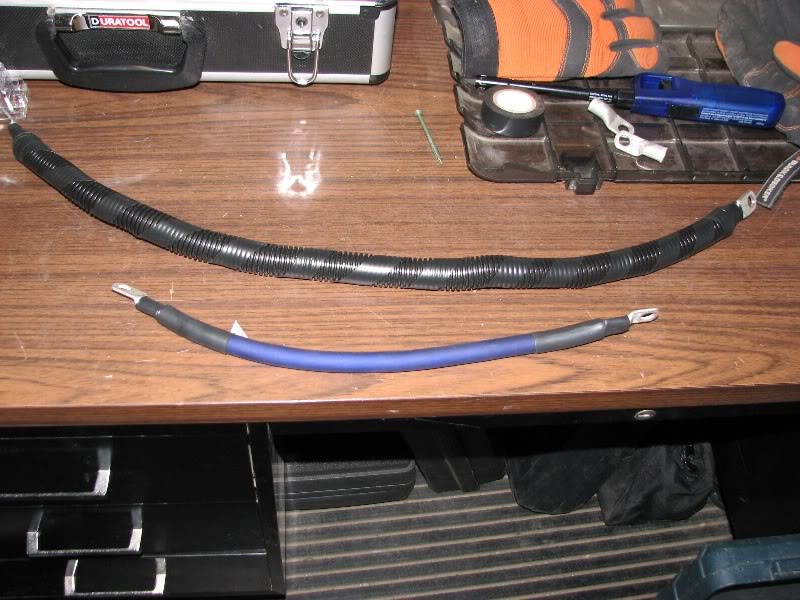
grounds getting marine grade ring terminals, heat shrink, then split loom
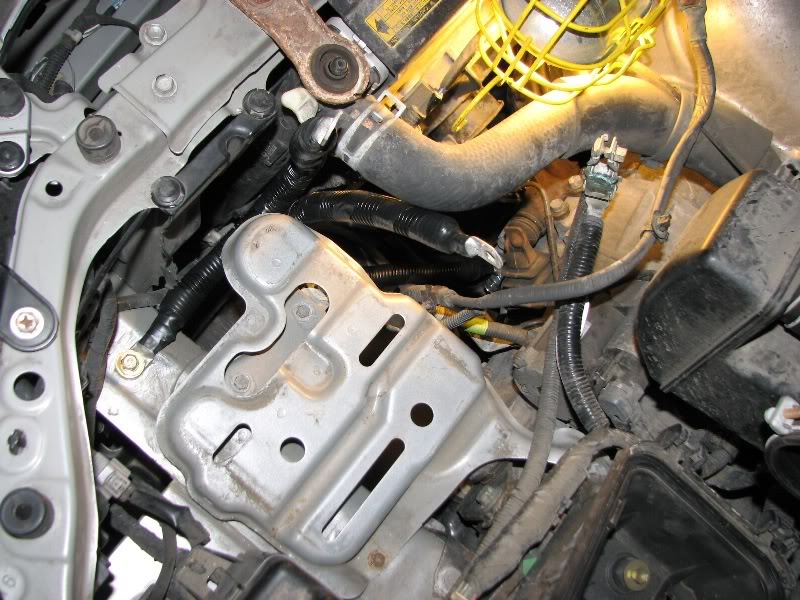
finished
factory grounds - under battery and just below the starter
green tape identifies an empty threaded M10 - 1.5 location for a engine block ground
chassis ground to frame just under battery
Grade 8 bolts used for grounding
paint sanded away
working on power wire fuse - Streetwires 1/0
I like Streetwires fuse holders
i made a custom bracket for the fuse holder
grounds getting marine grade ring terminals, heat shrink, then split loom
finished
Thread Starter
|
Super Moderator
Joined: Dec 2009
Posts: 3,279
From: Quad Cities, IL
while i was doing the engine bay, the owner was applying closed cell foam to the rear interior panels - all contact points.
every interior panel will get foam treatment - this itself will be a long process.
every interior panel will get foam treatment - this itself will be a long process.
Thread Starter
|
Super Moderator
Joined: Dec 2009
Posts: 3,279
From: Quad Cities, IL
i wasn't going to show the full build long on HAF since it's a Scion - but since the process itself is identical to any Honda - it is a nice build log to share that doesn't compromise the vehicle like mine does.
Thread Starter
|
Super Moderator
Joined: Dec 2009
Posts: 3,279
From: Quad Cities, IL
Here is some deadening i did last night on my 2001 Accord sedan:
So as a result of some recent "changes" that I will describe later, i've decided to run door midbass until I build the FG door pods. which, due to winter, won't be started until late spring 2011.
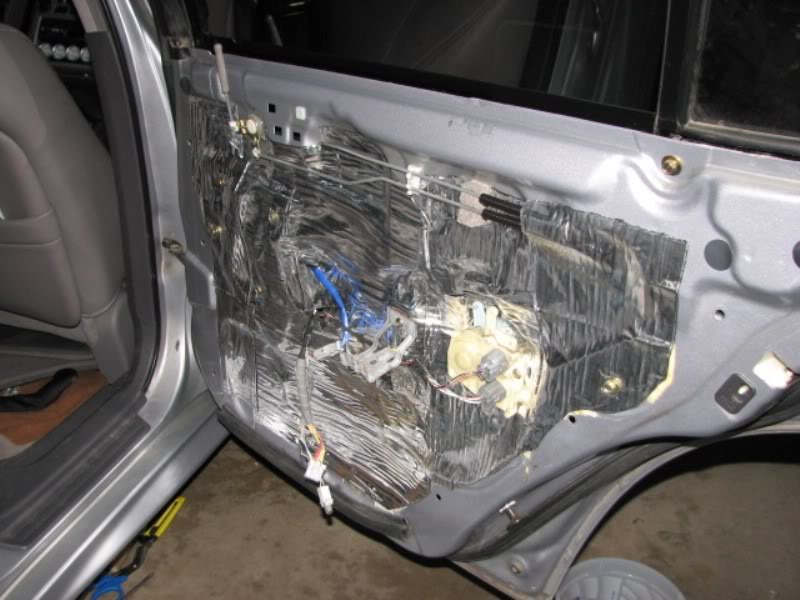
but first, I needed to actually seal up the door this time. before i just had some "thinmat" around the speaker that just simply pealed off (apparently roofing material doesn't stick in the cold).
I used Raammat BXT since i had about 50 sq. ft. of note, having used this and BXT II, there is a HUGE advantage to the BXT II. BXT II is better in every way.
today i'll make a new speaker baffle and move on to the next door.
cleaned and ready, i used a mild mix of oxy clean and some nitrile gloves to clean all metal surfaces.
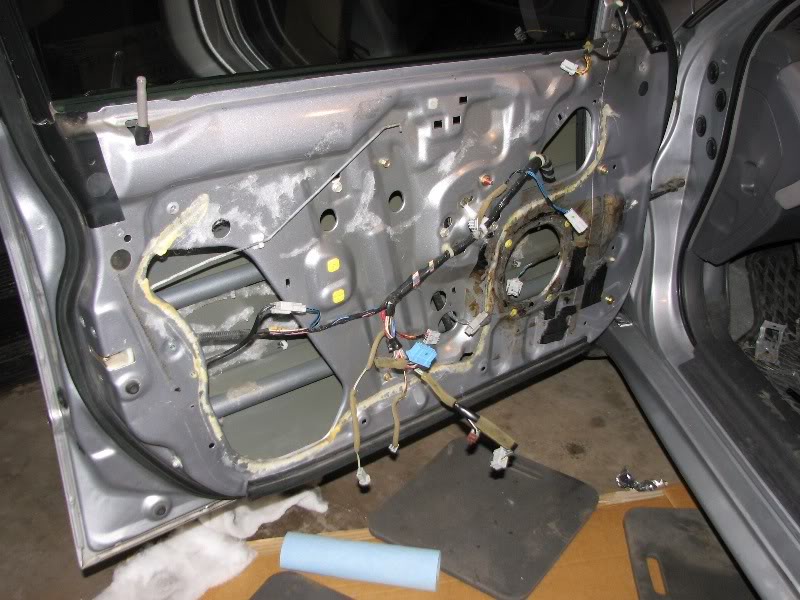
started with about 8 sq. ft. on the inside of the door cavity
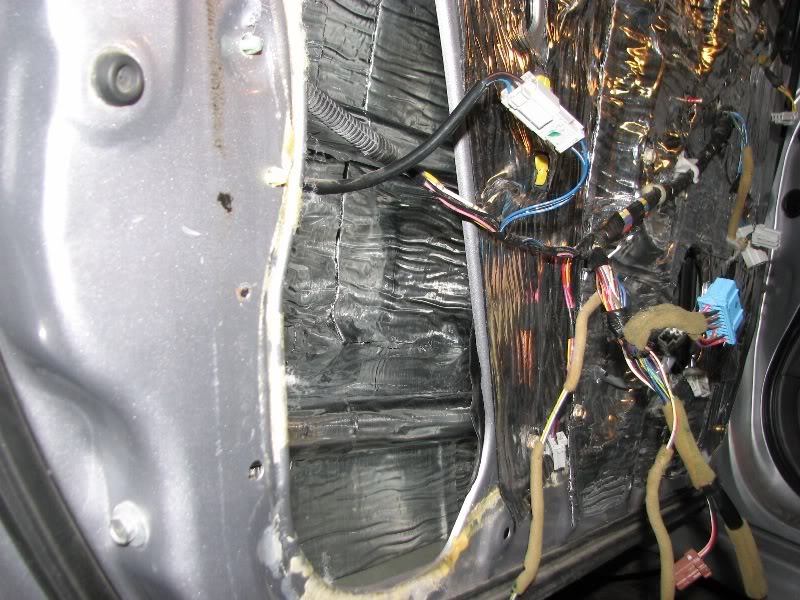
multiple layers in the middle of the door
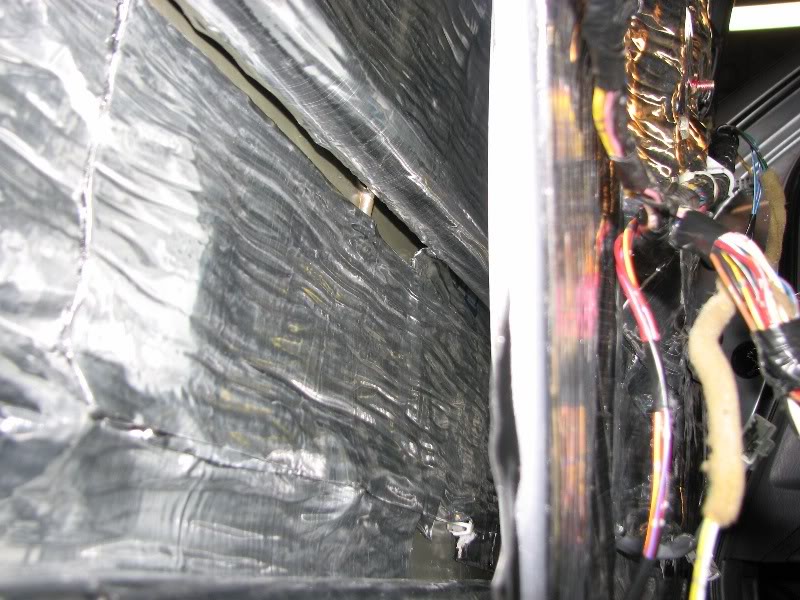
then i moved to the inner skin
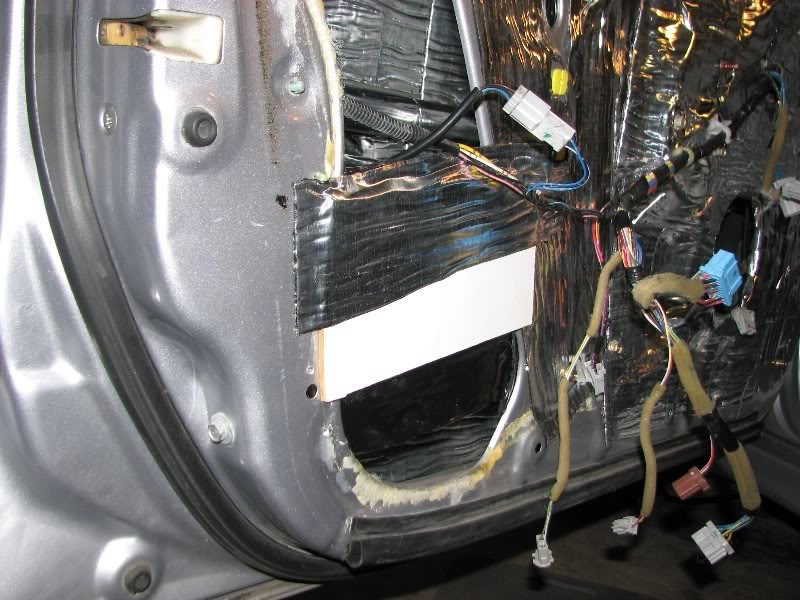
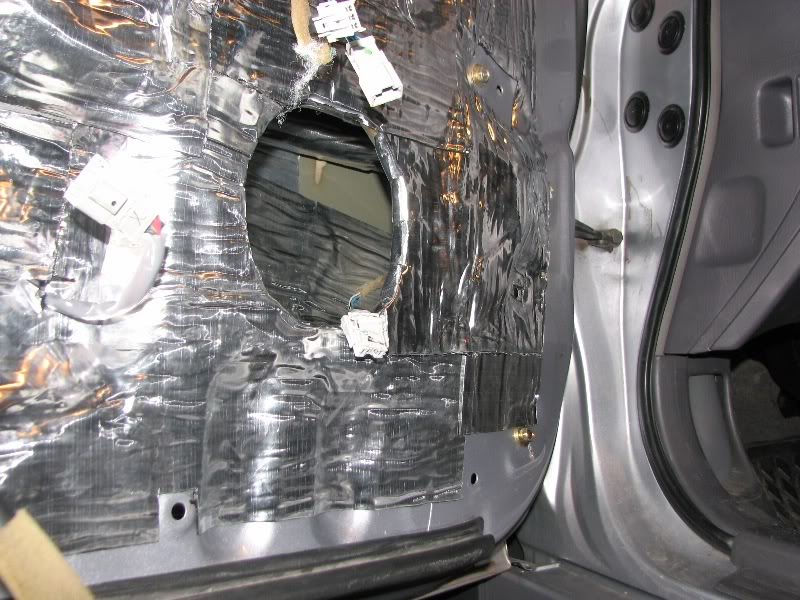
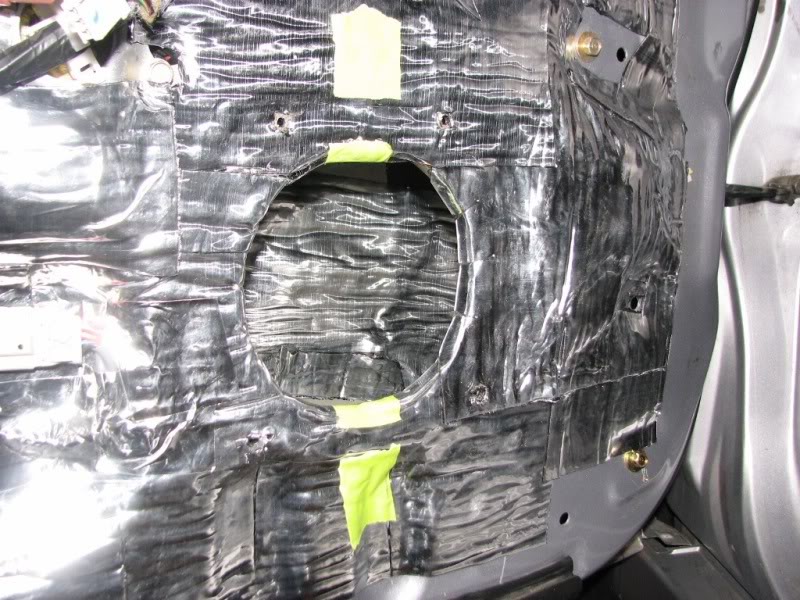
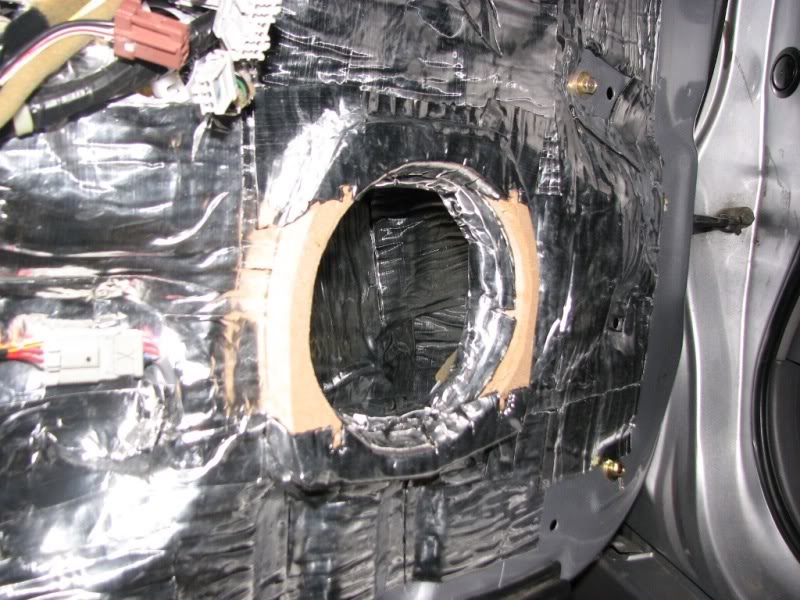
for the large opening i had a few options. option 1 is to make a fiberglass cover, option 2 is to make a sheet metal cover, option 3 is to make due with materials you have on hand. i chose option 3 since it was around midnight.
i used some thin board and made sure to have deadening on both sides. in this case, i ran a piece on the inside that overlapped the metal on each side of the opening, then used gorilla glue to hold the board to the deadening/metal around the opening, then covered with a few layers of deadener.
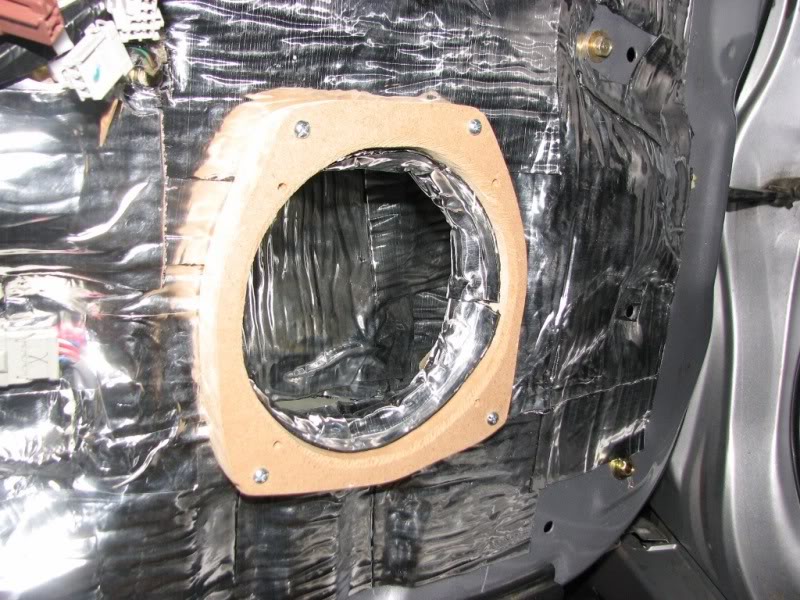
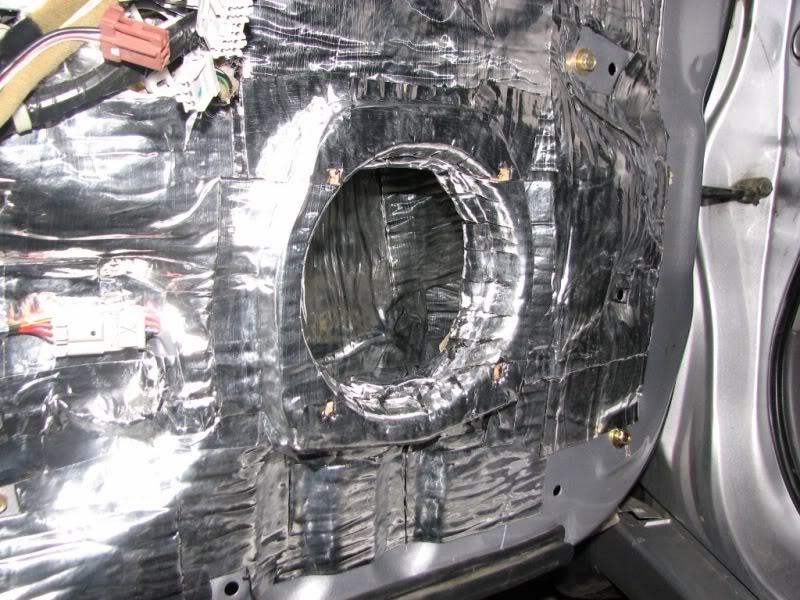
i repeated the process
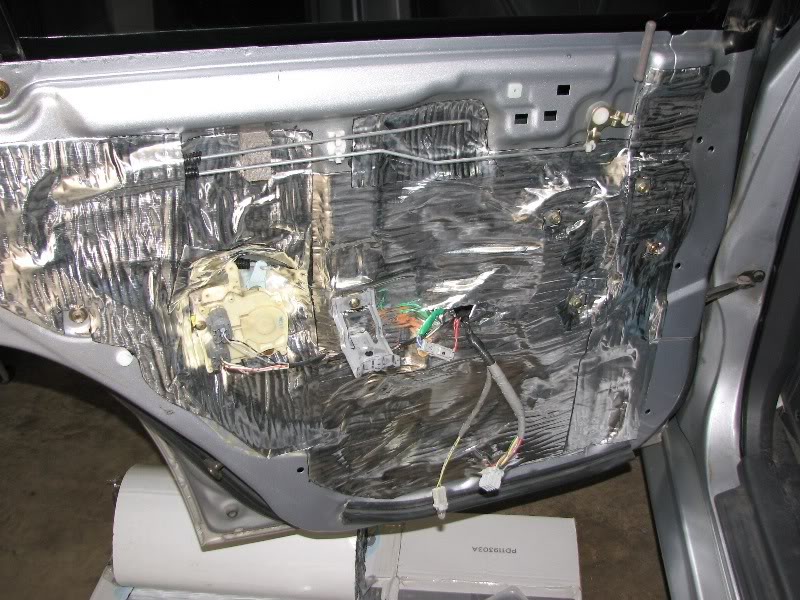
mostly finished, i did some trimming along the outer edges
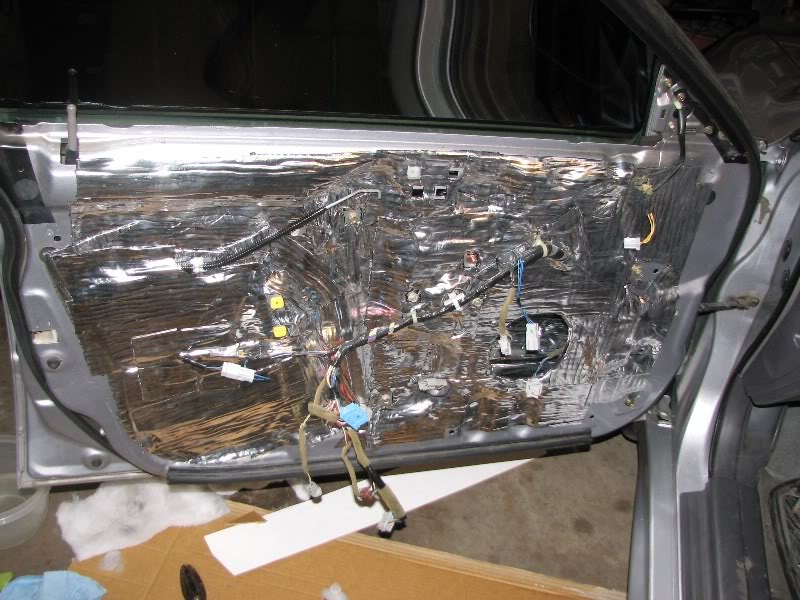
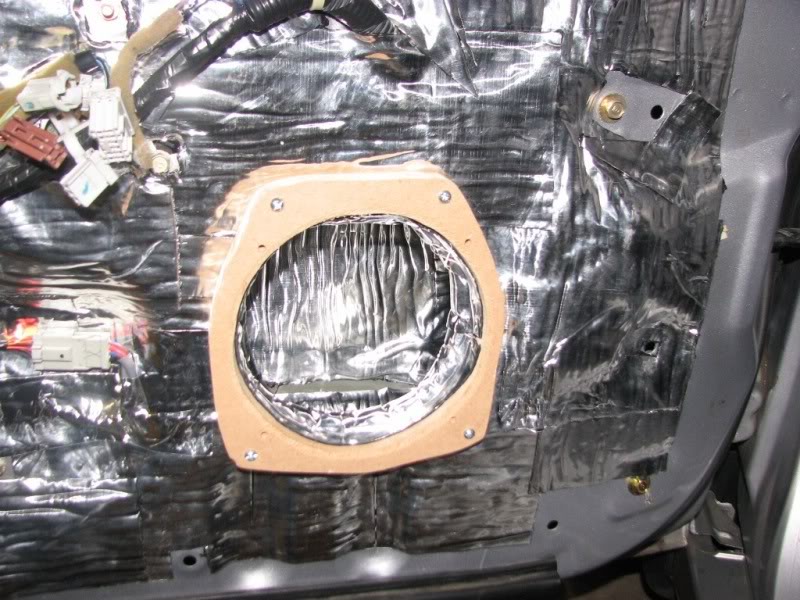
funny how i noticed i missed an area with this angle, i'll probably cover it today.
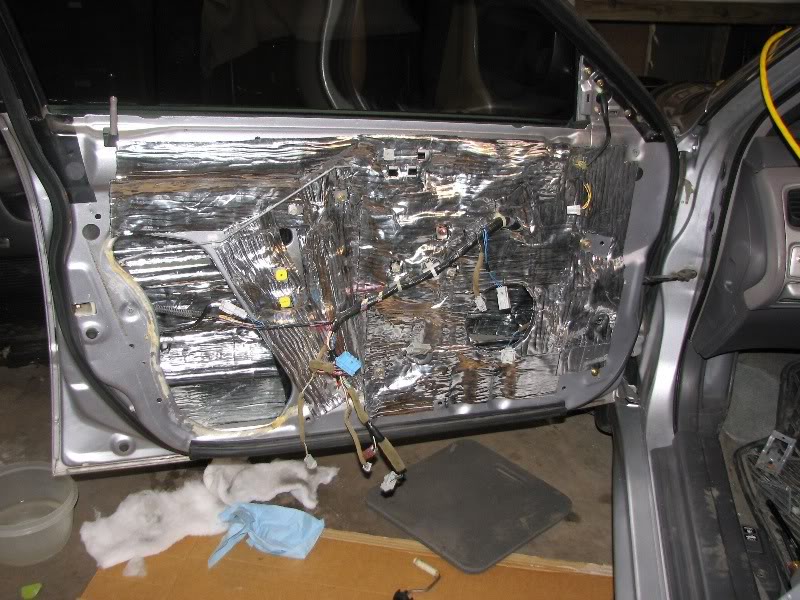
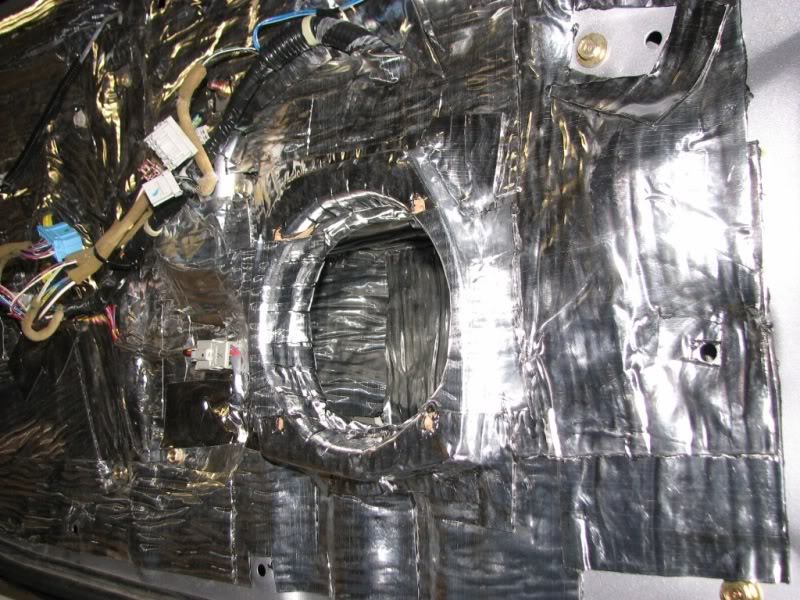
In all, I used 16 sq. ft. of Raammat BXT on this door - for complete coverage and sealing. So for planning purposes - 20 sq. ft. for each front door will also let you coat the speaker baffle and add a few more layers around and behind the speaker.
So as a result of some recent "changes" that I will describe later, i've decided to run door midbass until I build the FG door pods. which, due to winter, won't be started until late spring 2011.
but first, I needed to actually seal up the door this time. before i just had some "thinmat" around the speaker that just simply pealed off (apparently roofing material doesn't stick in the cold).
I used Raammat BXT since i had about 50 sq. ft. of note, having used this and BXT II, there is a HUGE advantage to the BXT II. BXT II is better in every way.
today i'll make a new speaker baffle and move on to the next door.
cleaned and ready, i used a mild mix of oxy clean and some nitrile gloves to clean all metal surfaces.
started with about 8 sq. ft. on the inside of the door cavity
multiple layers in the middle of the door
then i moved to the inner skin
for the large opening i had a few options. option 1 is to make a fiberglass cover, option 2 is to make a sheet metal cover, option 3 is to make due with materials you have on hand. i chose option 3 since it was around midnight.
i used some thin board and made sure to have deadening on both sides. in this case, i ran a piece on the inside that overlapped the metal on each side of the opening, then used gorilla glue to hold the board to the deadening/metal around the opening, then covered with a few layers of deadener.
i repeated the process
mostly finished, i did some trimming along the outer edges
funny how i noticed i missed an area with this angle, i'll probably cover it today.
In all, I used 16 sq. ft. of Raammat BXT on this door - for complete coverage and sealing. So for planning purposes - 20 sq. ft. for each front door will also let you coat the speaker baffle and add a few more layers around and behind the speaker.
Last edited by keep_hope_alive; Dec 23, 2010 at 10:01 AM.
Thread Starter
|
Super Moderator
Joined: Dec 2009
Posts: 3,279
From: Quad Cities, IL
2001 Accord Sedan - some recent rear door deadening for road noise reduction (sealing door). each door took about 20 minutes. I used Raammat BXT on them.
driver side
split loom to let cables pass through
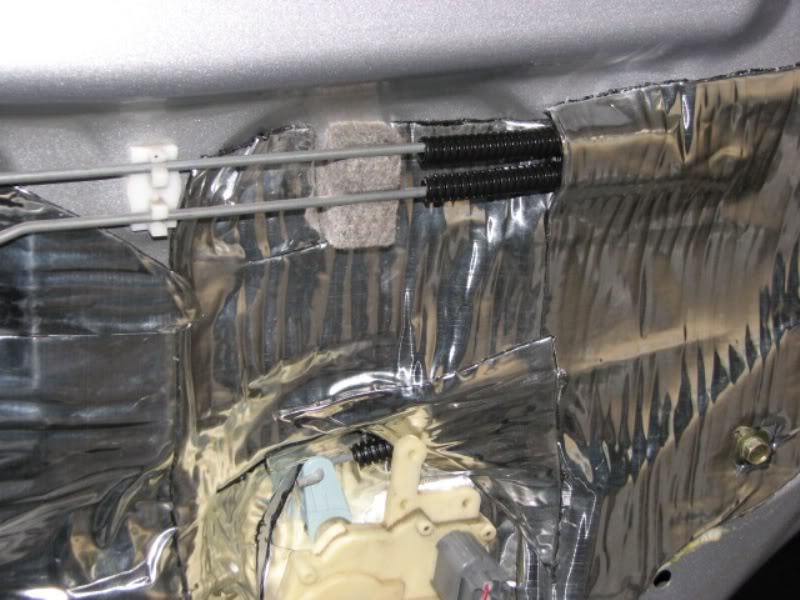
driver side
split loom to let cables pass through
Last edited by keep_hope_alive; Dec 23, 2010 at 09:50 AM.
Thread Starter
|
Super Moderator
Joined: Dec 2009
Posts: 3,279
From: Quad Cities, IL
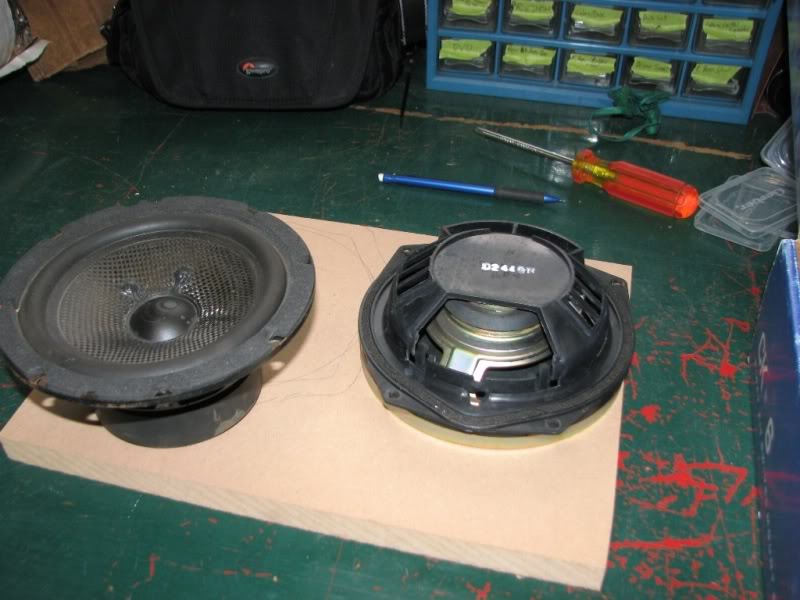
so, replacing front stock speakers in your accord...
factory comparison with a late 90's Massive Audio CD6 woofer
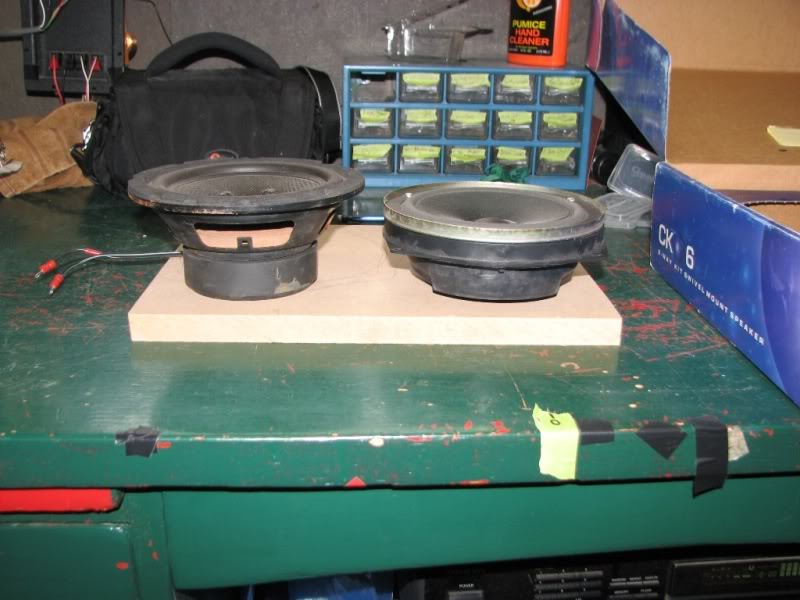
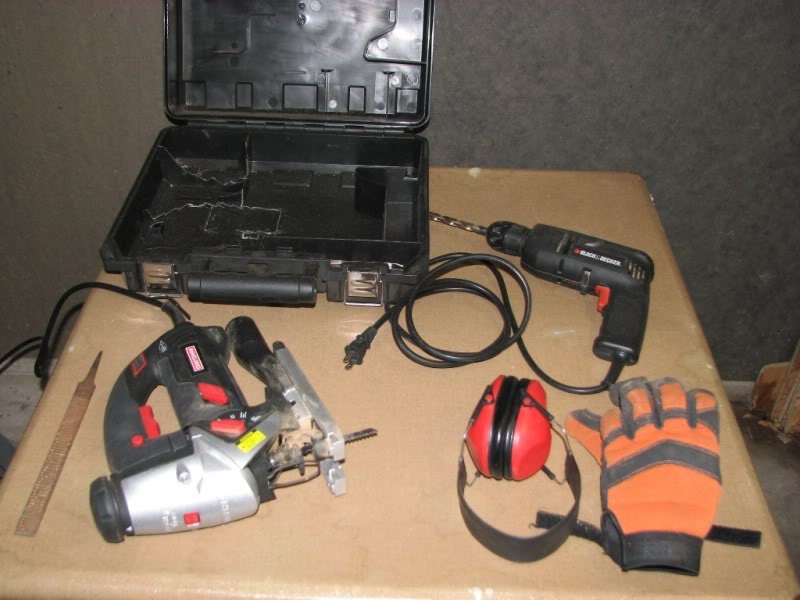
some tools required - a jig saw and drill are essential.
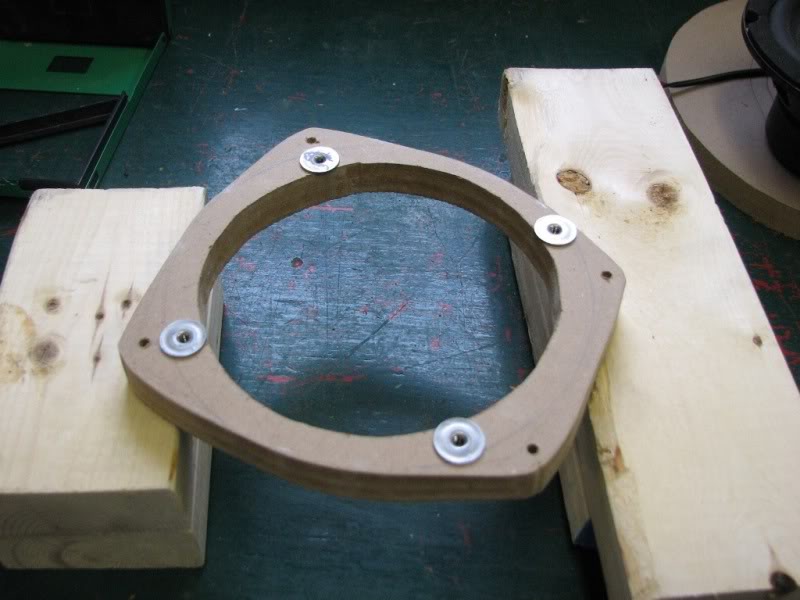
i find that the holes you cut in sub boxes can be reused for door speakers. here we have 3/4" MDF.
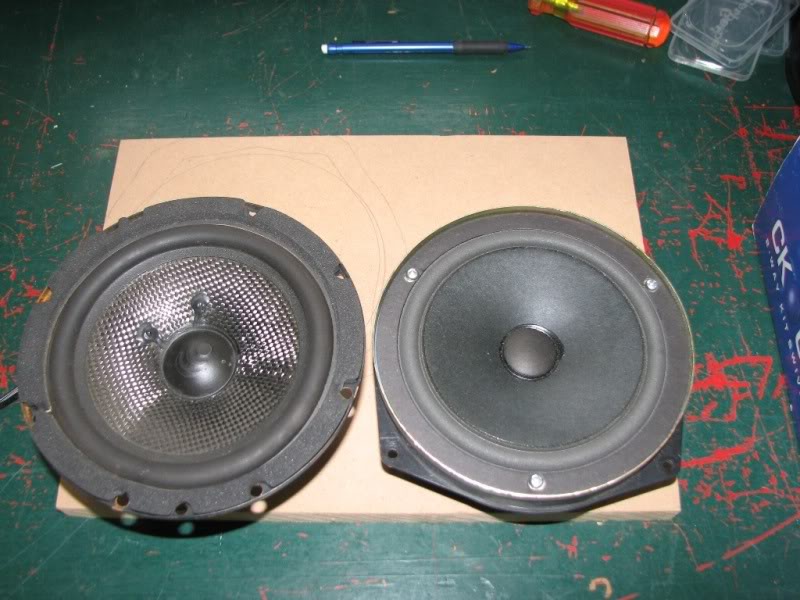
start by tracing the factory speaker mount, then superimpose the new speaker basket outline. determine the outer boundaries of the new mount - making sure you leave ample room for at least four bolts. then mark your driver cut-out in the center - i used the factory cardboard that held the driver for shipping as my template.
secure the wood so you can make your cuts
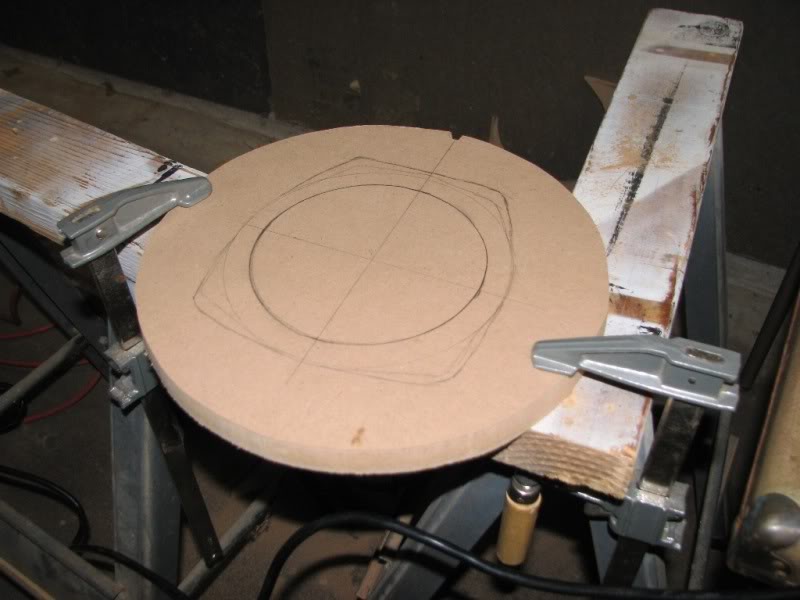
drill a hole on the inside of the center cut out, and on the outside of any sharp corners
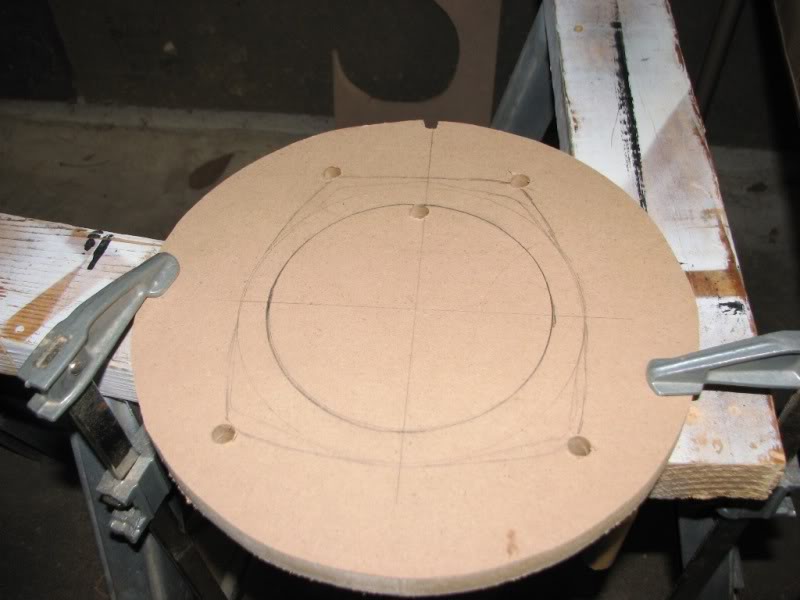
always cut the center out first so you can easily secure the overall piece of wood
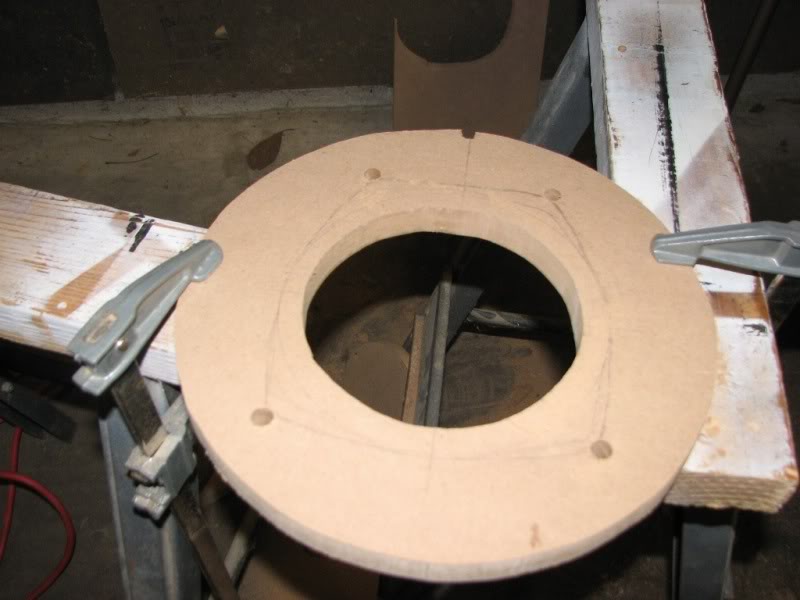
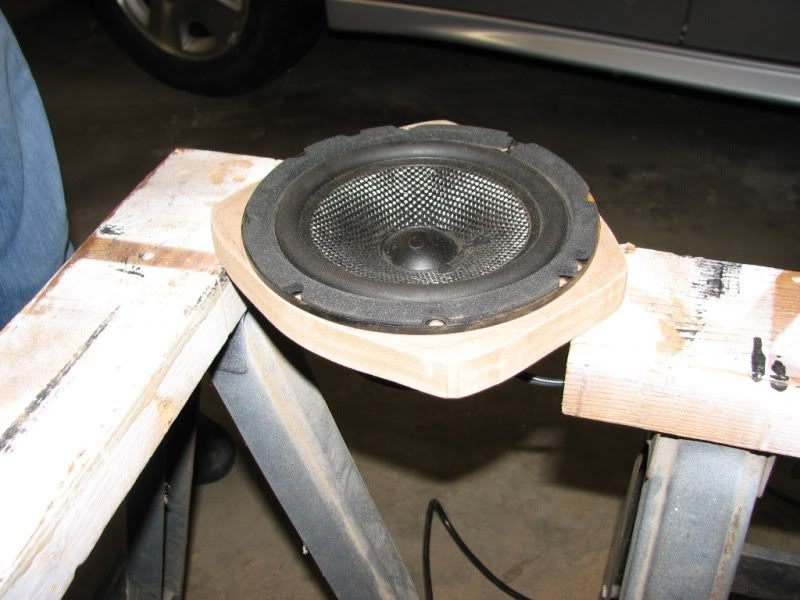
test fit your driver
factory comparison with a late 90's Massive Audio CD6 woofer
some tools required - a jig saw and drill are essential.
i find that the holes you cut in sub boxes can be reused for door speakers. here we have 3/4" MDF.
start by tracing the factory speaker mount, then superimpose the new speaker basket outline. determine the outer boundaries of the new mount - making sure you leave ample room for at least four bolts. then mark your driver cut-out in the center - i used the factory cardboard that held the driver for shipping as my template.
secure the wood so you can make your cuts
drill a hole on the inside of the center cut out, and on the outside of any sharp corners
always cut the center out first so you can easily secure the overall piece of wood
test fit your driver
Thread Starter
|
Super Moderator
Joined: Dec 2009
Posts: 3,279
From: Quad Cities, IL
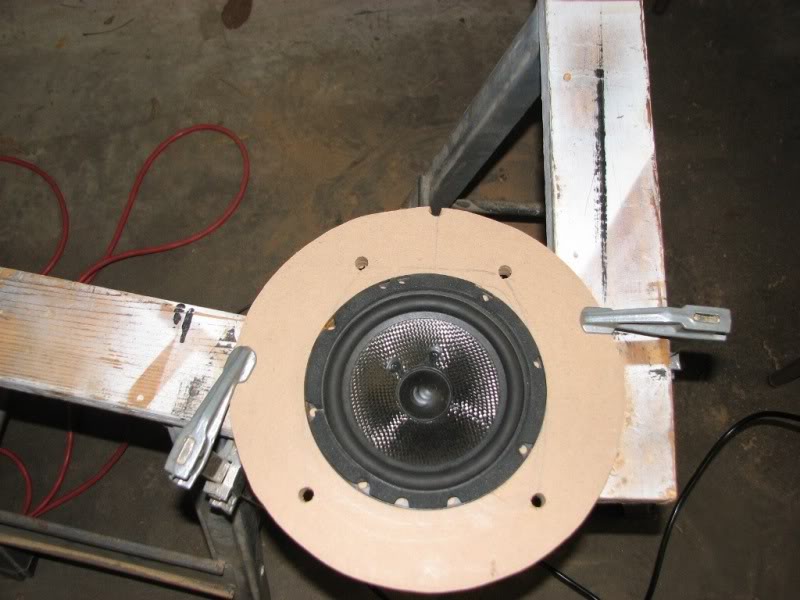
finish cutting out the rest
drill out your mounting holes (driver and baffle) and use t-nuts or hurricane nuts for driver mounting. MDF doesn't work well with standard wood screws.
test fit your piece and use tape to help align the mount. mark your mounting holes so you have a clean cut you need to remove deadener BEFORE you drill - as it makes a mess. use brake-cleen or gasoline to remove deadener from the drill bit.
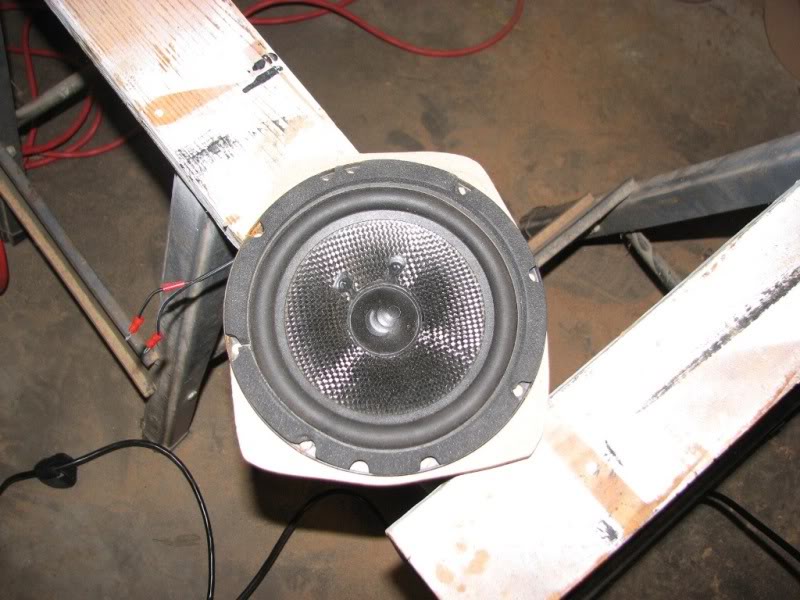
test fit the piece - if it's good then secure with bolts. in this case, i am using 1-1/2" 8-32 bolts with a nut and washer inside the door. you tighten with a screw driver and socket driver.
start by working a layer of deadener around the inside seam where the baffle meets the door
once it is secure, you can deaden over this piece to ensure it is water proof.
drill out your mounting holes (driver and baffle) and use t-nuts or hurricane nuts for driver mounting. MDF doesn't work well with standard wood screws.
test fit your piece and use tape to help align the mount. mark your mounting holes so you have a clean cut you need to remove deadener BEFORE you drill - as it makes a mess. use brake-cleen or gasoline to remove deadener from the drill bit.
test fit the piece - if it's good then secure with bolts. in this case, i am using 1-1/2" 8-32 bolts with a nut and washer inside the door. you tighten with a screw driver and socket driver.
start by working a layer of deadener around the inside seam where the baffle meets the door
once it is secure, you can deaden over this piece to ensure it is water proof.