
What did you do to your Honda today?


Thread Starter
|
Almost A Senior Member
Joined: Apr 2012
Posts: 328
From: Redwood City, CA 94065
Yesterday I did the following:
1. Stitch-on steering wheel cover.
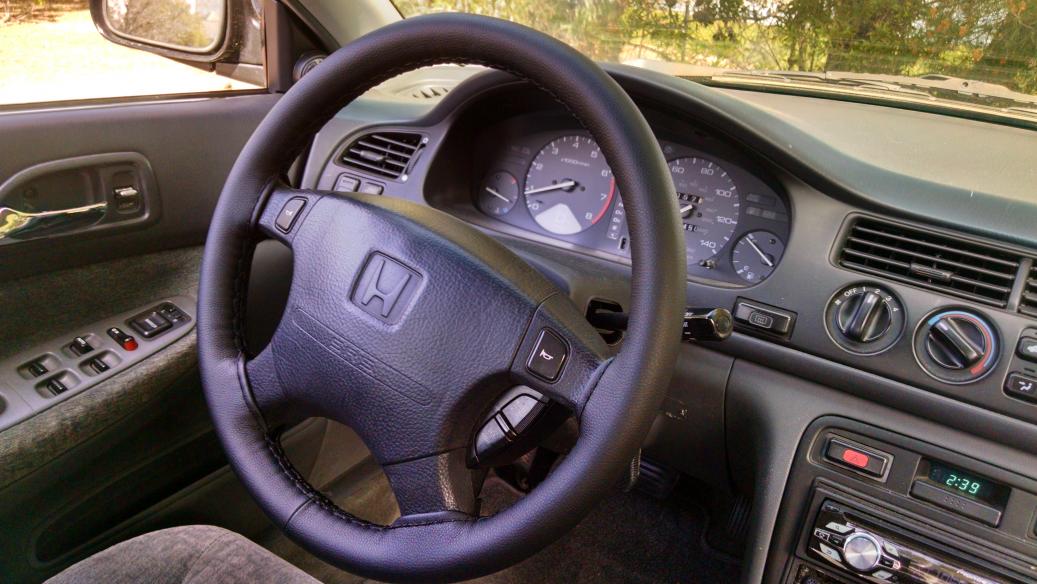
Since this was my first attempt at this I bought a cheap faux-leather cover. I also wanted to try the pre-stiched style cover where you laced through the stitching -- seemed more refined than the stitch-through-the-raw-leather look. The results are not perfect, but I think reasonably good looking compared to the bare wheel. This cover has padding so the wheel is now a lot thicker ... if I get a real leather skin it won't be padded and will look more like a real leather wheel.
2. Installed coil insulators on the rear Eibach Pro Kit springs and eliminated 95% of the rear suspension noise ... all info is in this thread --
https://www.hondaaccordforum.com/for...s-60281/page4/
1. Stitch-on steering wheel cover.
Since this was my first attempt at this I bought a cheap faux-leather cover. I also wanted to try the pre-stiched style cover where you laced through the stitching -- seemed more refined than the stitch-through-the-raw-leather look. The results are not perfect, but I think reasonably good looking compared to the bare wheel. This cover has padding so the wheel is now a lot thicker ... if I get a real leather skin it won't be padded and will look more like a real leather wheel.
2. Installed coil insulators on the rear Eibach Pro Kit springs and eliminated 95% of the rear suspension noise
... all info is in this thread --https://www.hondaaccordforum.com/for...s-60281/page4/
Last edited by jkowtko; Mar 16, 2015 at 07:19 PM.


Almost A Senior Member
Joined: Jul 2010
Posts: 262
From: Orchard Park NY USA
Yesterday I did the following:
1. Stitch-on steering wheel cover.
Since this was my first attempt at this I bought a cheap faux-leather cover. I also wanted to try the pre-stiched style cover where you laced through the stitching -- seemed more refined than the stitch-through-the-raw-leather look. The results are not perfect, but I think reasonably good looking compared to the bare wheel.
Thread Starter
|
Almost A Senior Member
Joined: Apr 2012
Posts: 328
From: Redwood City, CA 94065
On eBay for $9.99 -- this is the listing I purchased:
Leather Steering Wheel Cover with Needles Thread DIY Black Size M USA | eBay
Since the link won't be active forever, the search I used was "leather steering wheel cover black". There are both versions with perforated and non-perforated surface. It's a USA seller so the shipping was pretty quick.
For a real leather one, add the word "genuine" to your search. You can still find them cheap, e.g.:
Genuine Black Leather Car Steering Wheel Cover Breathable with Needle Thread DIY | eBay
But they are now coming from China or Hong Kong, so shipping will take 2-3 weeks.
The "top of the line" covers seem to be Wheelskins ... but they're a bit more expensive.
To me this is a good alternative to purchasing a used leather steering wheel -- saves a lot of install time too.

Thread Starter
|
Almost A Senior Member
Joined: Apr 2012
Posts: 328
From: Redwood City, CA 94065
Adjusted the toe-in this morning.
A couple of weeks ago I replaced the radius rod bushings and spring seat and top shock mount rubber, and it pulled the alignment off a bit. Up on ramps, tape measure in hand, three rounds of adjustments with a test drive in between each, and the wheel is straight and the car feels good. About 30 minutes in total.
The car still has a very slight drift to the right on a level road. I know the right side control arm shock mount bushing (the one that holds up the car) is stretched down a bit, and the car sits a bit higher on the left than on the right -- so next up will be the lower control arm bushings.
-- John
Last edited by jkowtko; Mar 19, 2015 at 07:04 PM.

Thread Starter
|
Almost A Senior Member
Joined: Apr 2012
Posts: 328
From: Redwood City, CA 94065
Preparing for installing a new oil pan gasket, this morning I checked the compression to see if I have excessive blowby and crankcase pressure.
The compression check came in at 165-165-165-165 ... not bad for an engine with 245k miles on it. I am assuming at this point that the rings and valves are okay.
By the way, I've never done a compression check before but it was incredibly easy ... took me 15 minutes in total. It took more time to pick up and drop off the loaner tool ...

